This is the documentation of JSU for Jira Cloud. If you are using JSU on Jira Server or on Jira Data Center, see the Server/Data Center documentation.
NOTE: This guide starts from the "Edit Workflow" screen of a chosen project. If you're not sure how to get to this page, follow the onboarding steps for existing projects in Edit a Jira Workflow.
 Avoid manual creation of repeated issue fields across linked issues
↓ Follow the visual step-by-step guide below to see how to configure this automation in your Jira instance. ↓
Have you ever wished value fields of an origin issue could be copied automatically to its linked issues? Your wish is our command!
Let's say you are a Hiring Manager and you are onboarding a new Marketing Assistant.
Your tasks to complete the onboarding would then include:
Create new contract
Order new computer
Below we illustrate how you can use JSU's Create a Linked Issue post function to automate the creation of the above-linked tasks and associated issue fields when an origin Jira issue called Hiring a Marketing Assistant moves into In Progress status.
Let's dive in, shall we?
Navigate to the Diagram workflow view in your project (Project settings → Workflows → Edit pencil icon (under Actions) → Diagram)

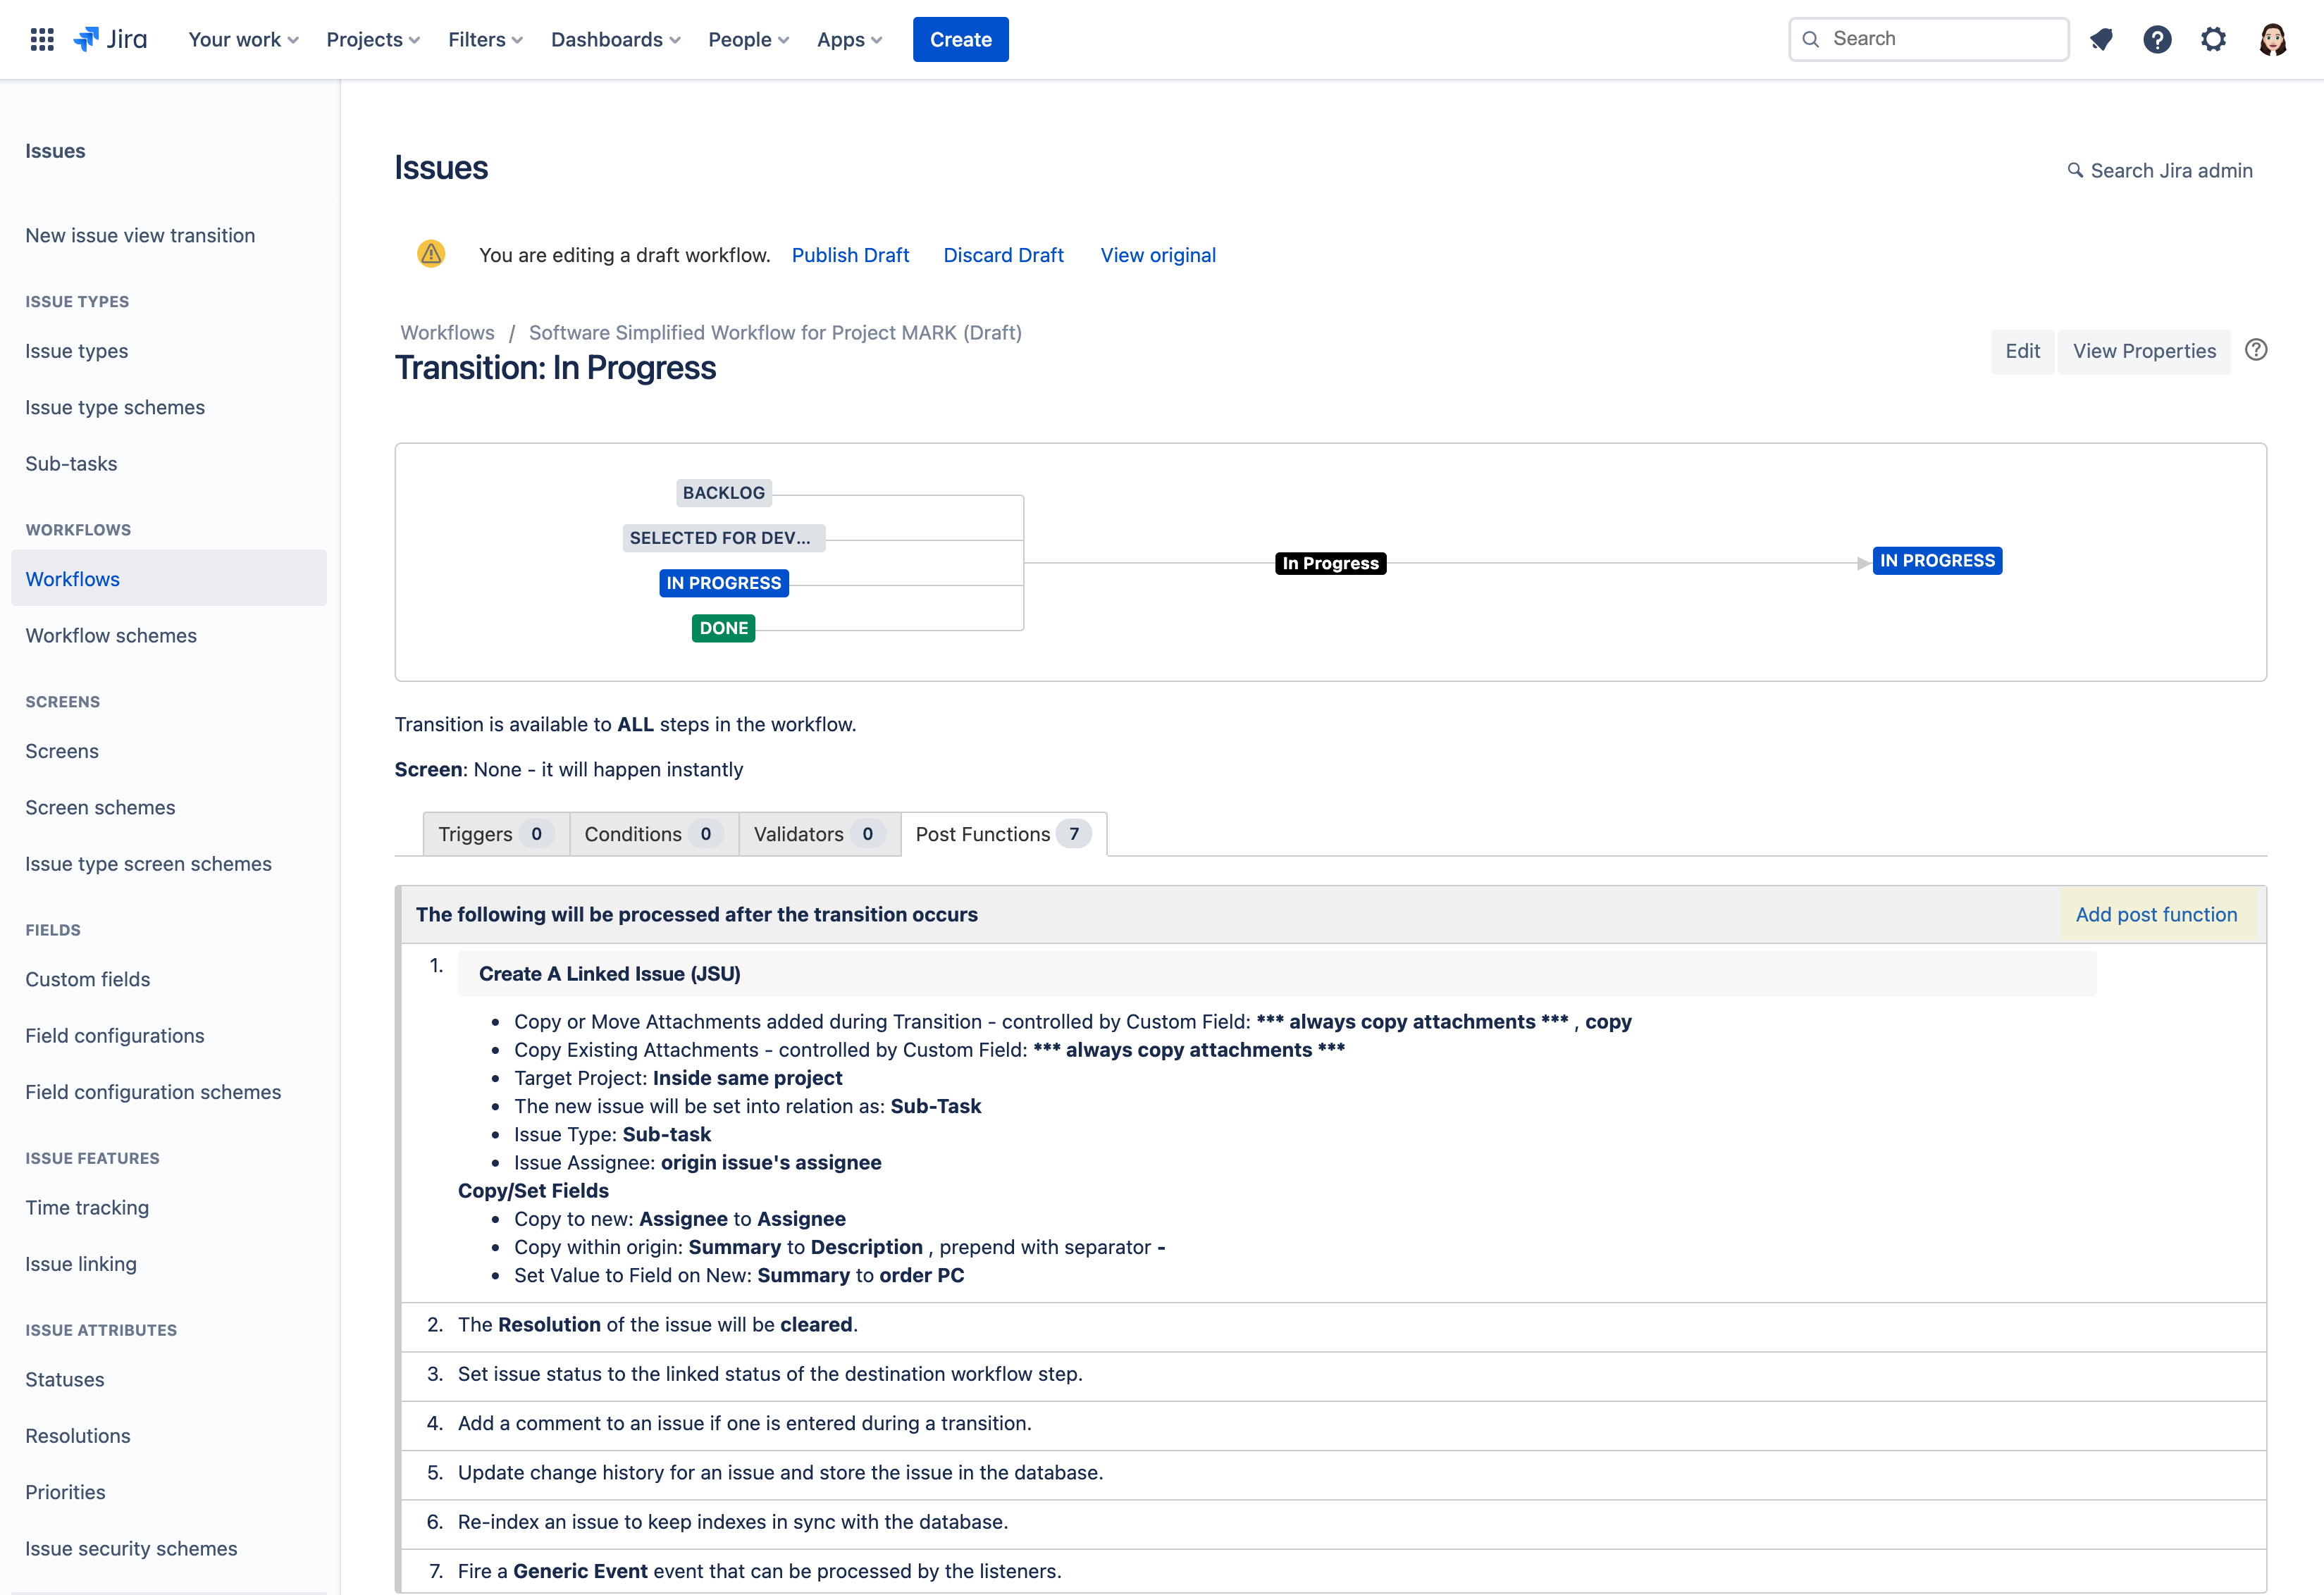
We will perform our automation on the IN PROGRESS transition, so when the task moves to in progress, two sub-tasks will automatically be created!
Click on the arrow that points inwards to the In Progress status to show the transition rule menu. Select Post Functions from the list which opens a new tab.
On the Post Functions tab, select Add post function.

Select the Create A Linked Issue (JSU) post function and then click Add at the bottom of the page.

Now let's configure your first post function:
- You want your automation to be perform inside the same project, so you keep the Target Project setting as Inside same project.
- You want your new issue to be related via Sub-Task, so in the The new issue will be related via option, select Sub-Task.
Now that we got some basic configurations out of the way, it's time for a little magic! Let's configure the values of different fields by selecting Add configuration at the bottom of the post function configuration page.
In this case, we want to copy a field value from the original issue (our task) to the new issue (a new sub-task). Select Add for the Copy to New operation.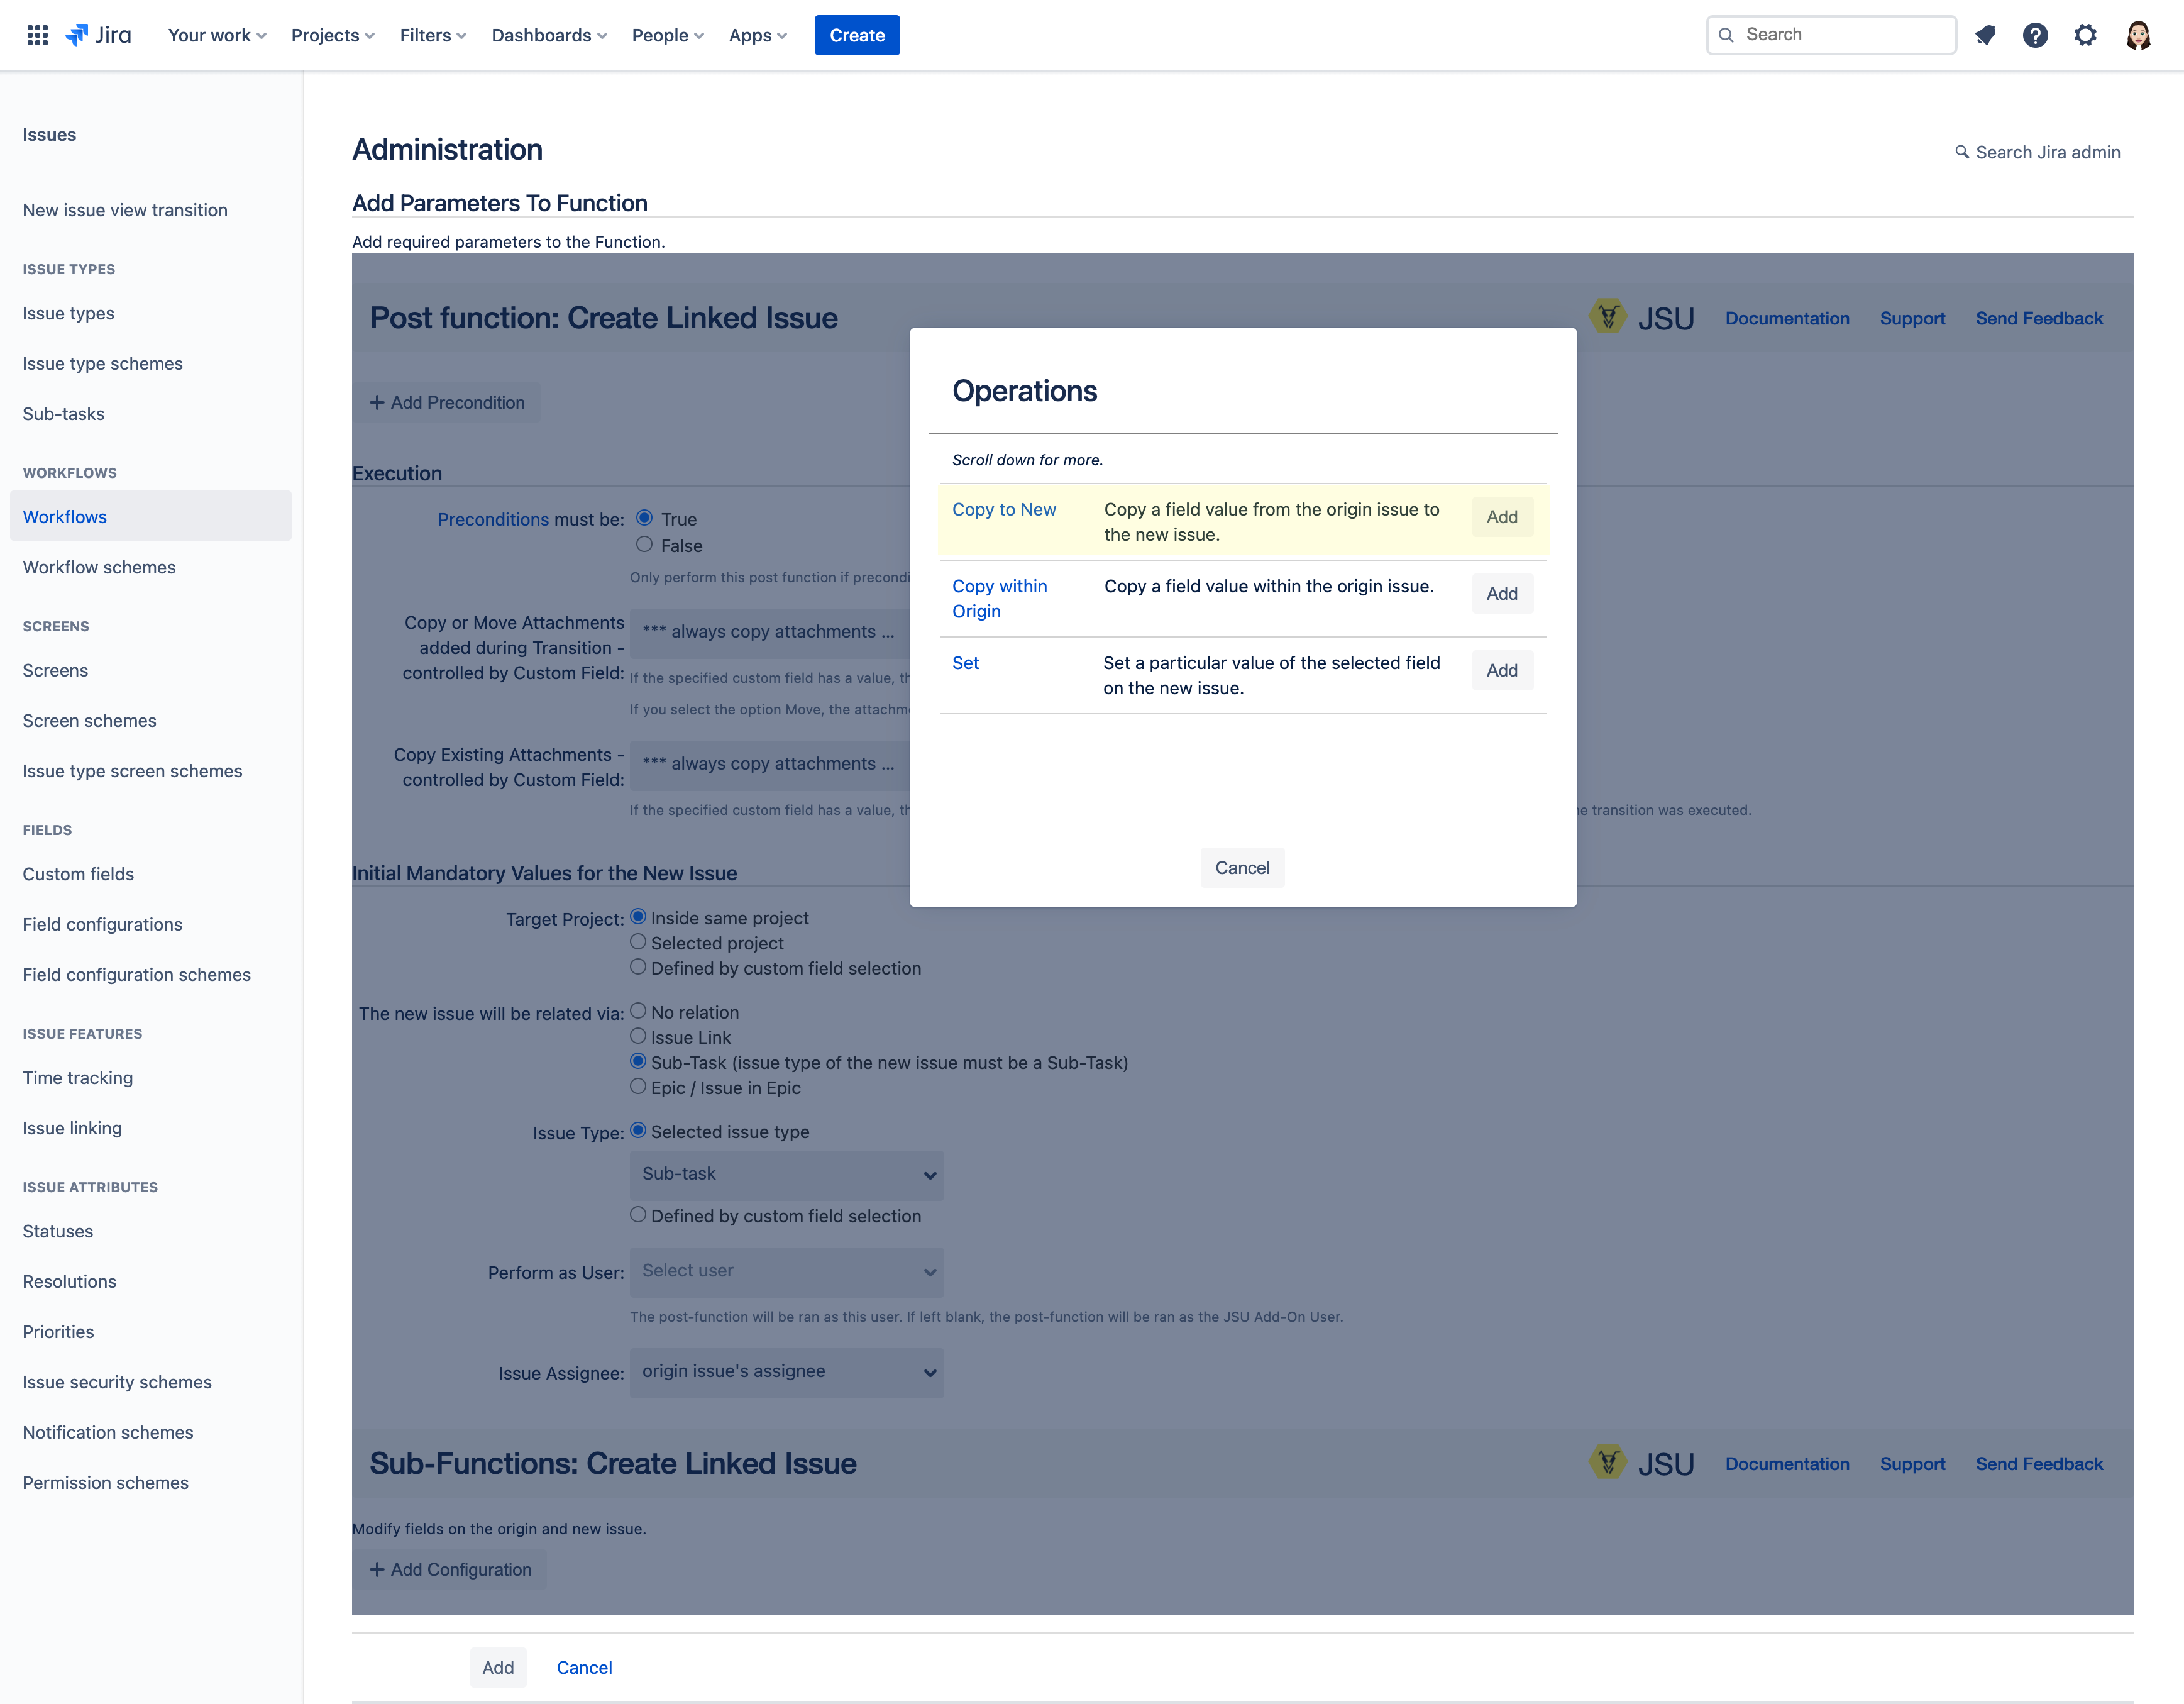
In the newly added Copy to New configuration, let's copy the Assignee of the task to the Assignee of the sub-task.
Next, we want to copy the value from one field to another field within the origin issue. We once again select Add configuration.

We want to copy the summary field of the origin issue to the description field of the origin issue, while prepending it with a dash. We select Add for the Copy within Origin operation.
.png?version=2&modificationDate=1654874874727&cacheVersion=1&api=v2&width=136&height=119)
In our second configuration, let's copy the Summary to Description. Select prepend and manually type in a dash symbol
-.
Congratulations! You've created your second configuration.We are going to configure the last operation by setting a value for the summary of the new sub-task. Once again, we select Add configuration.

Since we want to set the value for the summary of the new sub-task, we select Add for the Set operation.
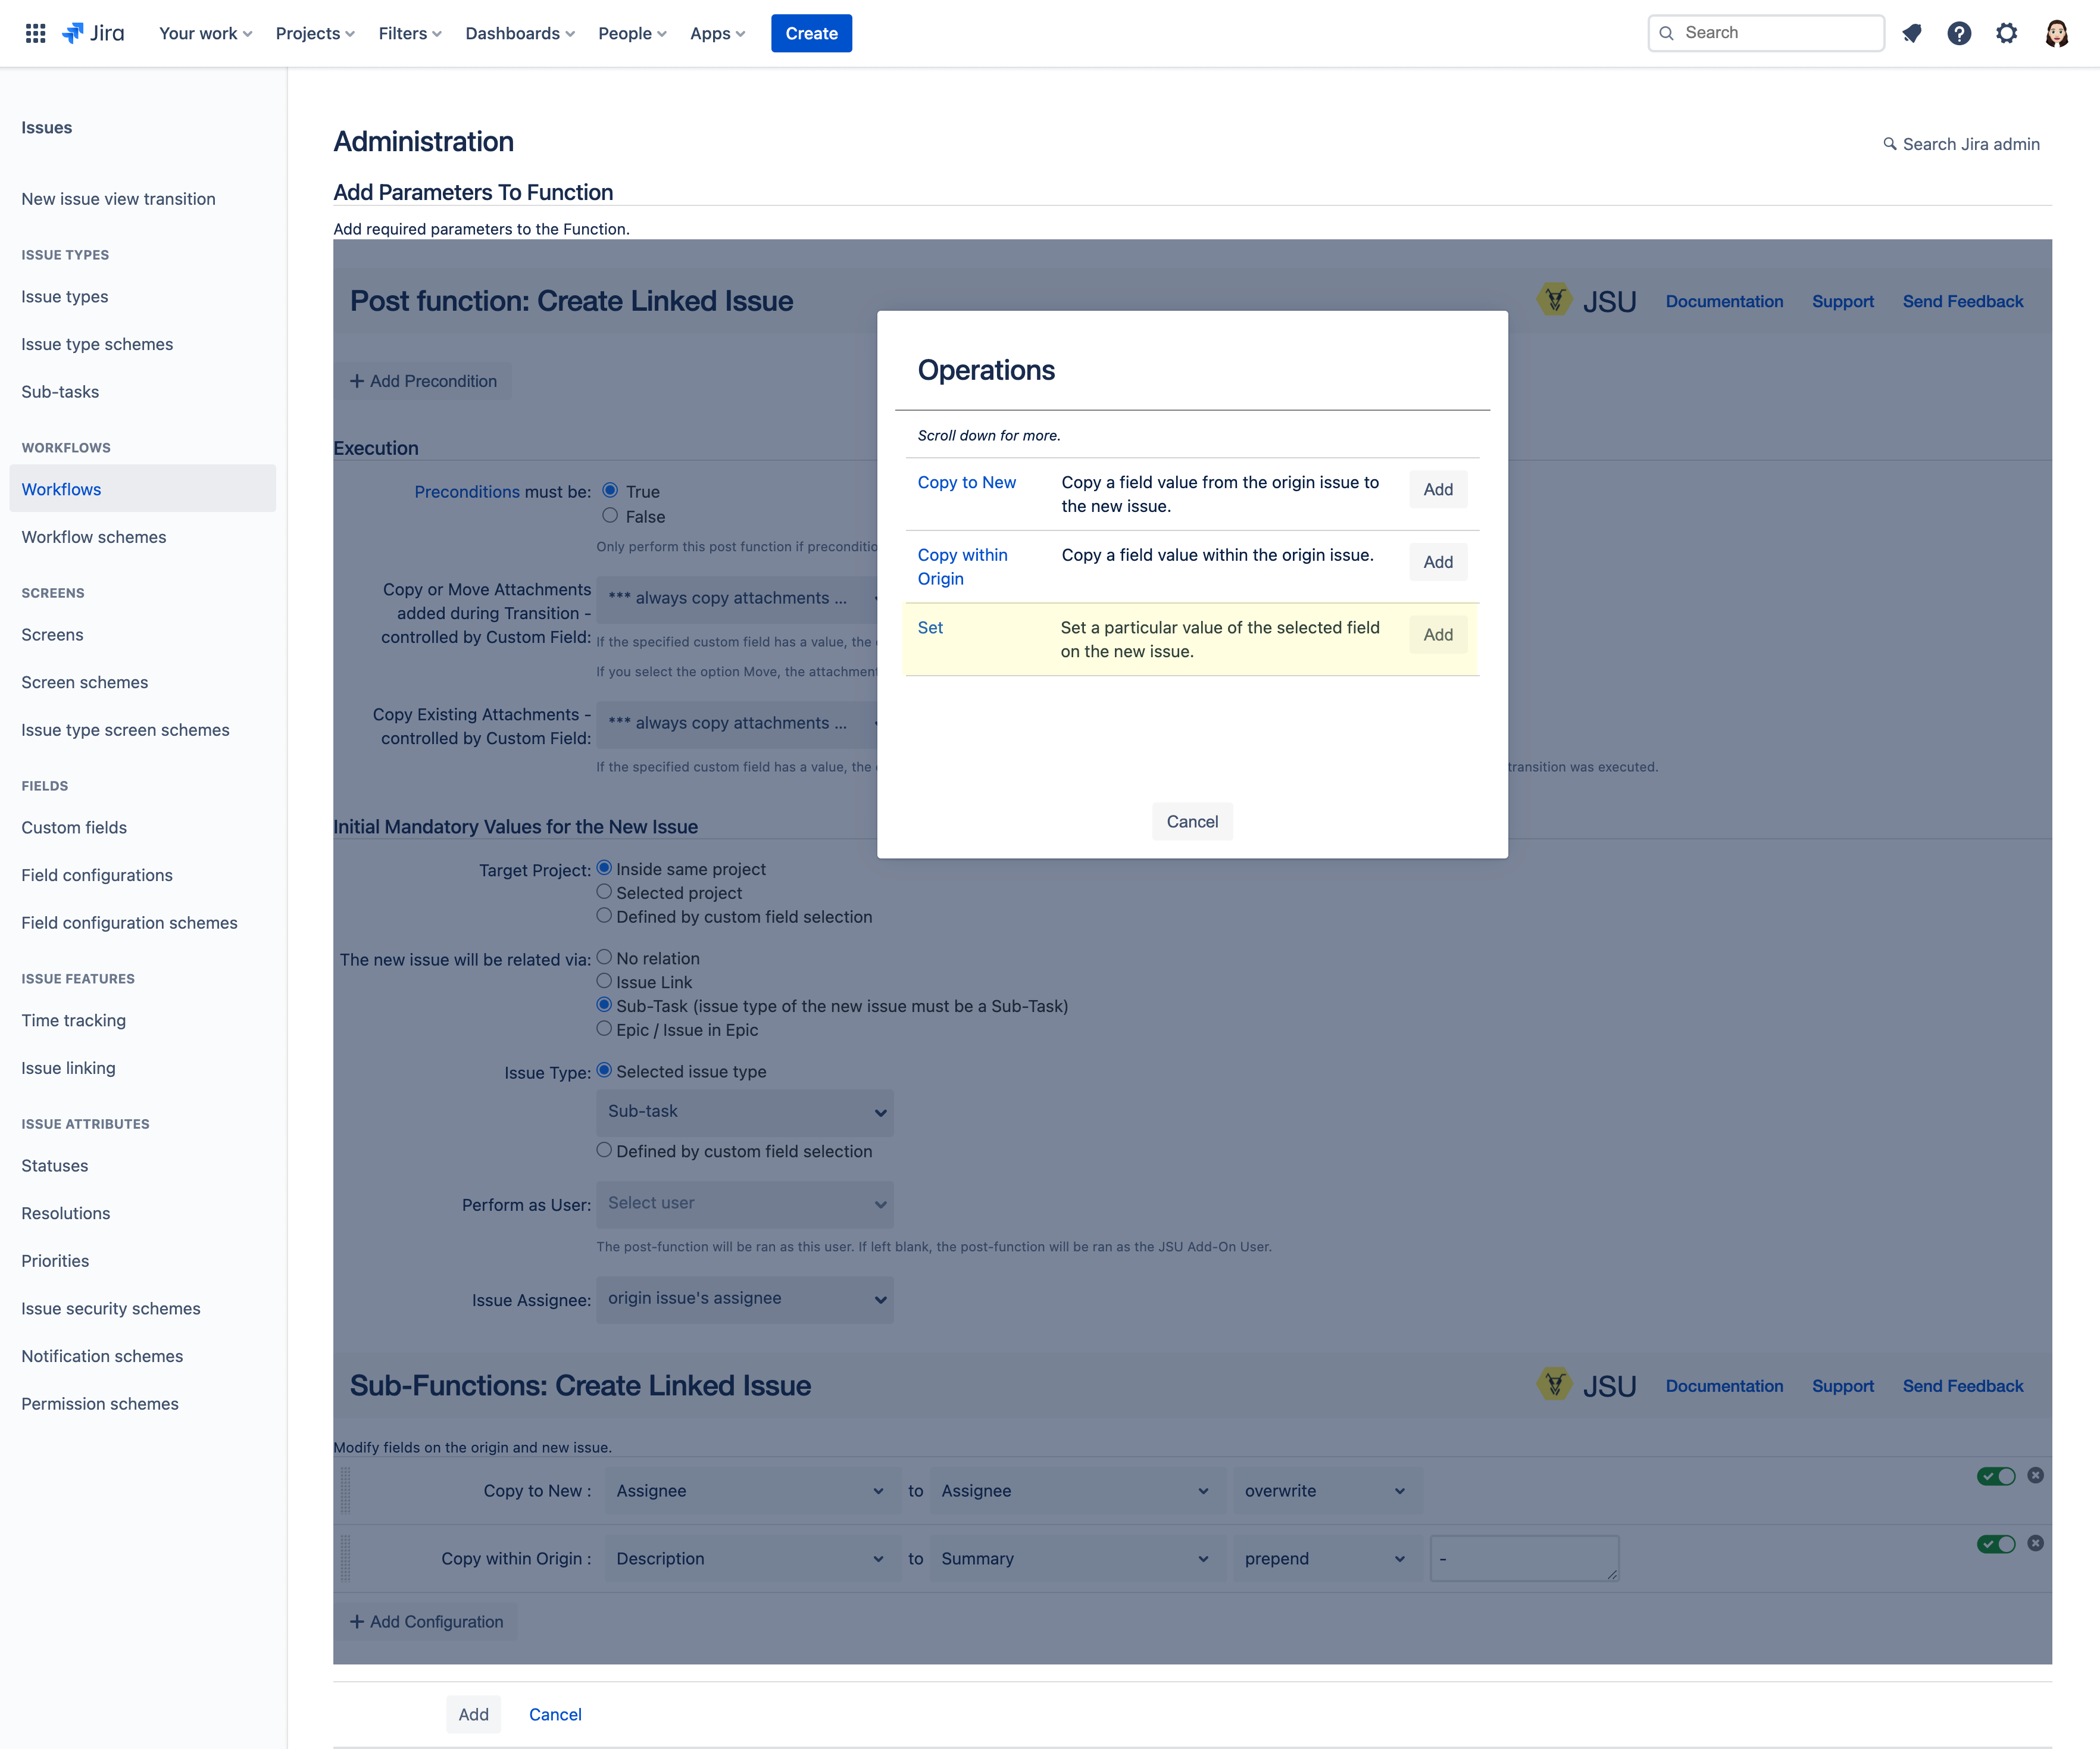
In our third configuration, we set Create contract to Summary. After completing your third configuration, click Add to add the post function to your workflow.

On the Post Functions summary screen, select Add post function.
Follow Steps 4 - 11 to create another sub-task for ordering a PC. In this case, set the summary of your new sub-task "order PC"
After finalizing, click Add to add the post function to your workflow.
Voila! We have now added all of our post functions!

Publish your workflow, then let's see our setup in action.
Test the workflow
Let's head over to our project and create a task for hiring a Marketing Assistant.
Make the Summary, Hiring Marketing Assistant.
Add Onboarding process in the Description.
Add an Assignee.
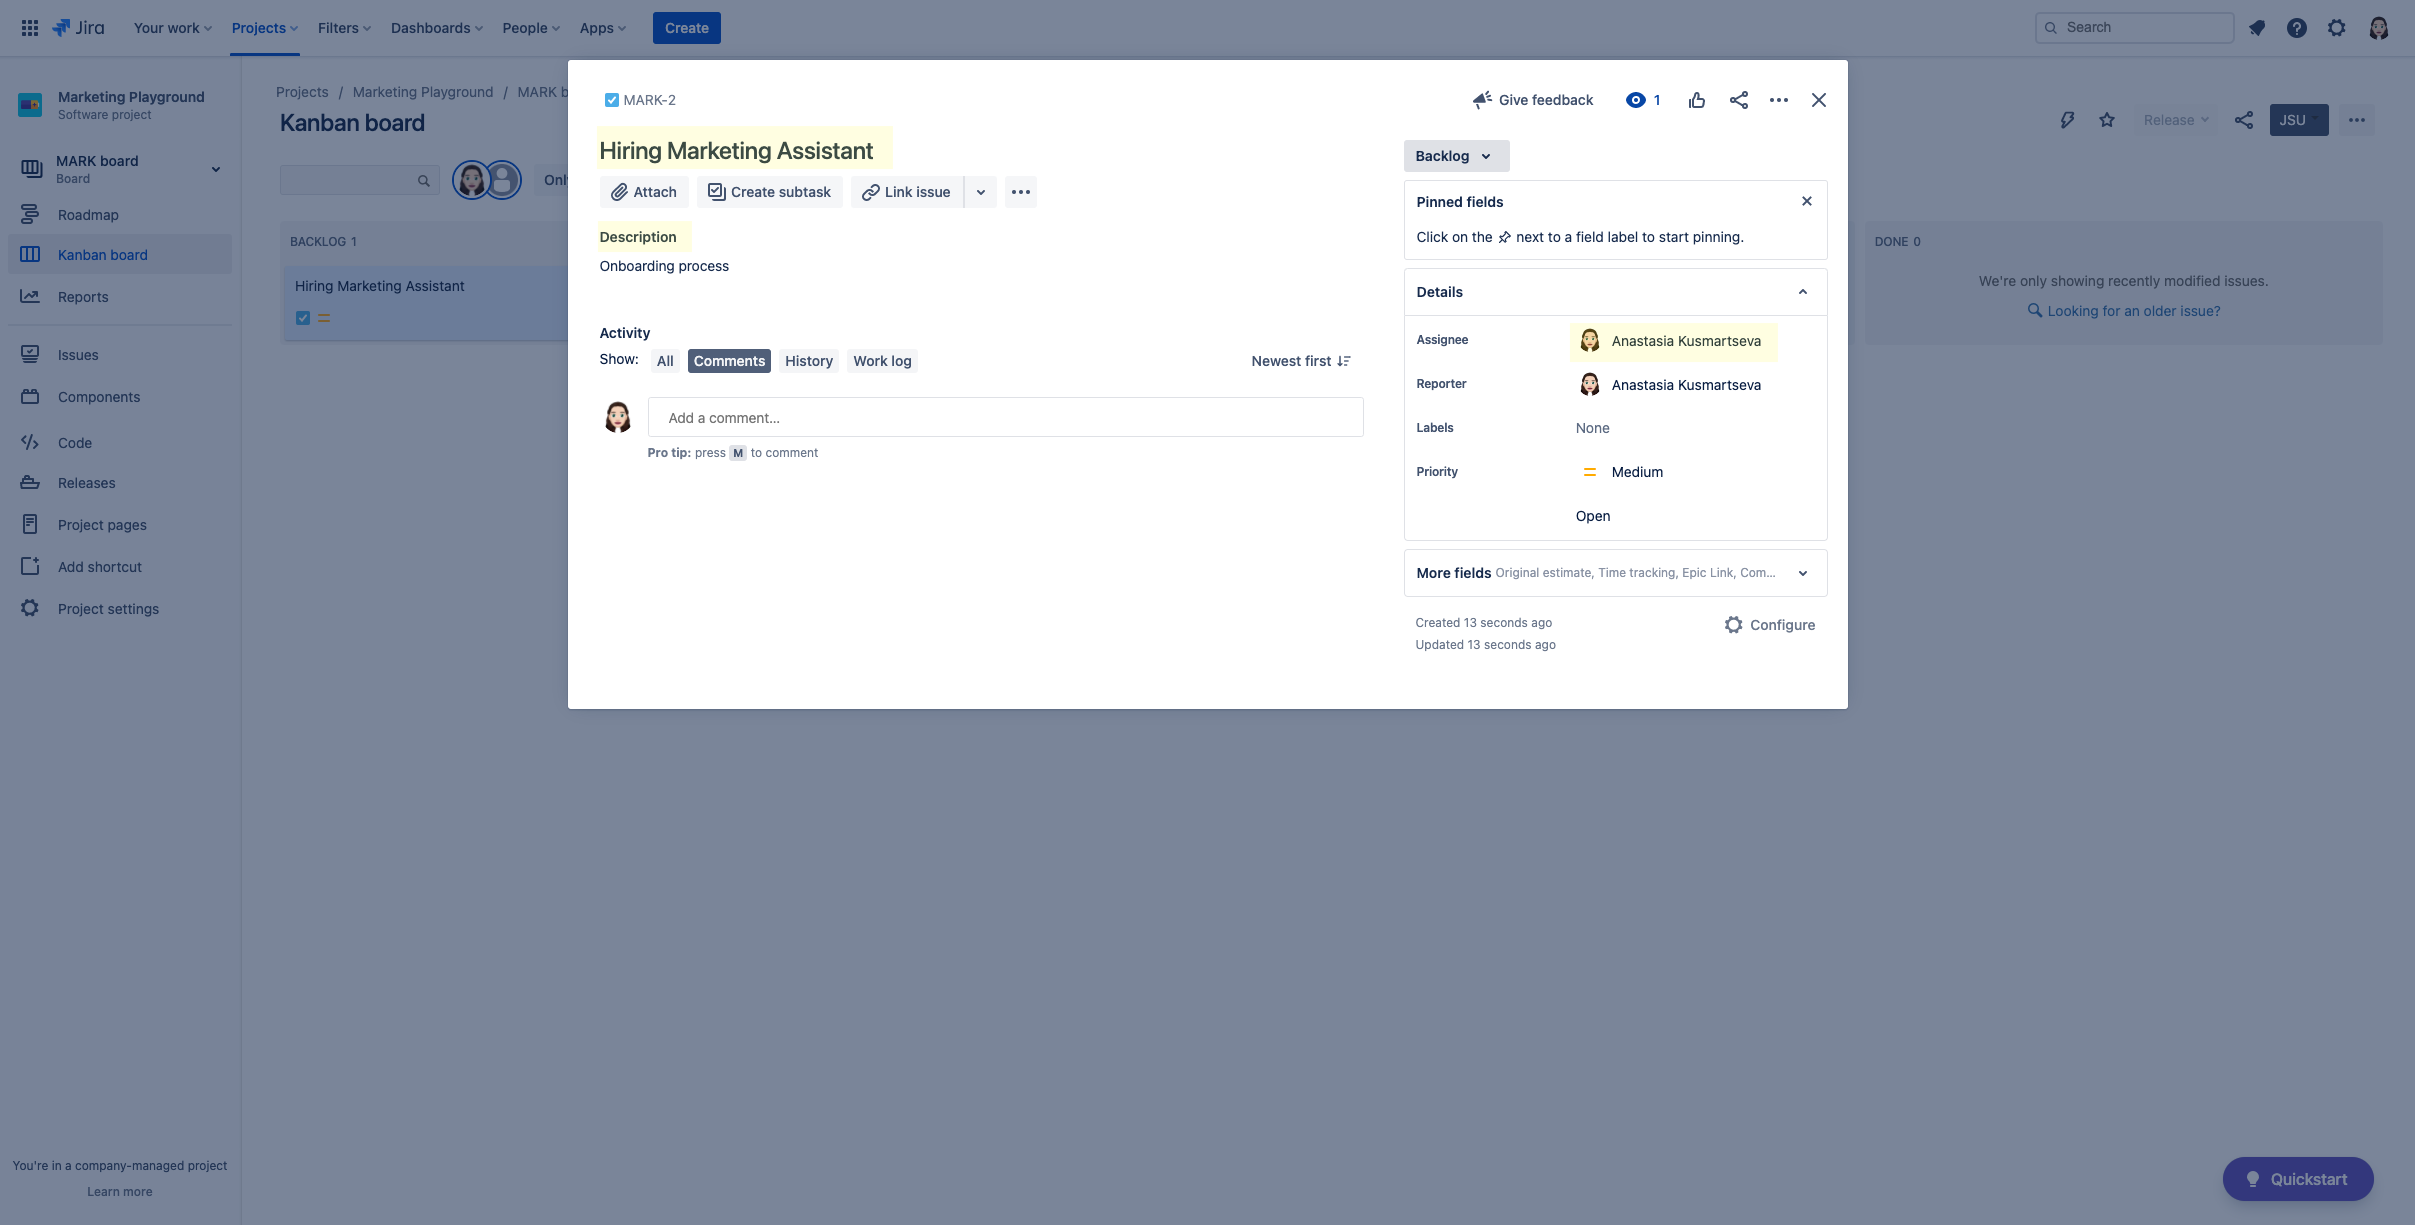
Change the task's status from Backlog to in Progress and watch the two sub-tasks magically appear through the automation we configured!
The description of your task is updated because of the "copy within origin" functionality. Your new sub-tasks have been assigned to the assignee of the task due to the "copy to new" functionality and their summary is set as configured by the "set" functionality.
That's it! JSU automated the work for you!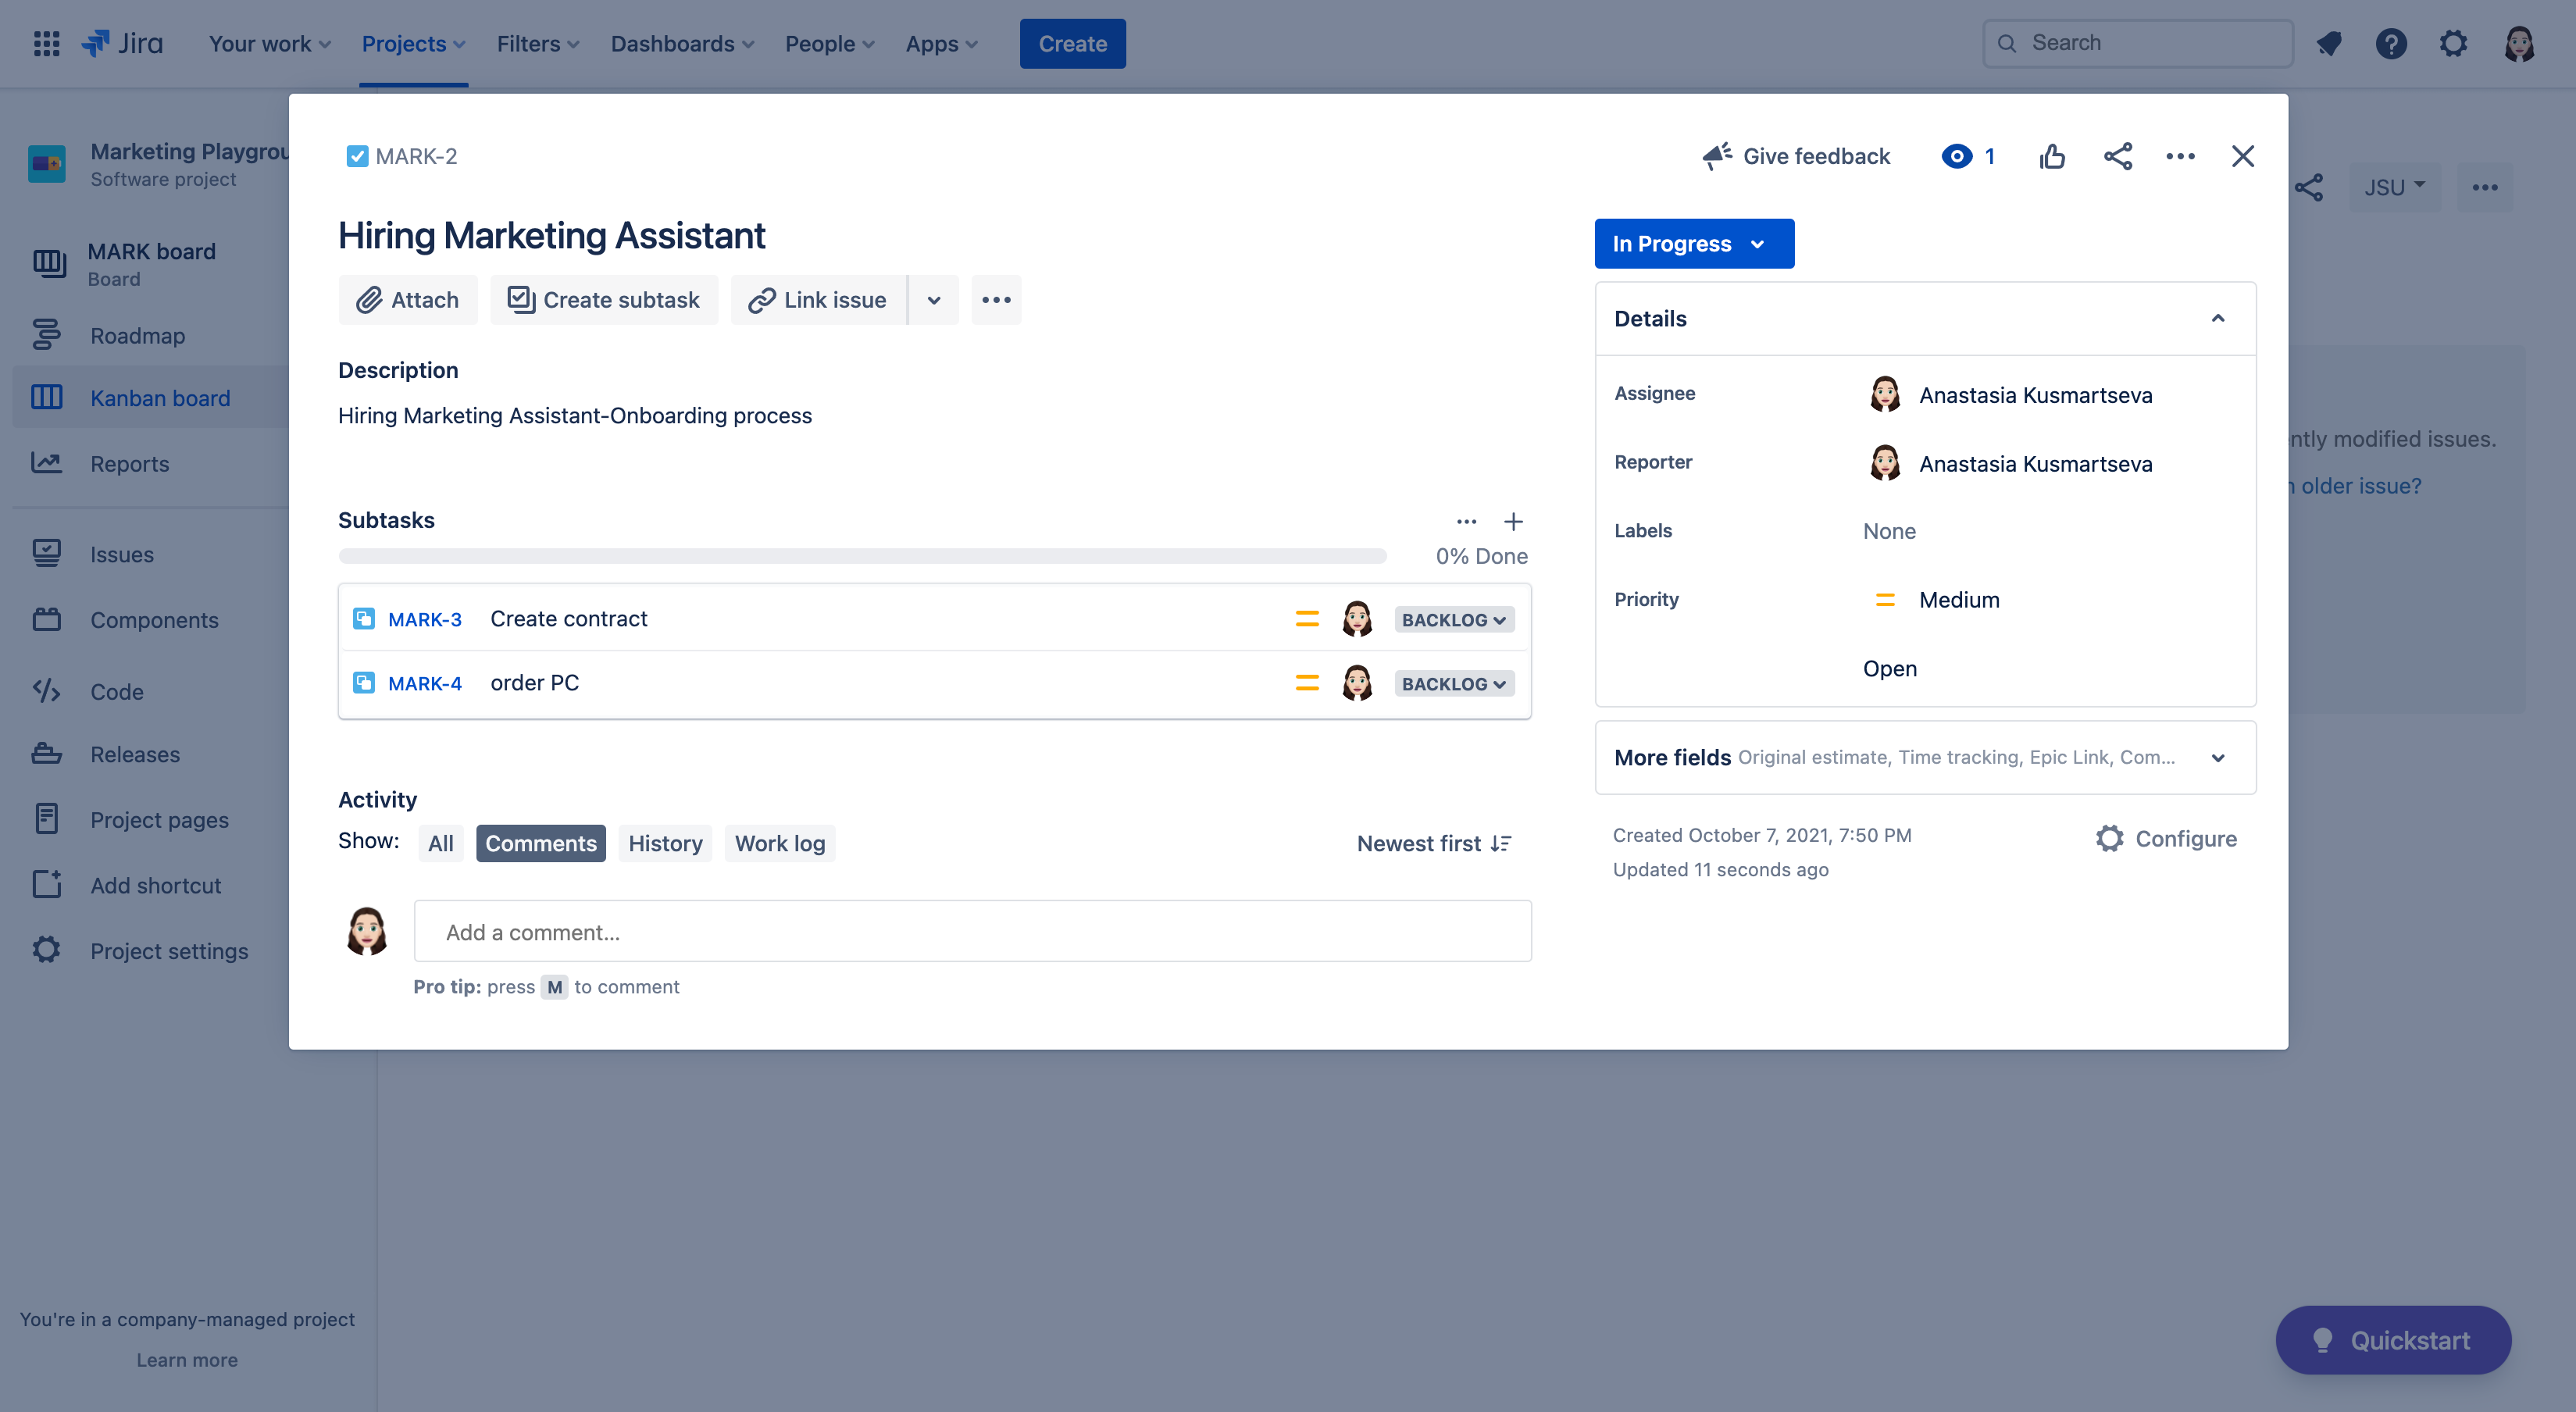
Good to know
This was just one example of automating linked issues and field creation. Regardless of your needs, JSU's "Create A Linked Issue" post function and its operations can help you:
copy a field value from the origin issue to a new linked issue,
copy the value from one field to another field within the origin issue, and
set the value of a field in a new linked issue.
Need more information or help? Get in touch!