This is the documentation of JSU for Jira Cloud. If you are using JSU on Jira Server or on Jira Data Center, you can find the documentation here. |
 Optimize your approval processes based on your team's needs: Budget approval, Travel approval, Production approval, etc.
Do you often set up issues that need approval to move to production? Do you need budget approval from your manager only for large budgets but not for smaller ones? In every organization, a budget approval process is required. Trigger budget approval efficiently and in accordance with your company's policies and rules with JSU.
With JSU Automation Suite for Jira Workflows you can configure, that the workflow will transition automatically to the correct status.
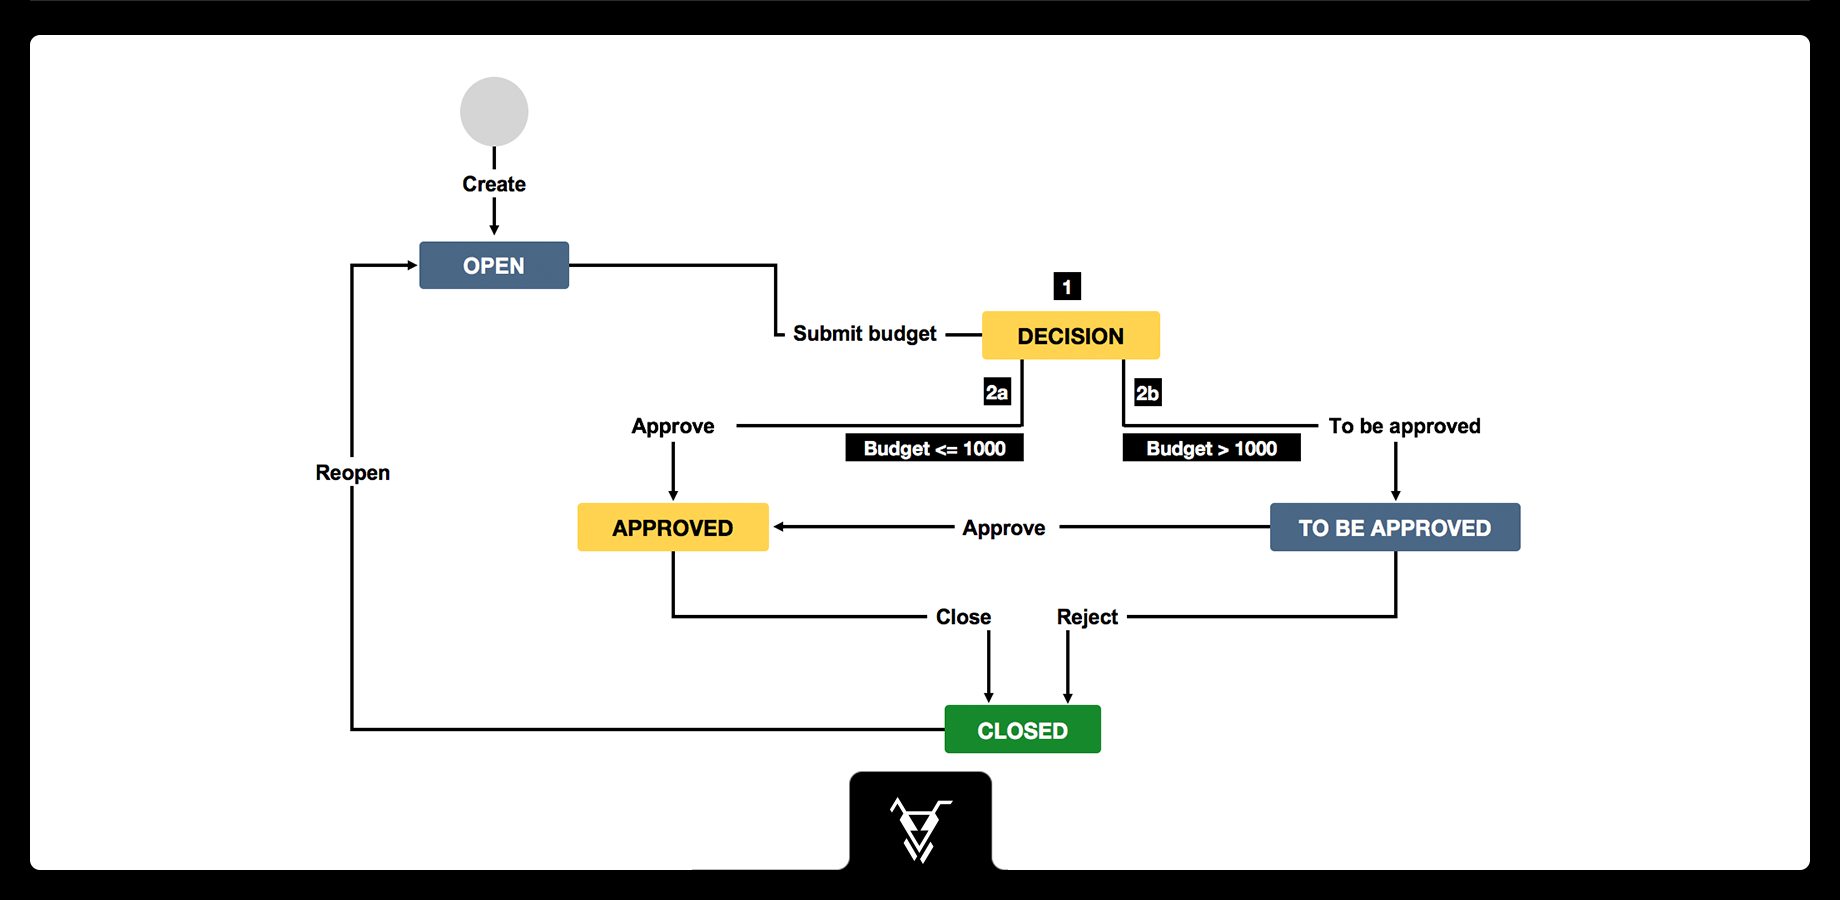
Have a look at the diagram below.

After the user submits the budget, JSU will continue from the DECISION status and automatically forward the process to the correct status, depending on the business rules in place: here, Budget <= 1'000 OR Budget > 1'000.
Check out the "How to" video further below to configure your budget approval automation.
How to configure this workflow
- Add the JSU Post Function Follow Up Transition in the "Submit Budget" Transition to follow up next transition.
The post function will evaluate the workflow conditions of all the next transitions on the target status of the current transition.
If exactly one condition is valid, that transition will be triggered as a "follow up" transition.
- Set up two different Value Field Conditions for the different transitions "To be approved" and "Approve". You can choose the amount of budget above which your budget needs approval. In this case we put 1'000:
- If Budget > 1'000 on the "To be approved" transition, then the status turns to "TO BE APPROVED"
- If Budget <= 1'000 on the "Approve" transition, then the status turns to "APPROVED"
 We have carefully set these conditions, that always exactly one condition is valid. Like this, the Follow Up Transition will always trigger one of these two transitions. The workflow will never be stuck at the Decision status.
- Make sure you add the "budget" field on your project screen before you move on with your issue creation.
- Create an issue in your project and set you budget to 2'000. Start progress and check the status. JSU has automated the DECISION with the follow up transition and moved your issue to "TO BE APPROVED" based on the conditions you set up before
- You can do the same by setting your budget to 800. Start progress and check the status. The automation turned the issue status to "APPROVED"
 How to video
Watch this video to see all of this in action:

This was only a bit of JSU in action. Subscribe to our YouTube channel and Access more JSU use cases.
See also the app documentation for some more examples and configuration screenshots.
Need more Information or help? Get in touch!
![]() Optimize your approval processes based on your team's needs: Budget approval, Travel approval, Production approval, etc.
Optimize your approval processes based on your team's needs: Budget approval, Travel approval, Production approval, etc.
