...
| Panel | ||||||||||
|---|---|---|---|---|---|---|---|---|---|---|
| ||||||||||
This is the documentation of JSU for Jira Cloud. If you are using JSU on Jira Server/Data Center, you can find the documentation here. |
| Info |
|---|
NOTE: This guide starts from the "Edit Workflow" screen of a chosen project. If you're not sure how to get to this page, follow the onboarding steps first on either: /wiki/spaces/JSUCLOUD/pages/27801900 or /wiki/spaces/JSUCLOUD/pages/1147633753 |
 Save you and your users' time and effort by letting JSU streamline approvals in your workflow
↓ Follow the visual step-by-step guide below to see how to configure this automation in your Jira instance. ↓
- If you use Jira to manage approvals in a workflow, then you'll know how any unnecessary steps and actions can cause frustration for those requesting approval, and those approving too.
Below is an example "approvals workflow" that is already configured as part of this tutorial. If you want, you can re-create this workflow in your instance in a few minutes. The main feature of the workflow is that from the
status, the issue could then move to eitherStatus colour Blue title submit
orStatus colour Blue title awaiting approval
. We'll add the logic to automate this decision-making in future steps.Status colour Blue title approved 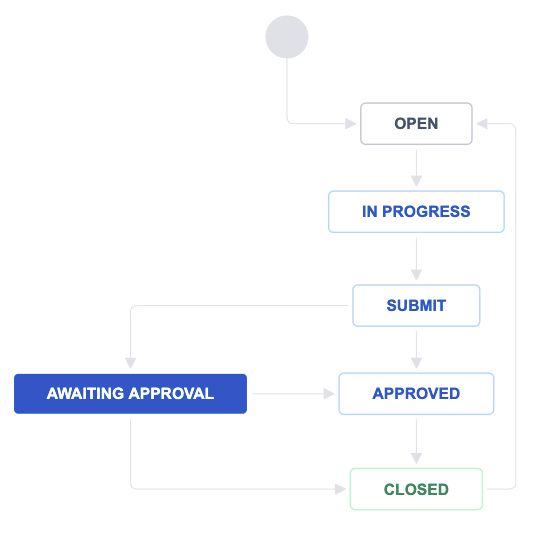
- To begin automating this workflow, we first want to set the criteria we'll use for determining what "requires approval" and what can be streamlined to be automatically "approved".
For our example workflow, we want to require approval for issues where the field "Budget Required" is over 1000. Where it is less than 1000, we'll let JSU automatically approve the request for us. To get started, make sure you're in "Edit Mode" for your workflow and then click on the transition (arrow) connecting the
andStatus colour Blue title submit
statuses.Status colour Blue title AWAITing approval 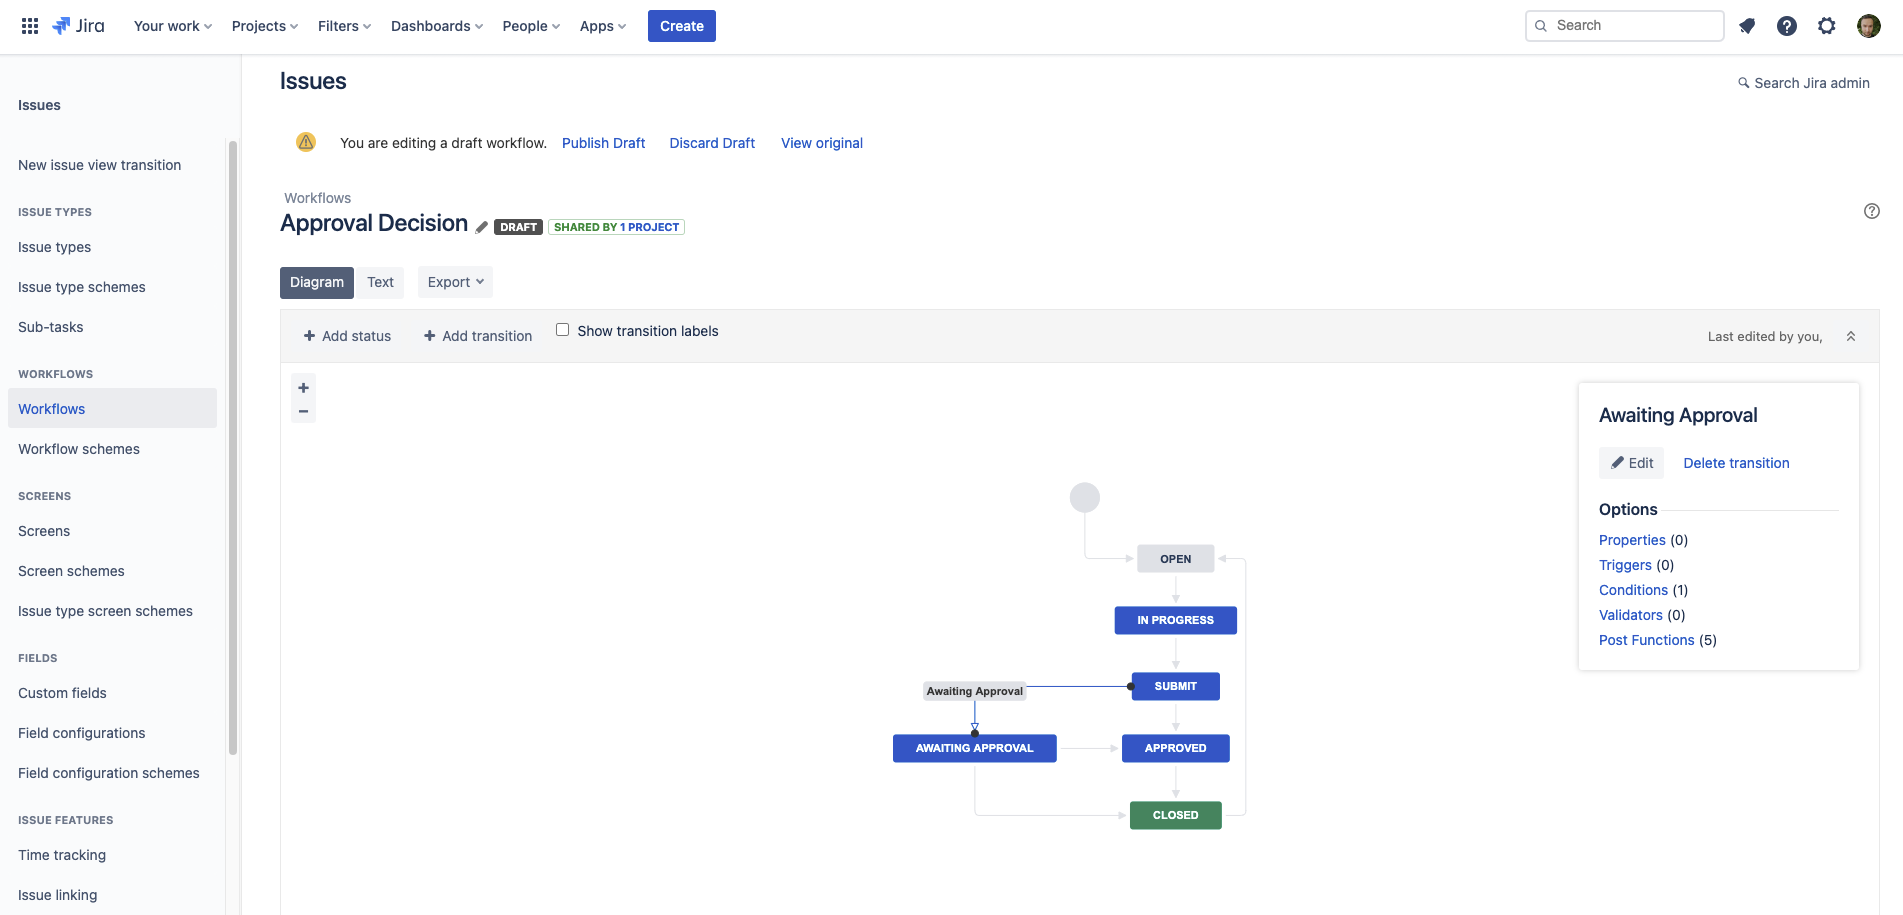
- From the pop-up that appears - click on "Conditions".
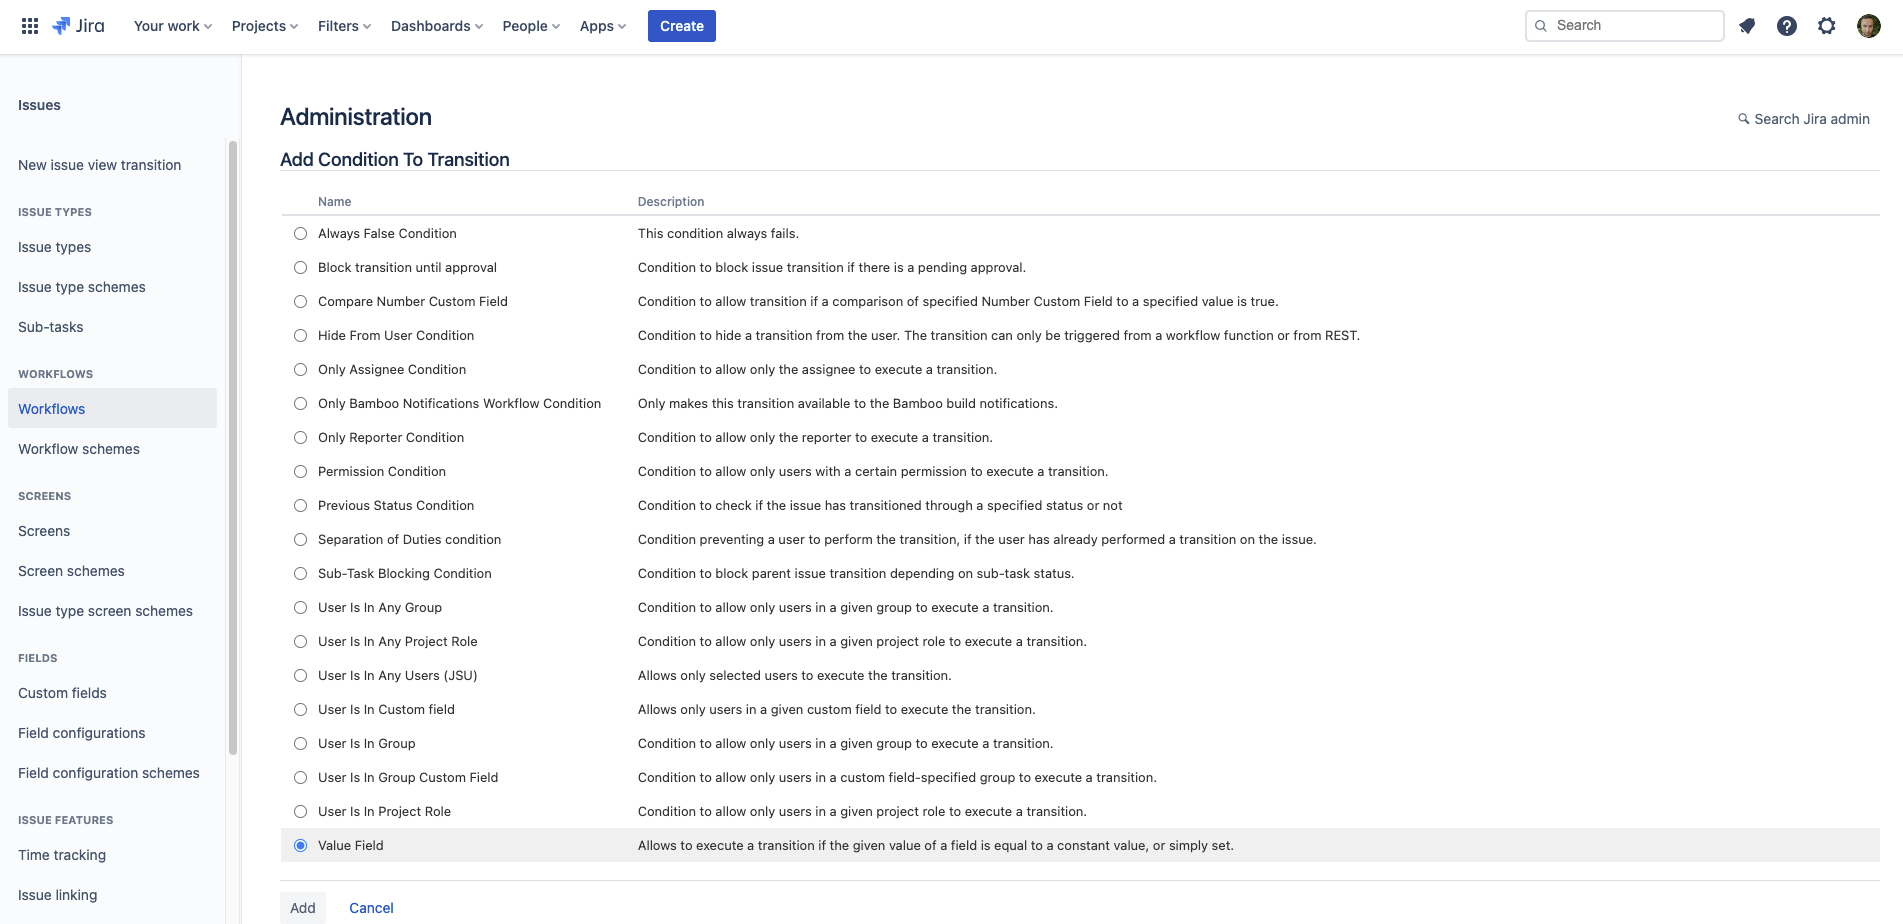
- Now let's choose "Add Condition".
- From the list of Conditions, choose "Value Field" and then click "Add".
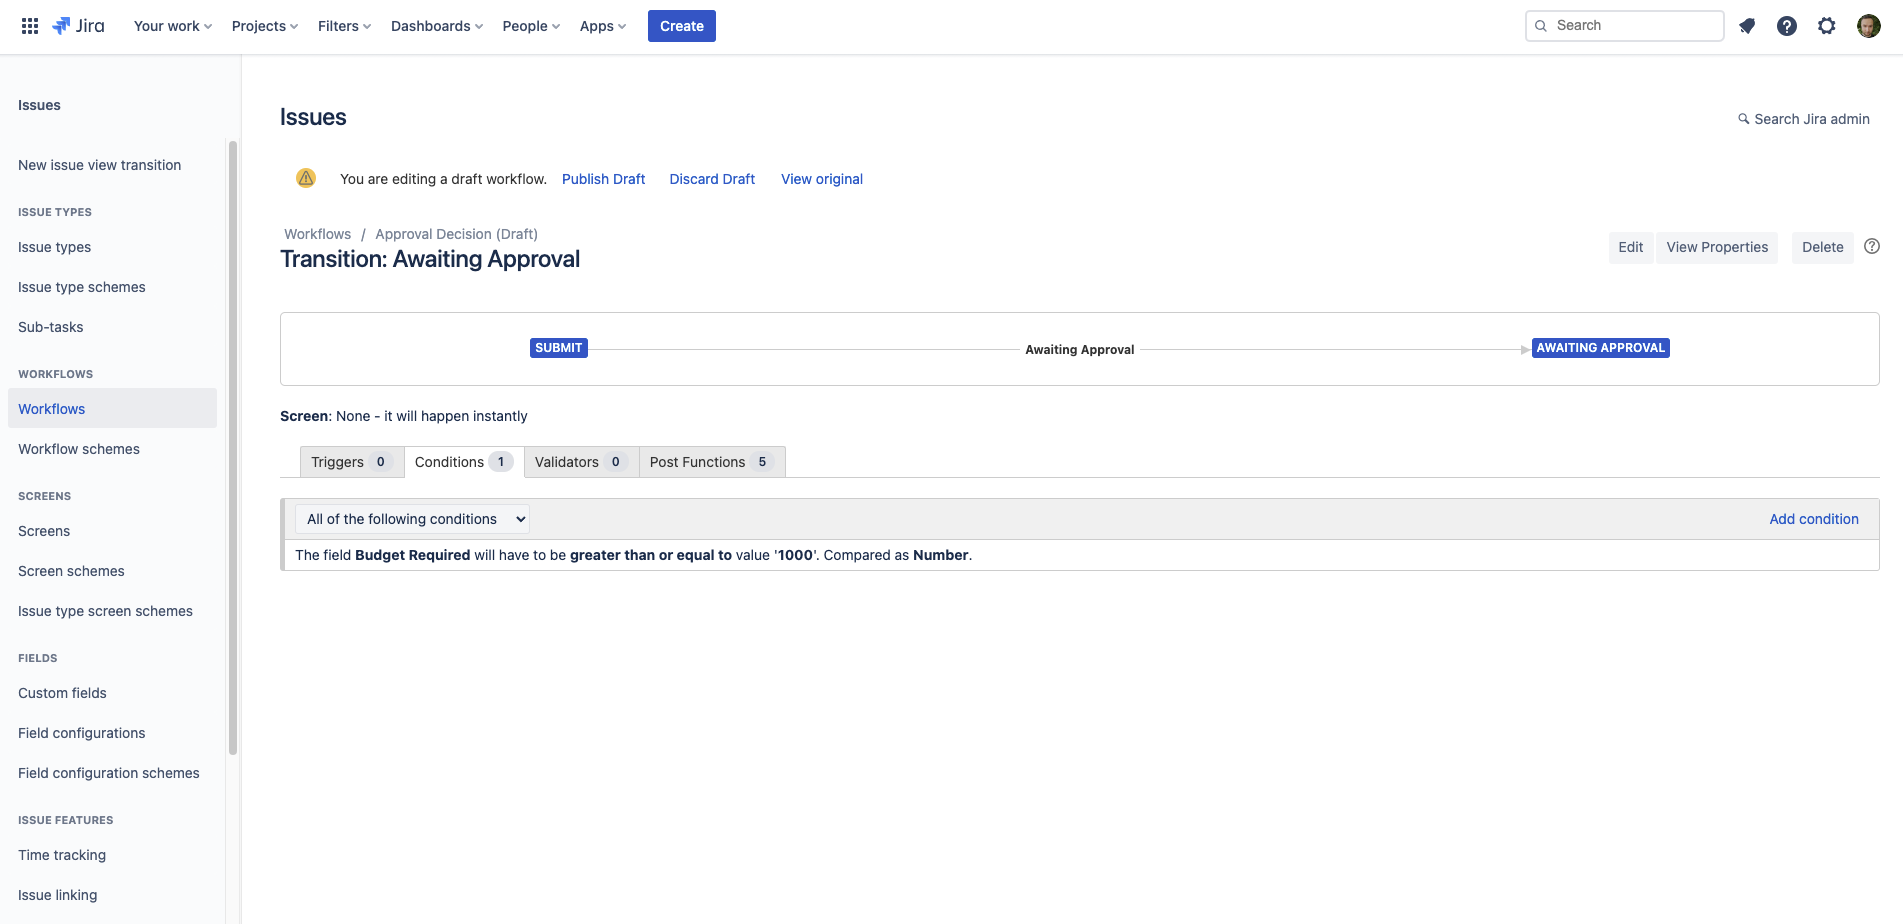
- Now, let's configure the Condition to ensure only the issues we desire have the ability to transition to
.Status colour Blue title awaiting approval
Field - Choose the field you want to inspect the value of, to determine whether an approval can be streamlined for it. In our case, we have a field called "Budget Required" that we've chosen.
Condition - Choose the type of comparison you're going to use when comparing with the value. In our case, we want to require approval when the "Budget Required" is greater than (or equal to) 1000. So we need to choose "greater-than-or-equal-to / >="
Value - Type in the value you want to compare the Field against. In our example, our chosen value is "1000".
Comparison Type - To ensure the Value (a number) can be compared against the Field (also a number), we need to specifically tell Jira that in this scenario that Value is a "Number".
When you're happy with the configuration, click "Add".
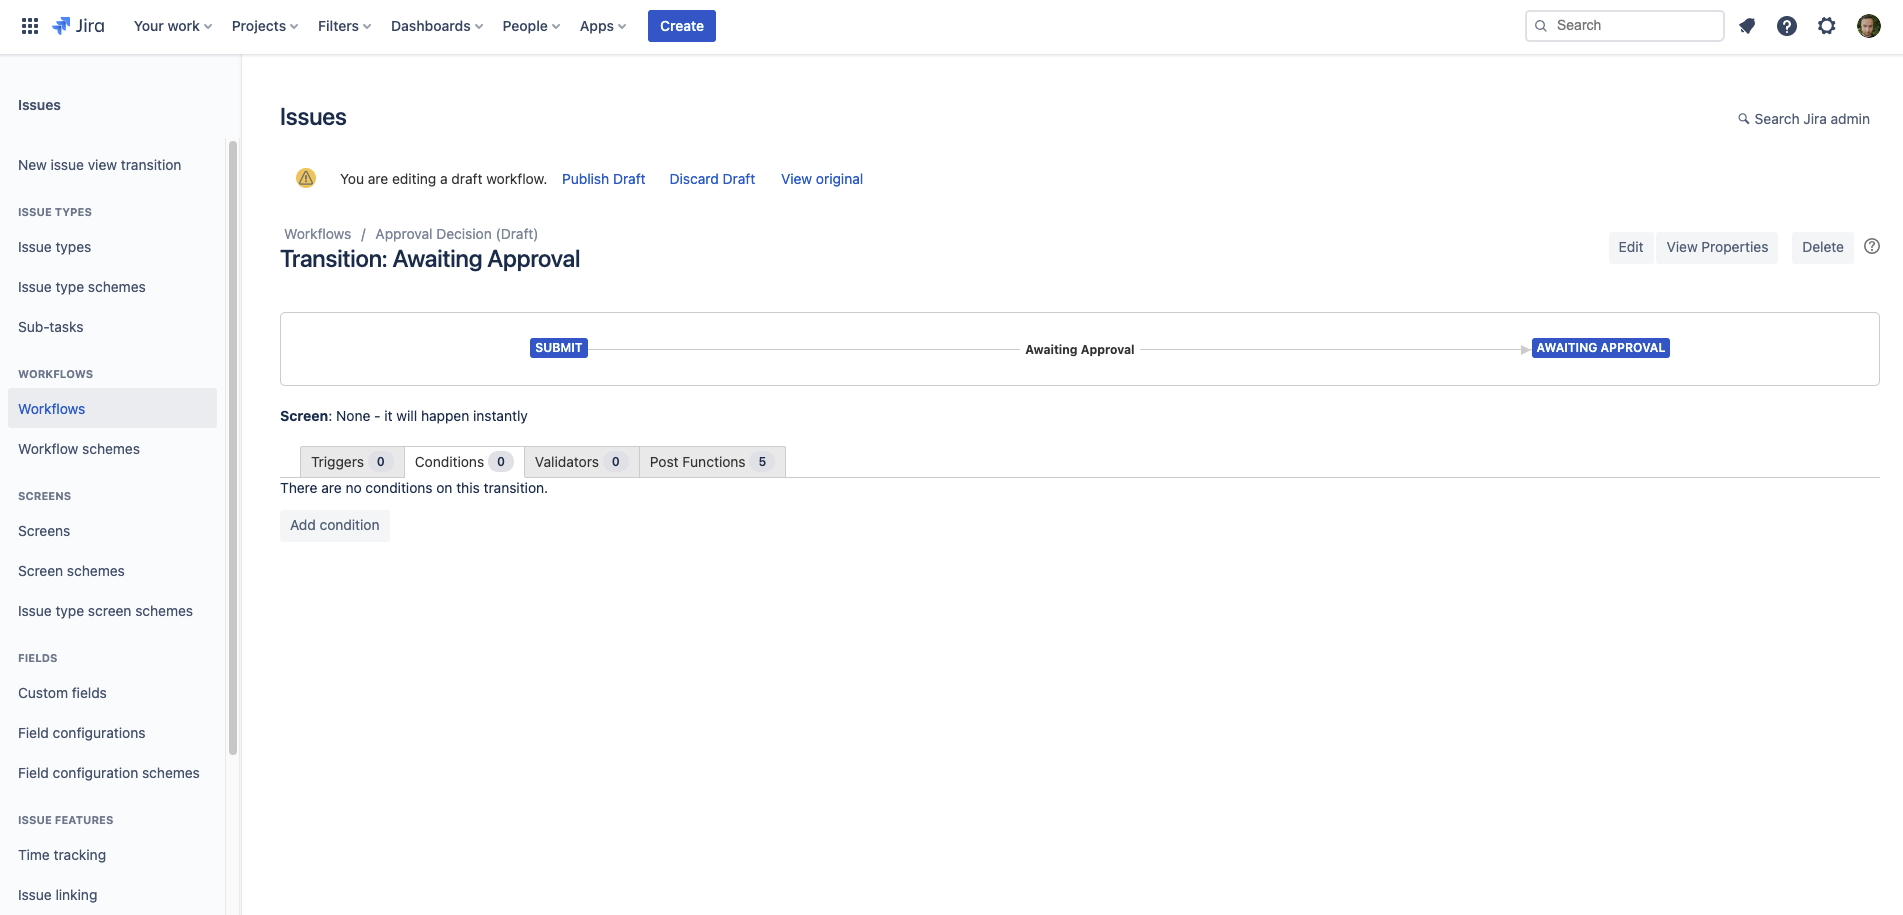
- You will now see a preview of the Condition we've just configured.
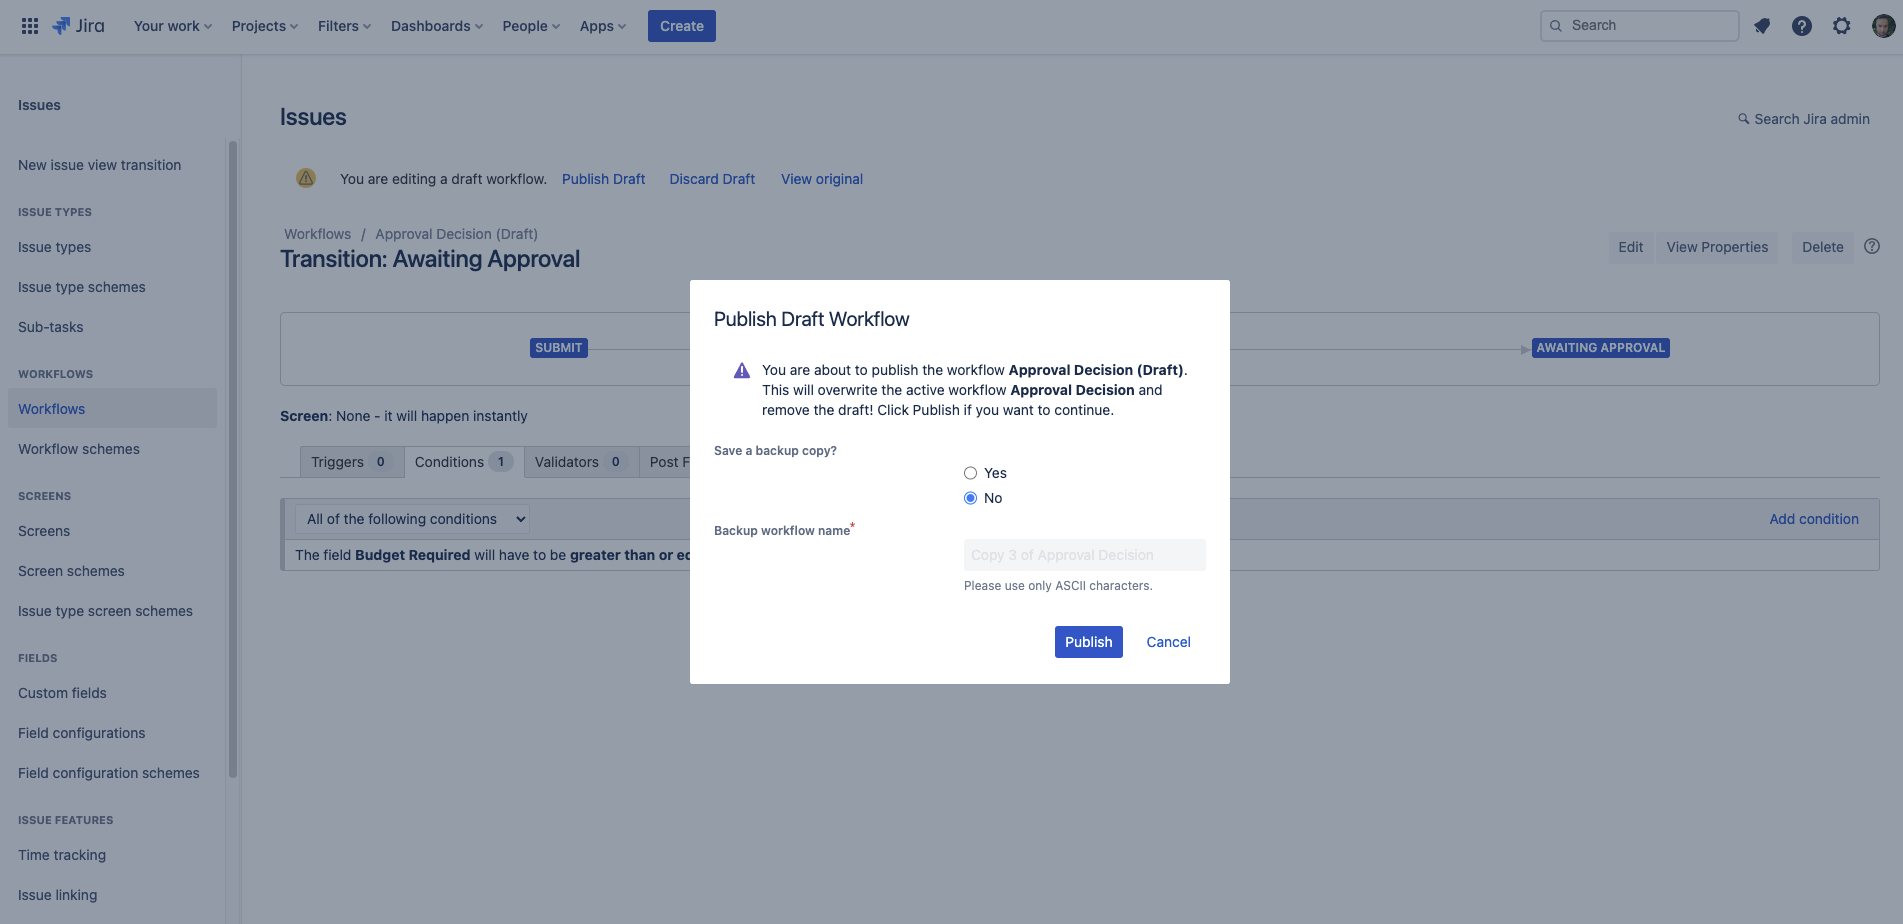
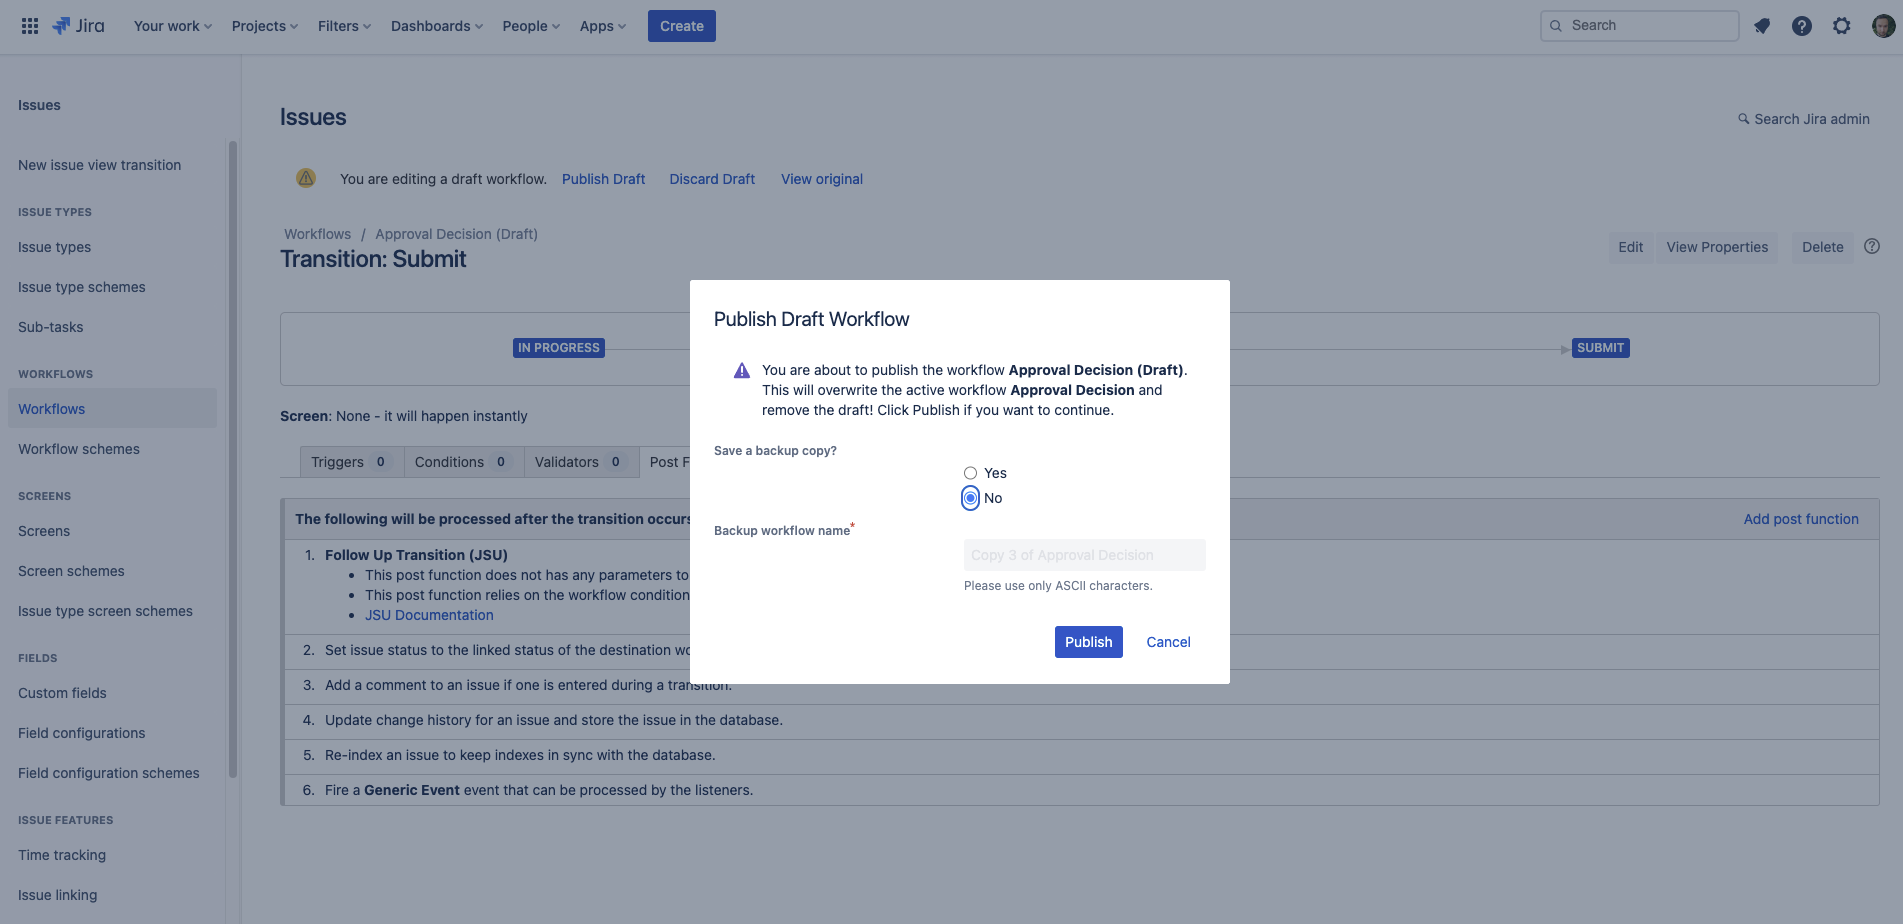
- You will be presented with a “Publish Draft Workflow” pop-up. It's not necessary to save a draft. Click "Publish" when you're happy and then we'll move on to the next transition.
- Head back your approvals workflow in Edit Mode. Now let's select the transition (arrow) connecting
andStatus colour Blue title submit
and again click "Conditions" in the pop-up that appears.Status colour Blue title approved 
- Repeat Steps #4 - #6 to configure the "Value Field" Condition against this transition. The only difference with the configuration here is that we're going to set the "Condition" to "less-than / <" to ensure that issues with a "Budget Required" of less than 1000 can be moved next to
instead ofStatus colour Blue title Approved
.Status colour Blue title awaiting approval 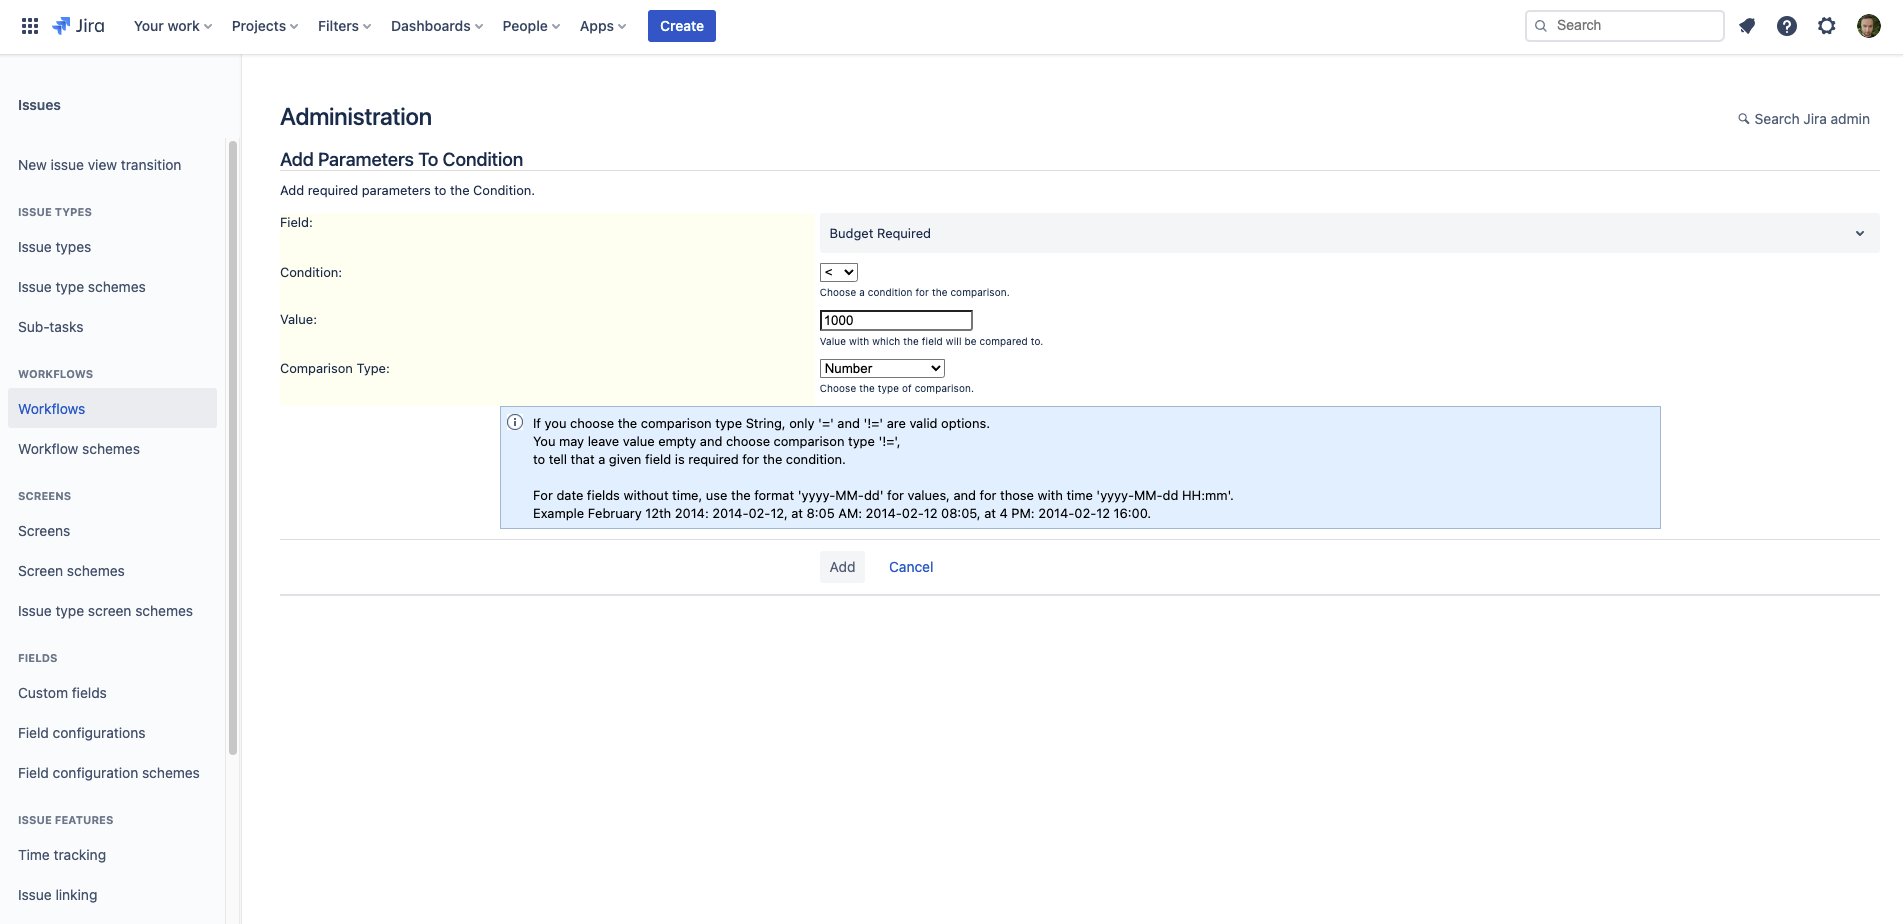
- After this, and just like in Steps #5 - #8, now you will need to "Add" the Condition, and then publish the draft workflow to make it active.
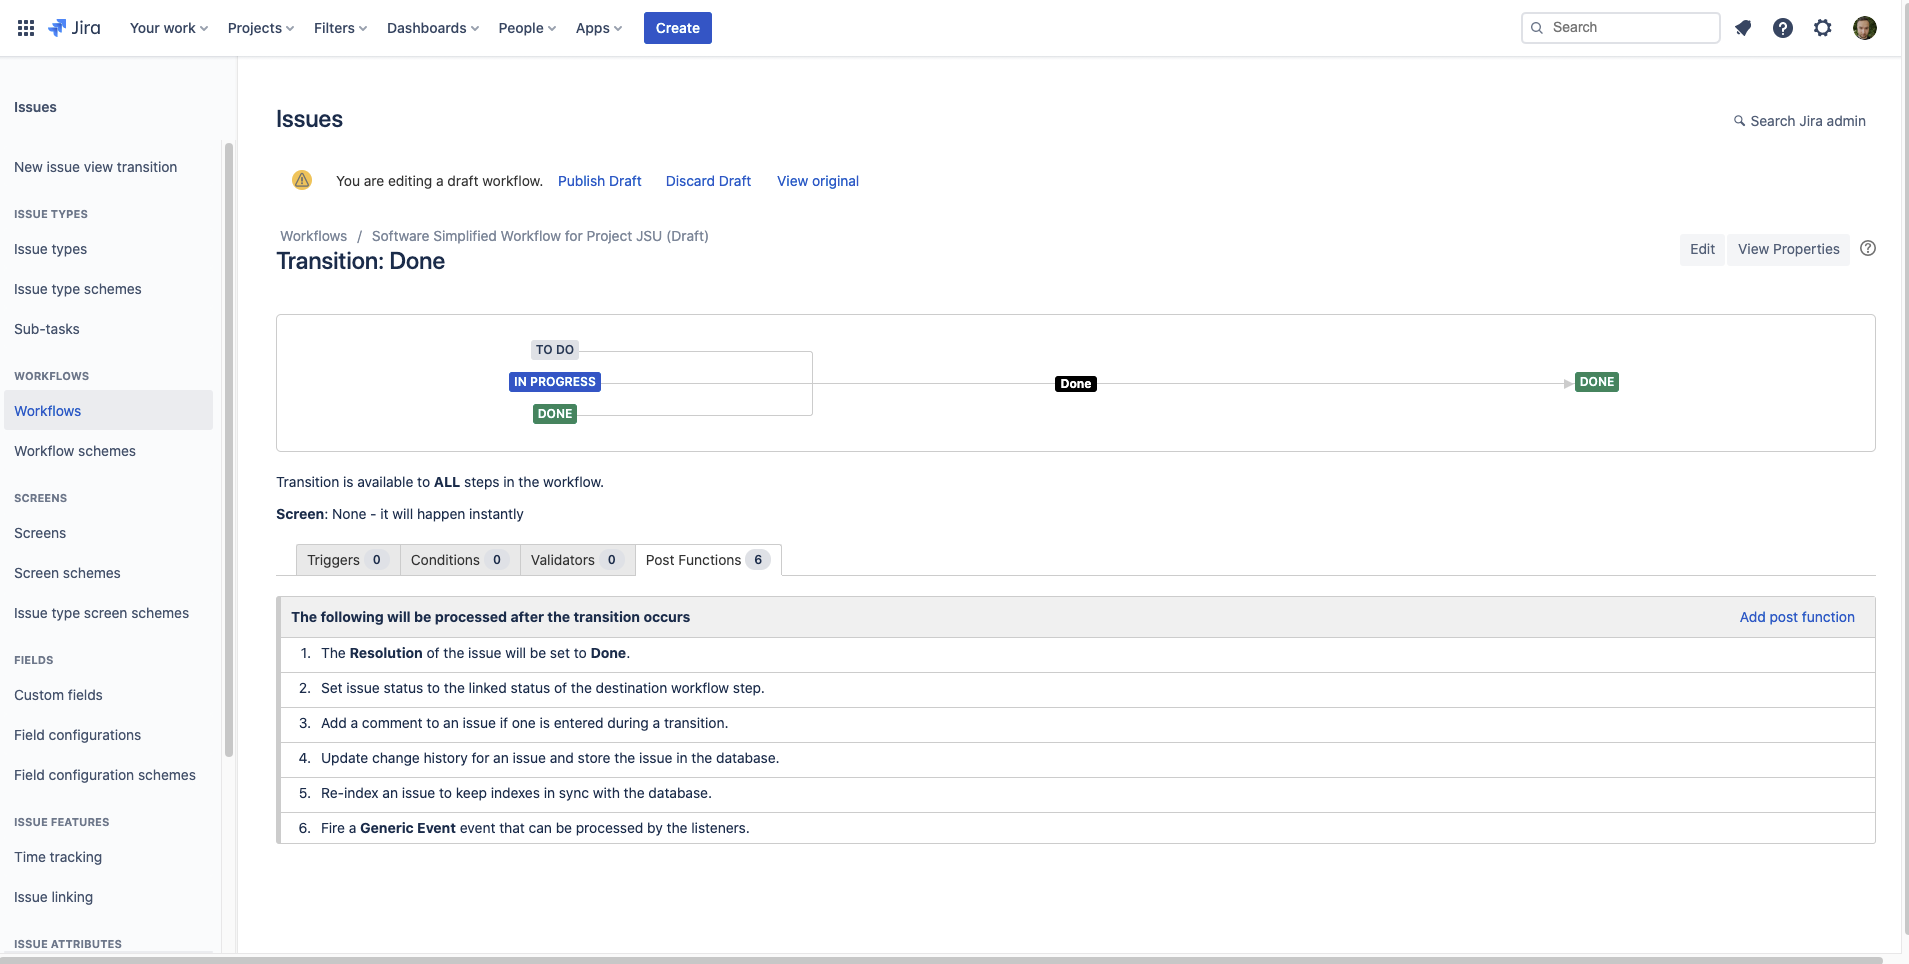
- Almost there! Now it's time to add our automation to let JSU make this approval decision for us, based on the "Budget Required" values when users move their issues to the
status.Status colour Blue title submit
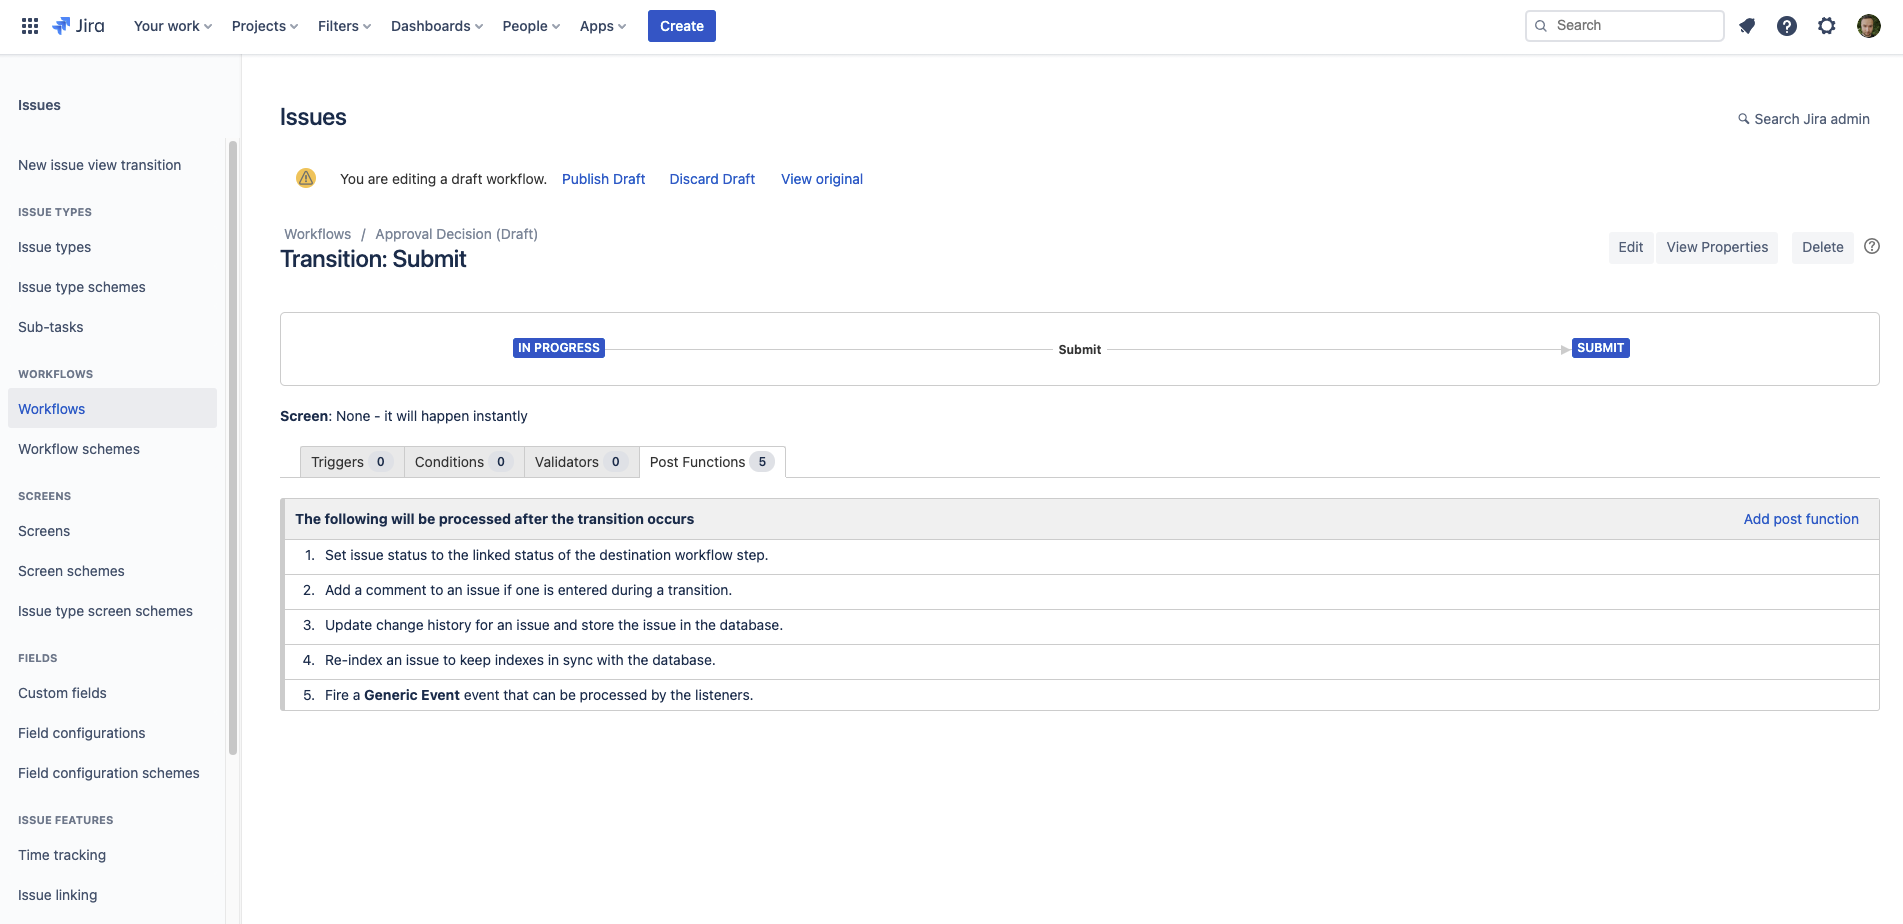
Head back to your approvals workflow in Edit Mode. Now let's select the transition (arrow) connecting
andStatus colour Blue title In progress
, but this time select "Post-Functions" in the pop-up that appears.Status colour Blue title submit 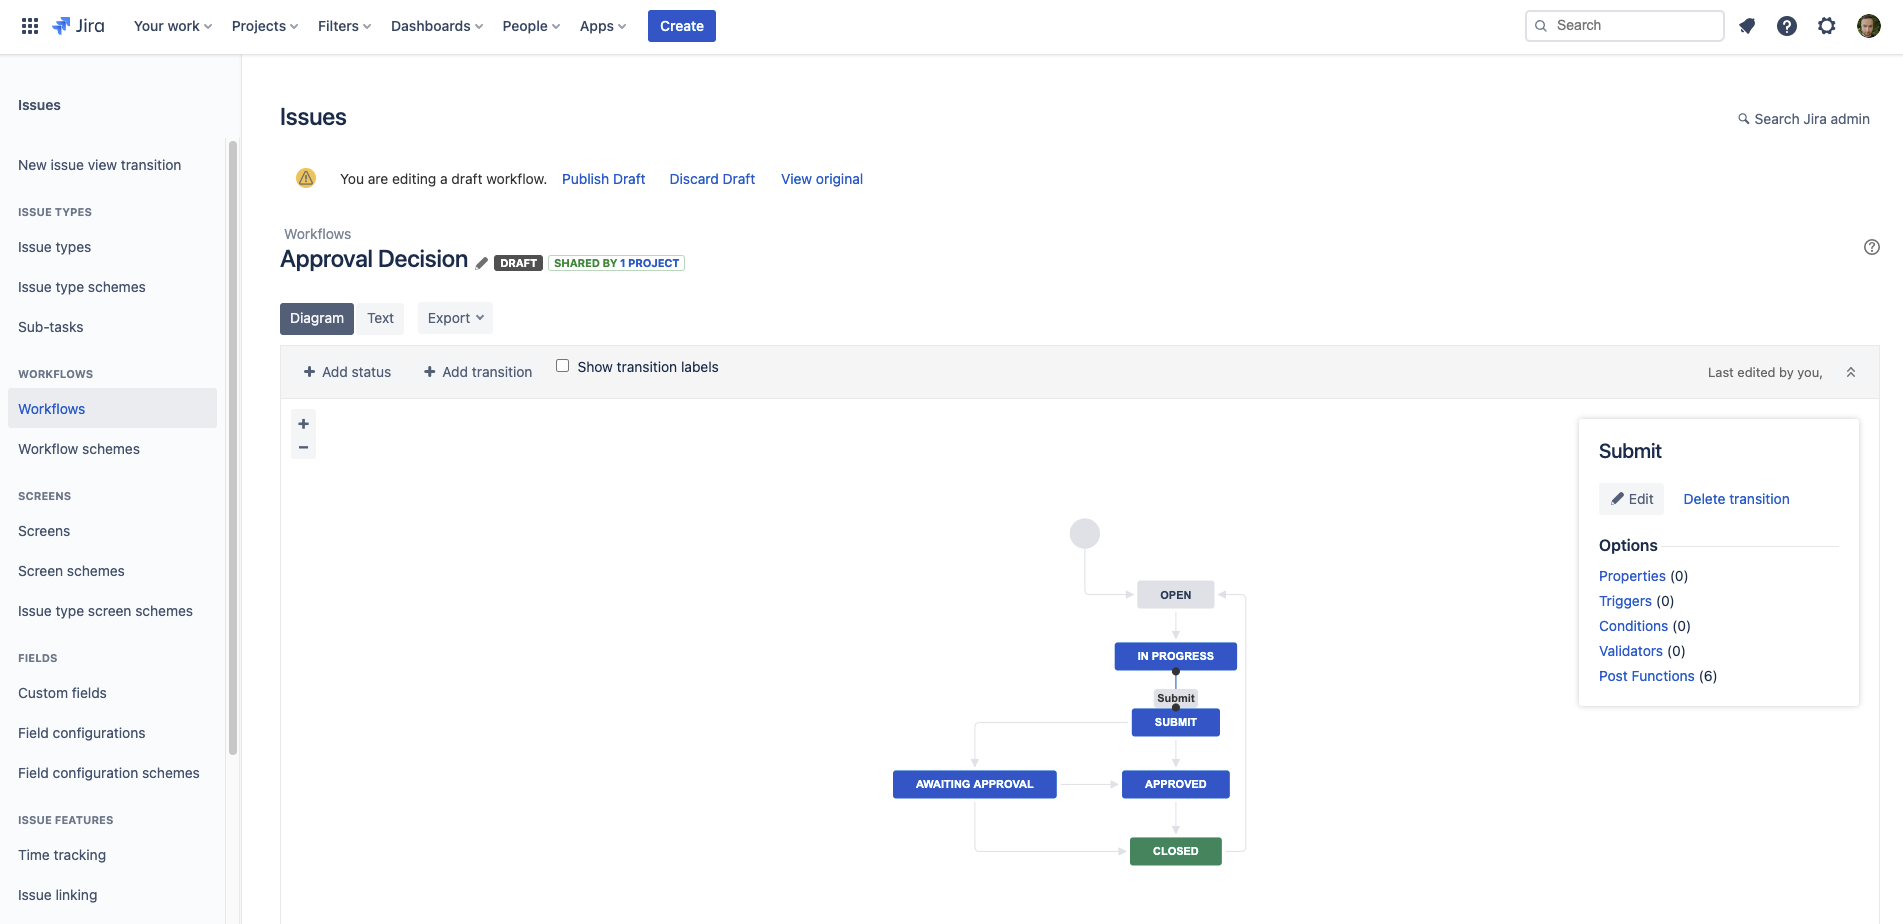
- Click "Add Post Function" towards the right-hand side of the screen.
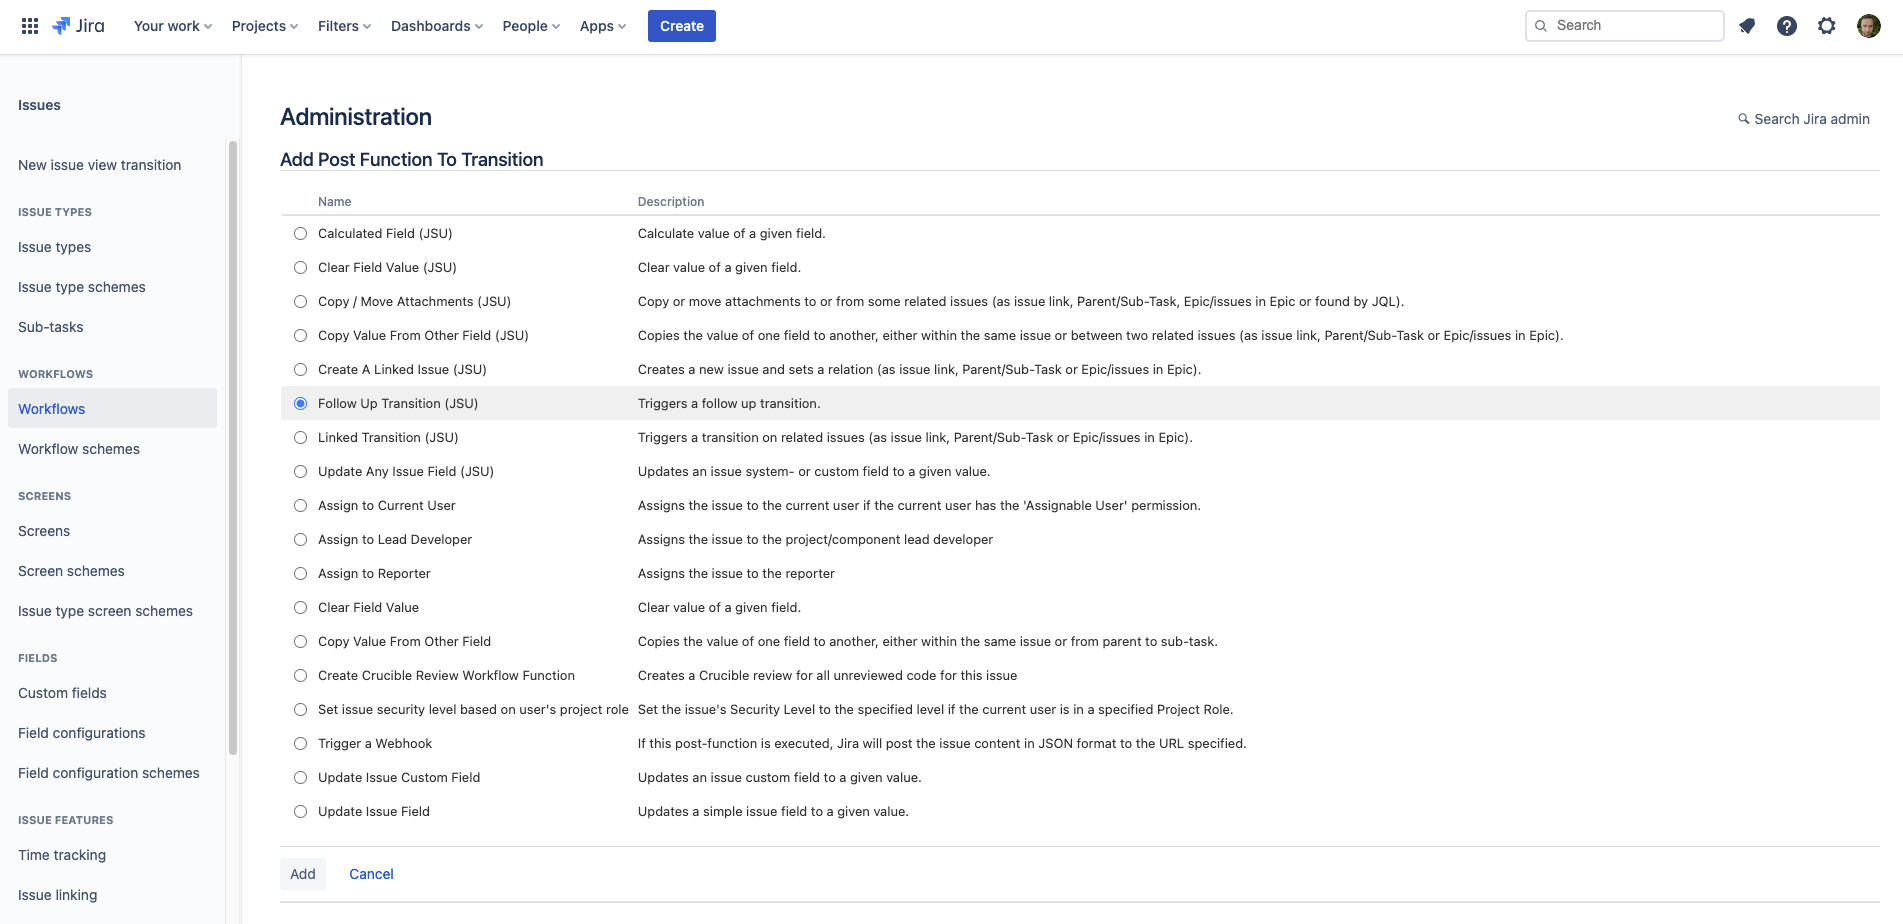
- From the list of Post-Functions, choose "Follow Up Transition (JSU)", then click "Add".
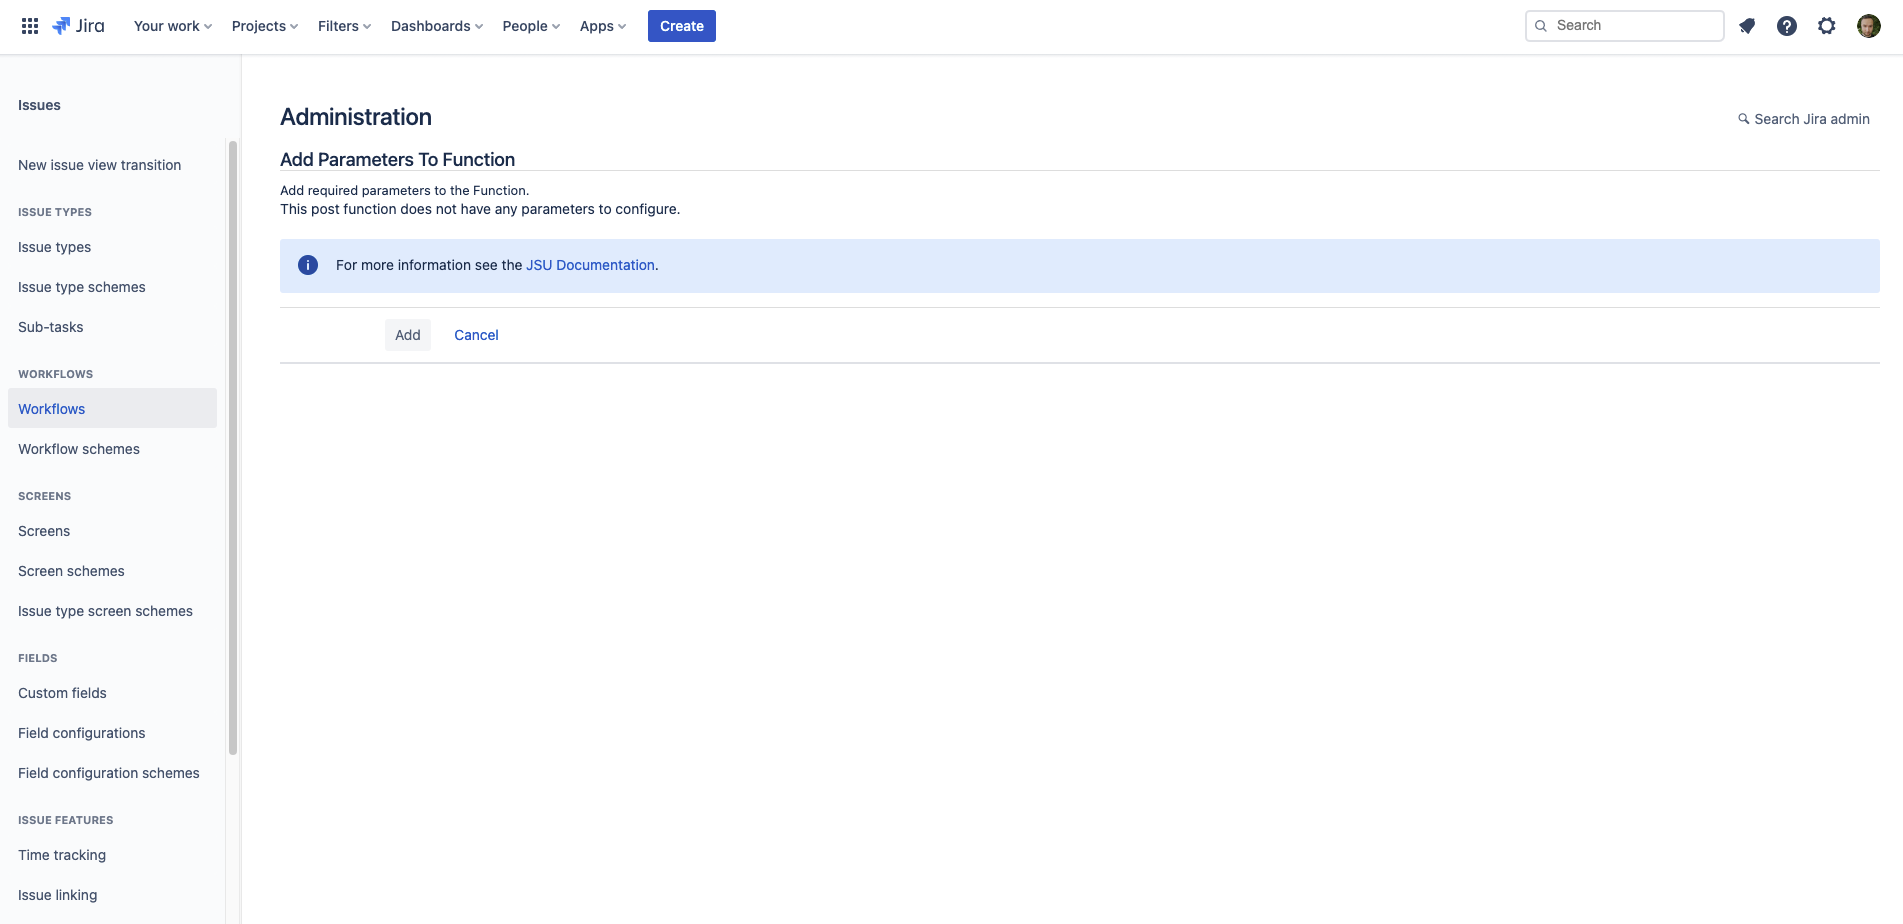
- There's nothing you need to configure on the next screen, so all you need to do is click "Add".
- Just like before, don't forget to Publish the workflow to make this new automation active.
- Now let's go see the workflow in action!
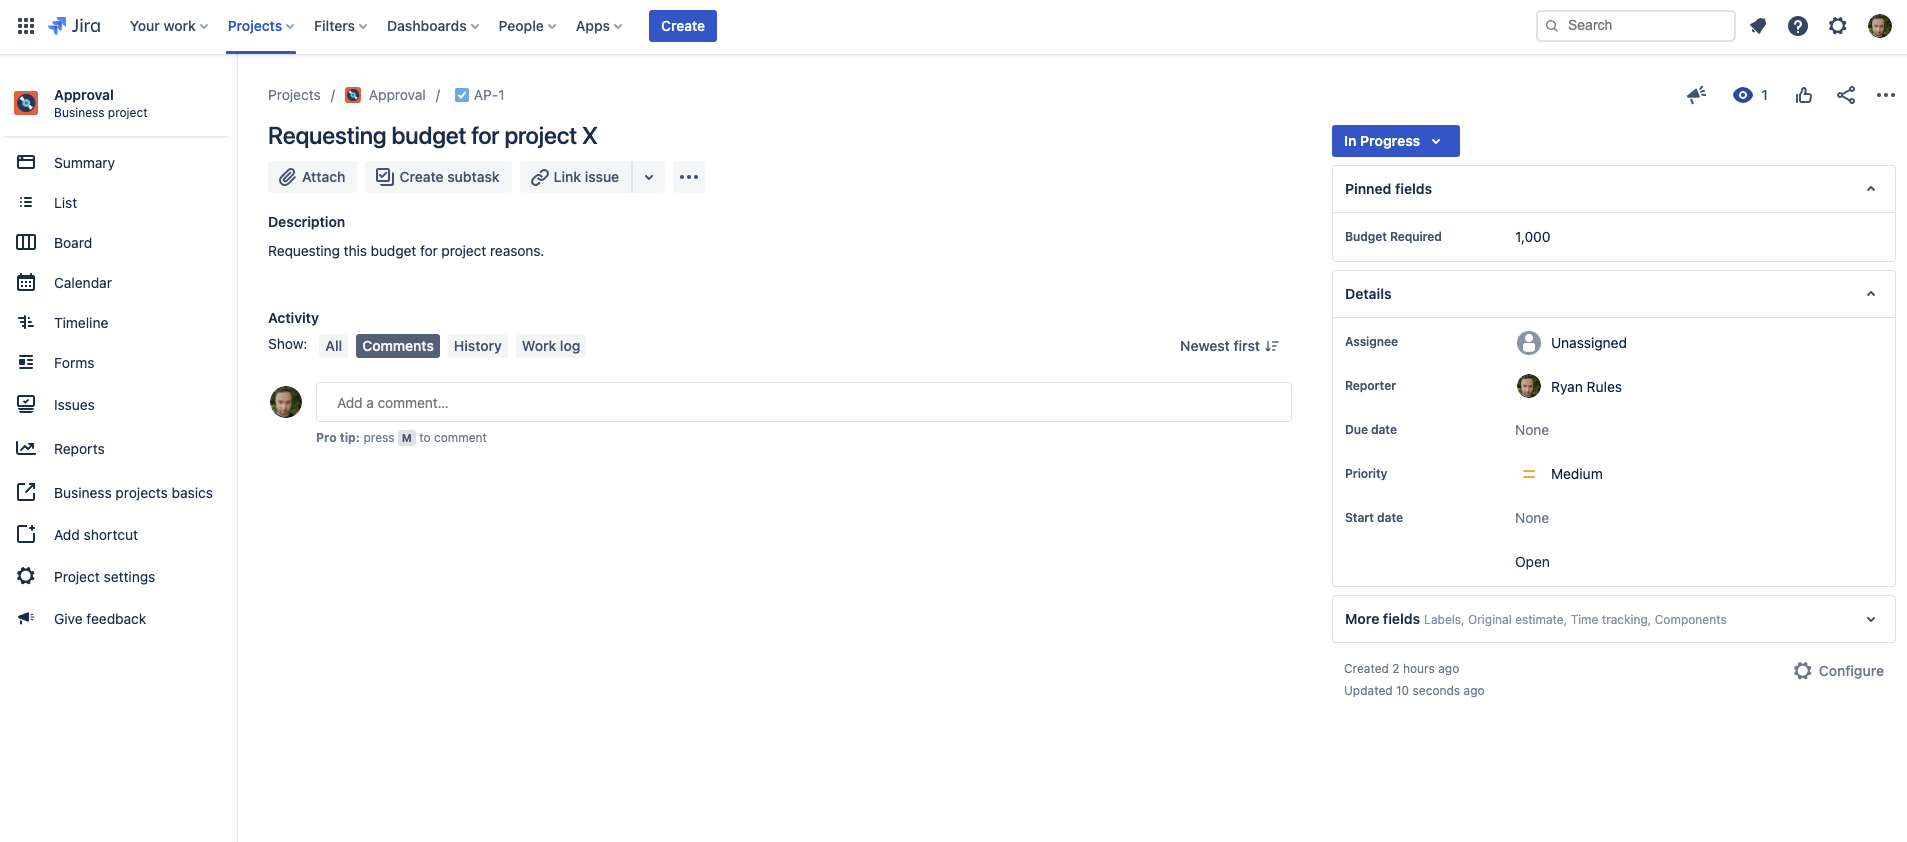
Head to an open issue in your Approvals project. In our case, we have an issue currently in
and with a "Budget Required" of 500.Status colour Blue title In progress 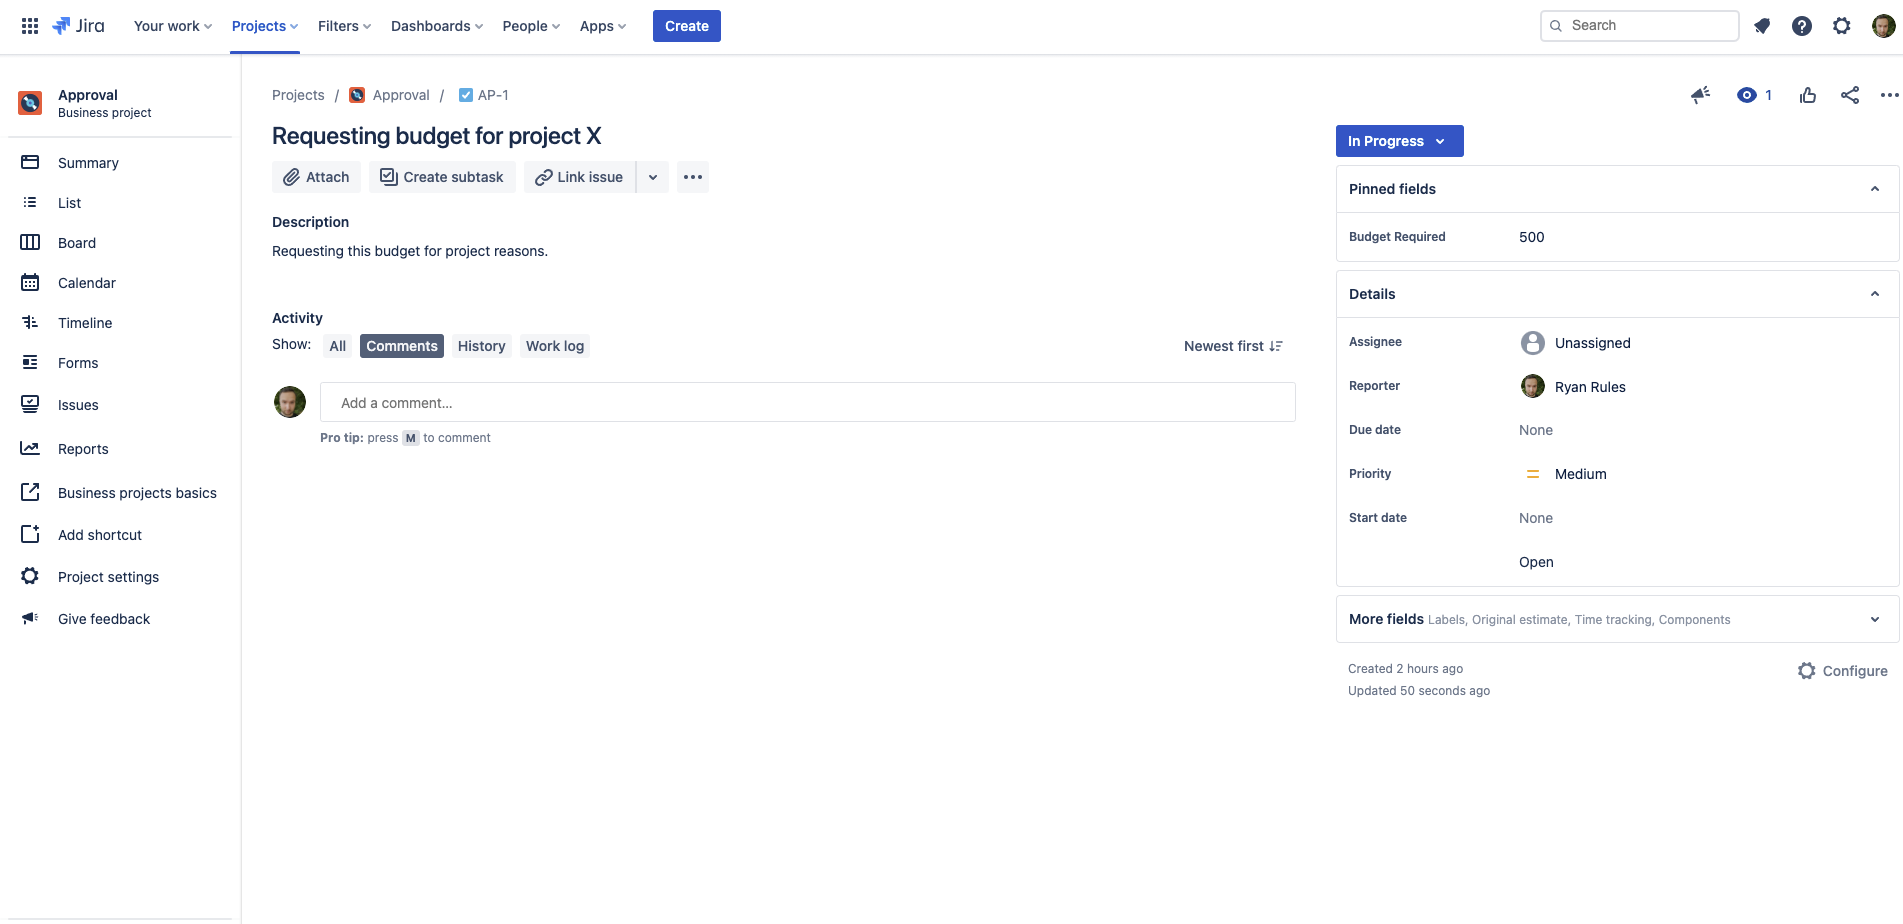
- Now, let's move the status to
and watch the magic happen!Status colour Blue title submit 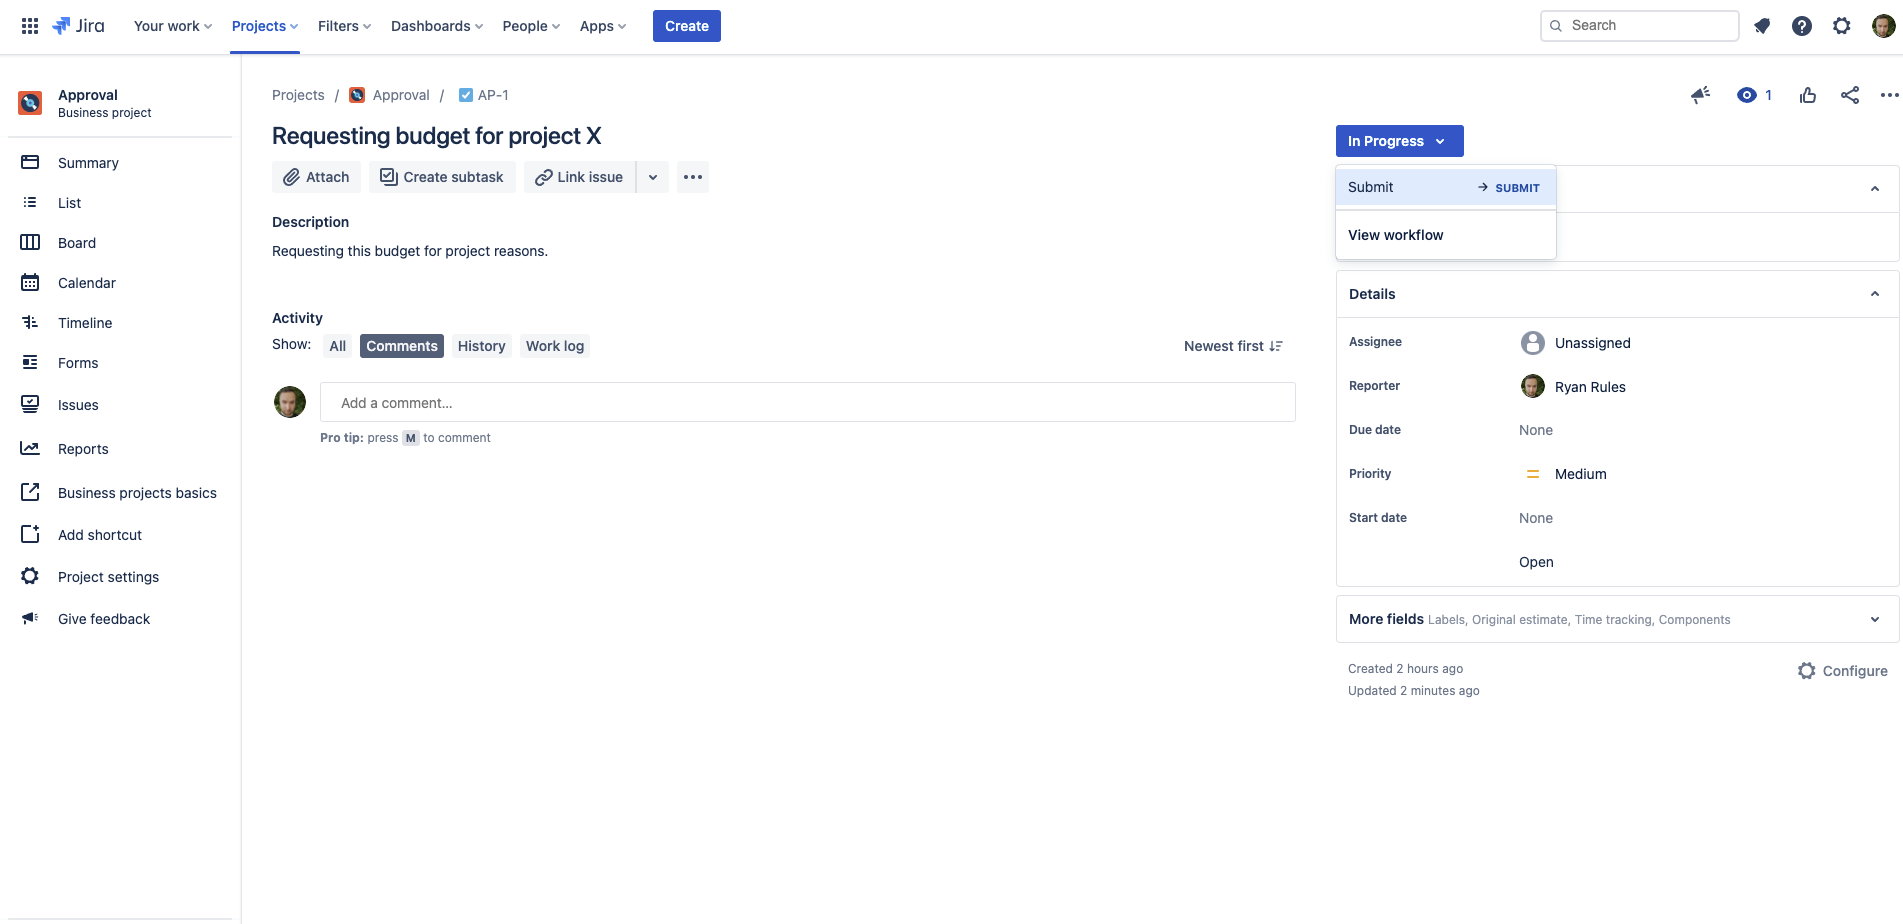
- Watch the issue move to the
status, but then a second (or two) later move automatically to theStatus colour Blue title submit
status!Status colour Blue title approved 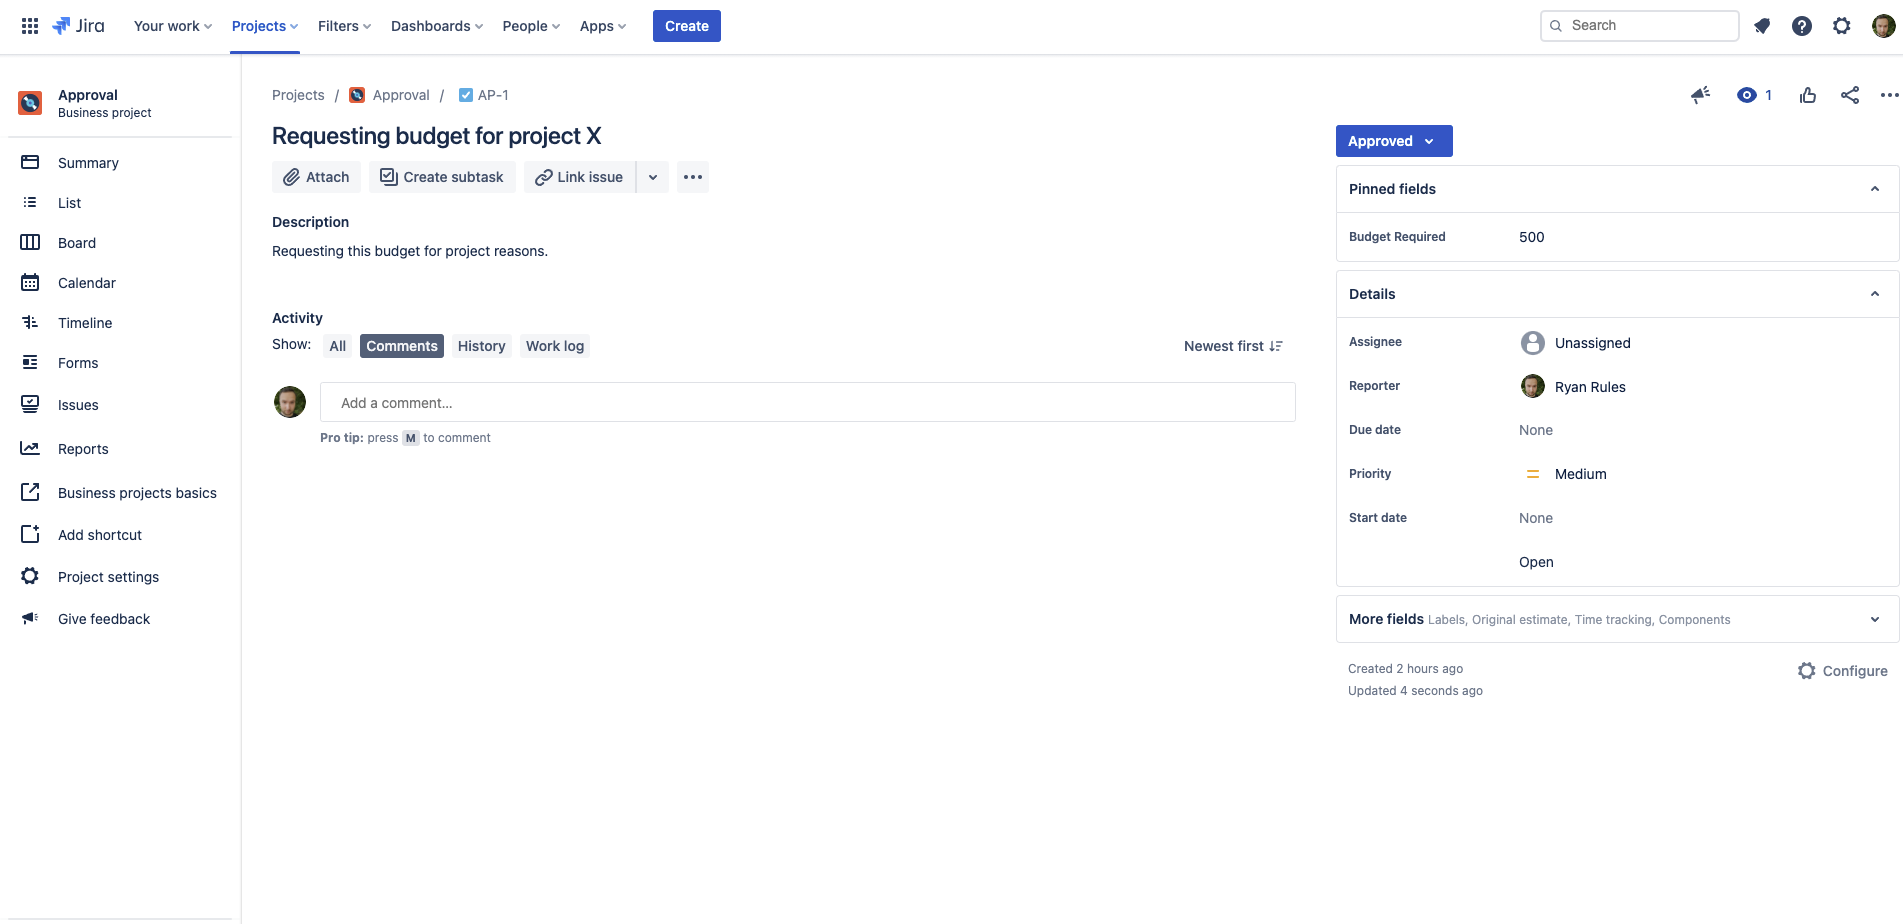
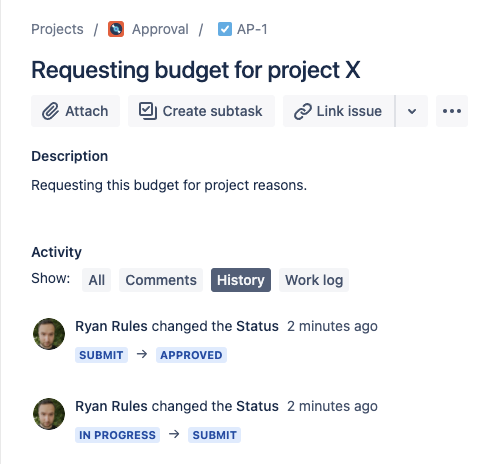
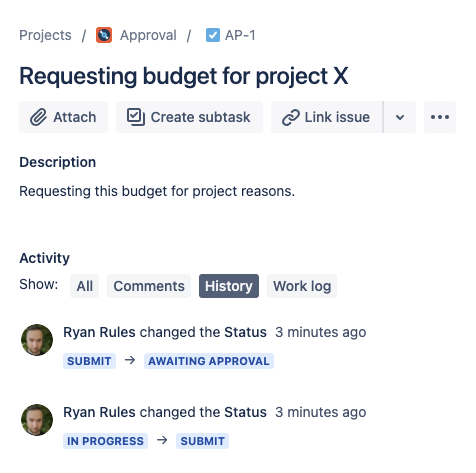
- HINT: The issue history confirms this streamlined transition did in fact happen!
- Now try the same scenario, but where the "Budget Required" is 1000 or more.
- Let's move this issue to
just like we did before.Status colour Blue title submit 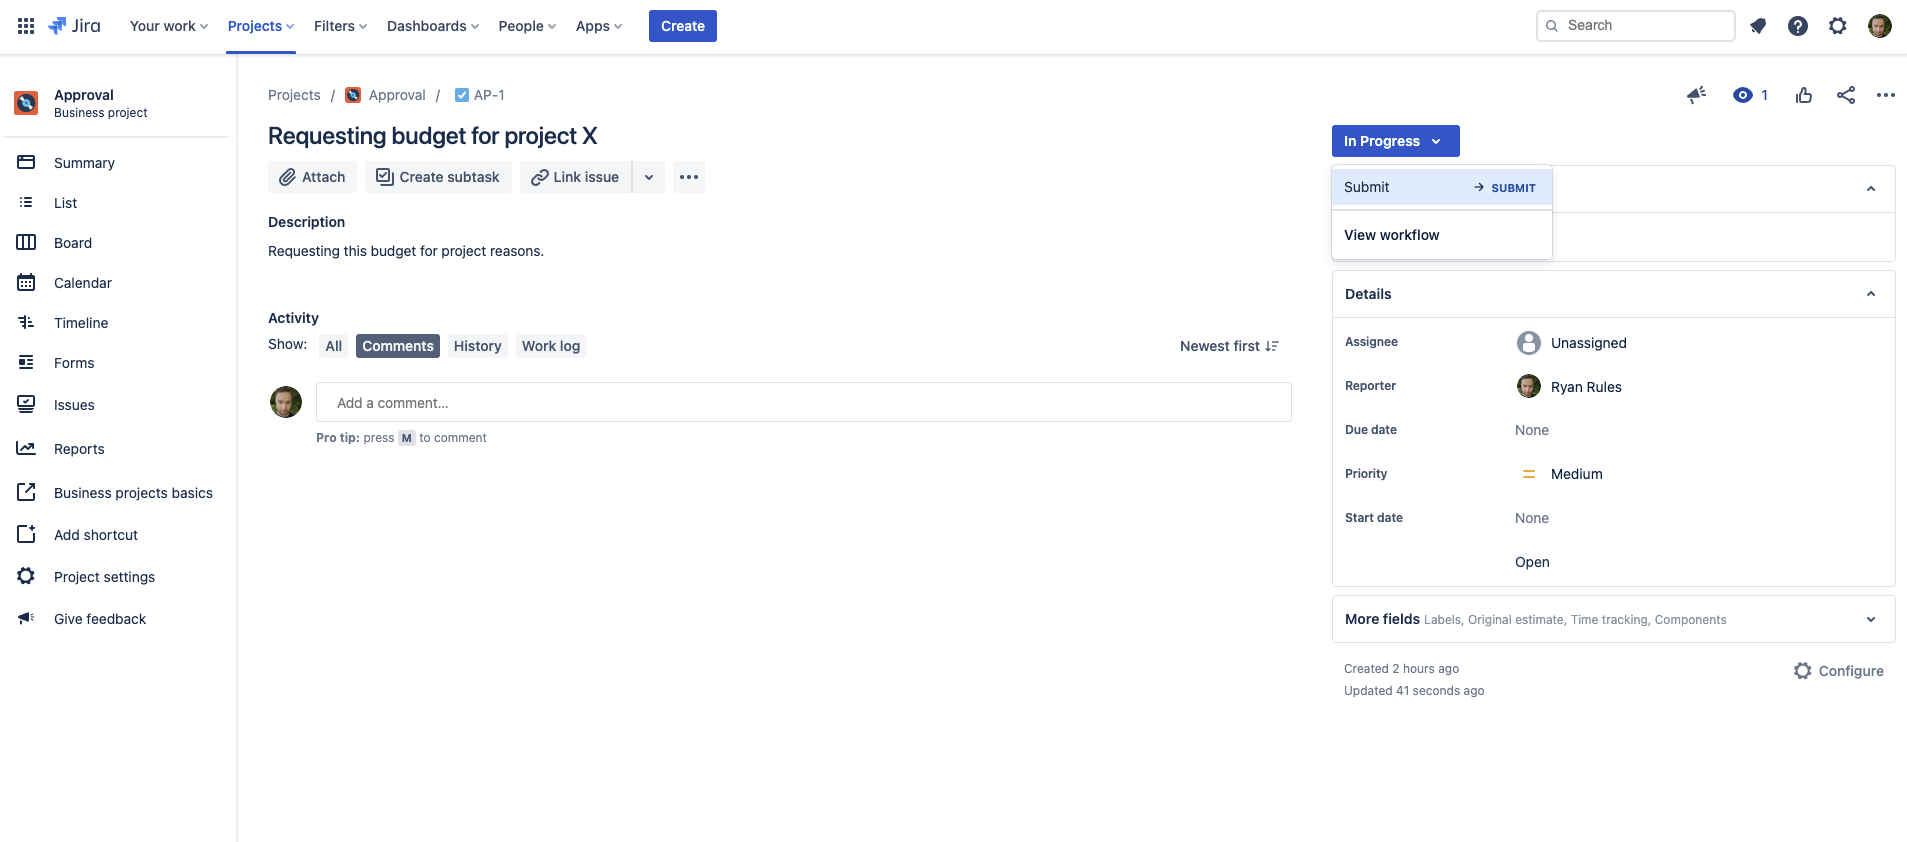
- Again, the issue will be forwarded onto its appropriate next transition, in this case as the "Budget Required" is greater-than-or-equal-to 1000, it's moved next to
!Status colour Blue title awaiting approval 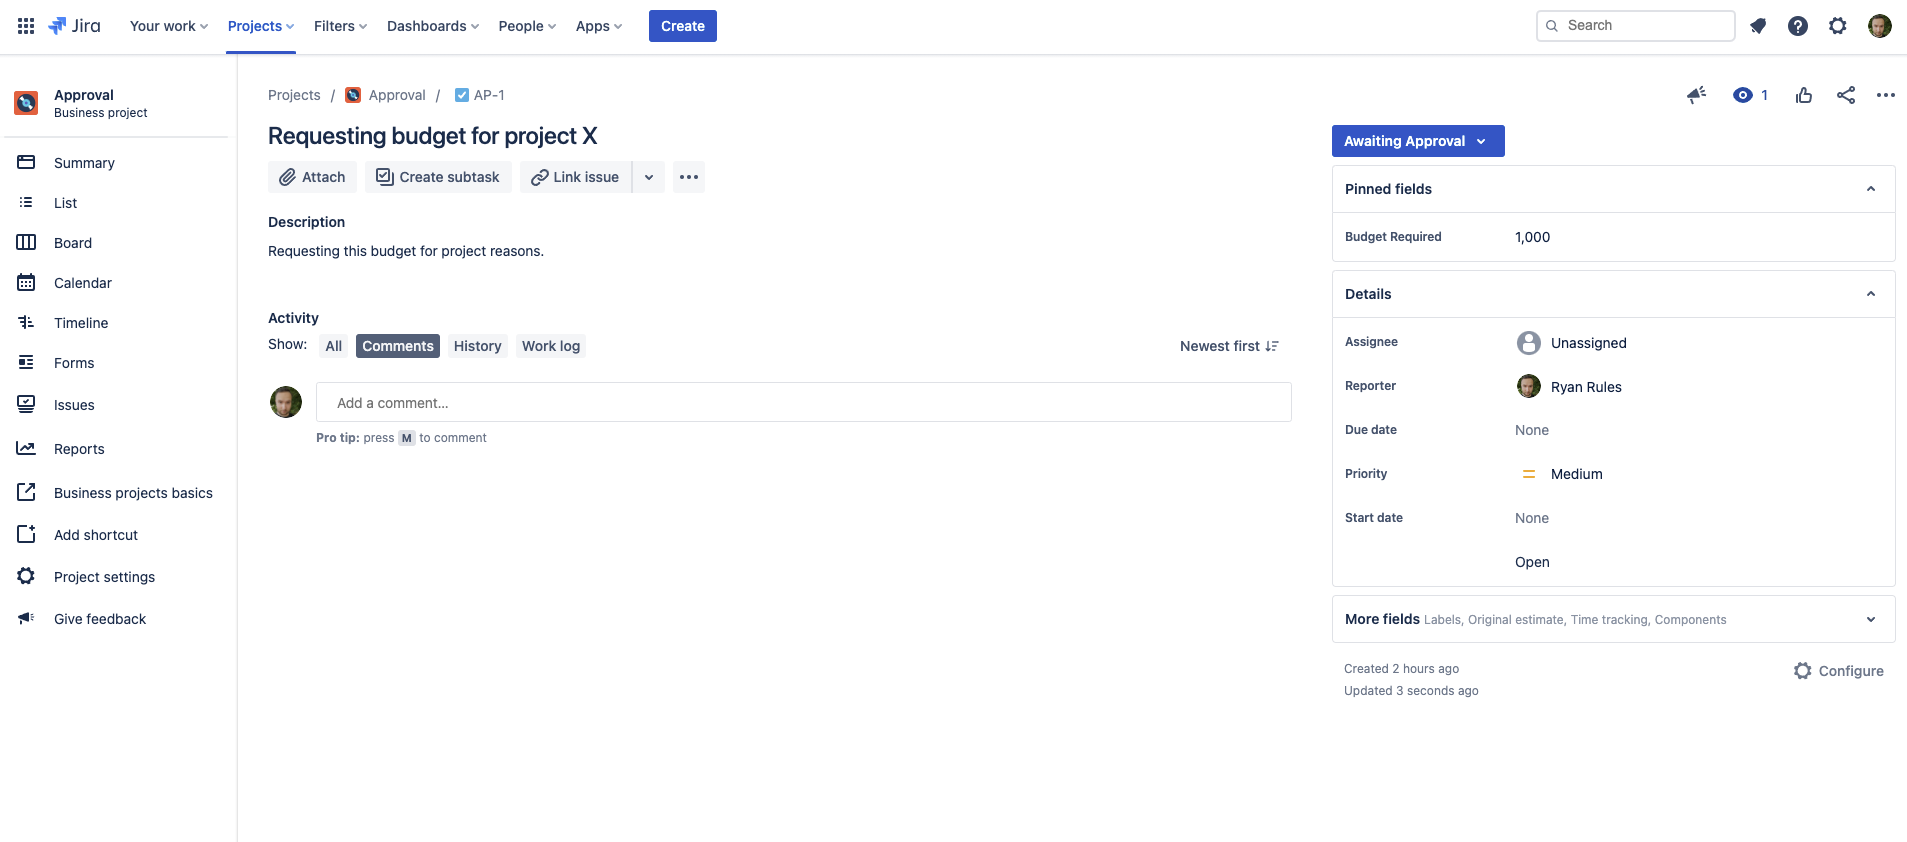
- Once again, the issue history confirms to us it was JSU helping us streamline the approvals here.
- There you have it! Streamlining your approval processes in Jira just got a lot easier thanks to the power of JSU

Need more information or help? Get in touch!