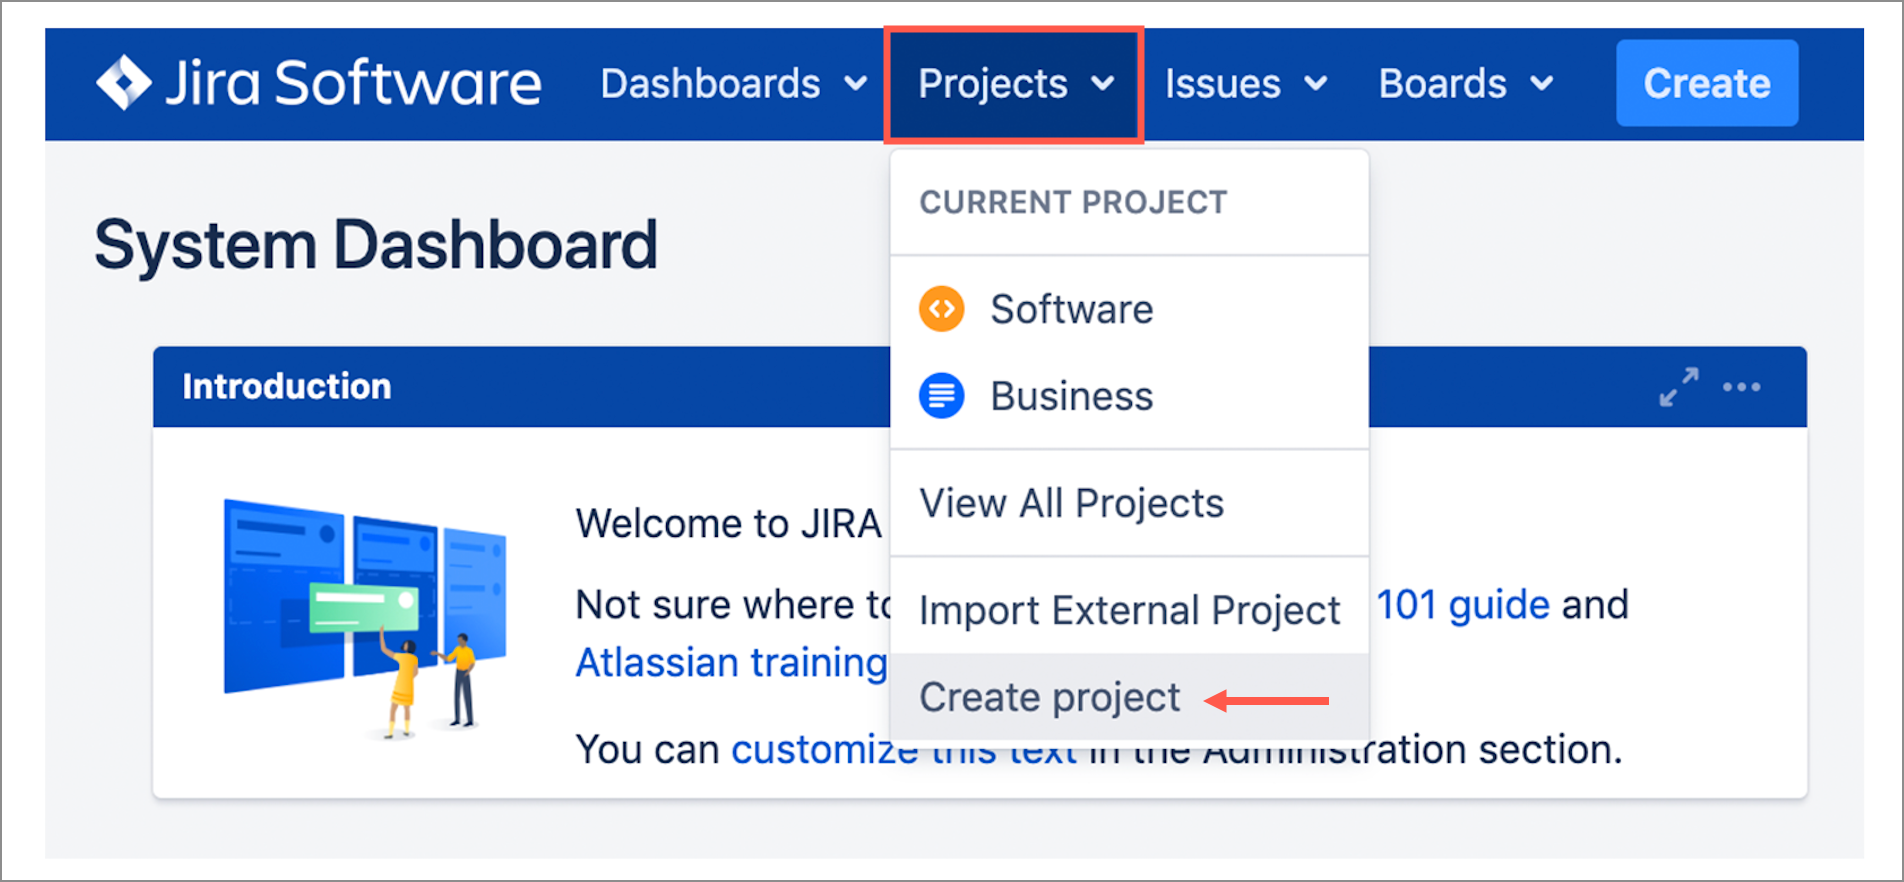
To edit a workflow in Jira, you need to start with a project. Here, we start by creating a new project.
Step 1:
It’s time to edit your workflow:
On the lower left corner of the page, click on “Project settings”Log in as a Jira admin and start by creating a new project in Jira. You will need this to design set up a simple workflow automation with JSU.

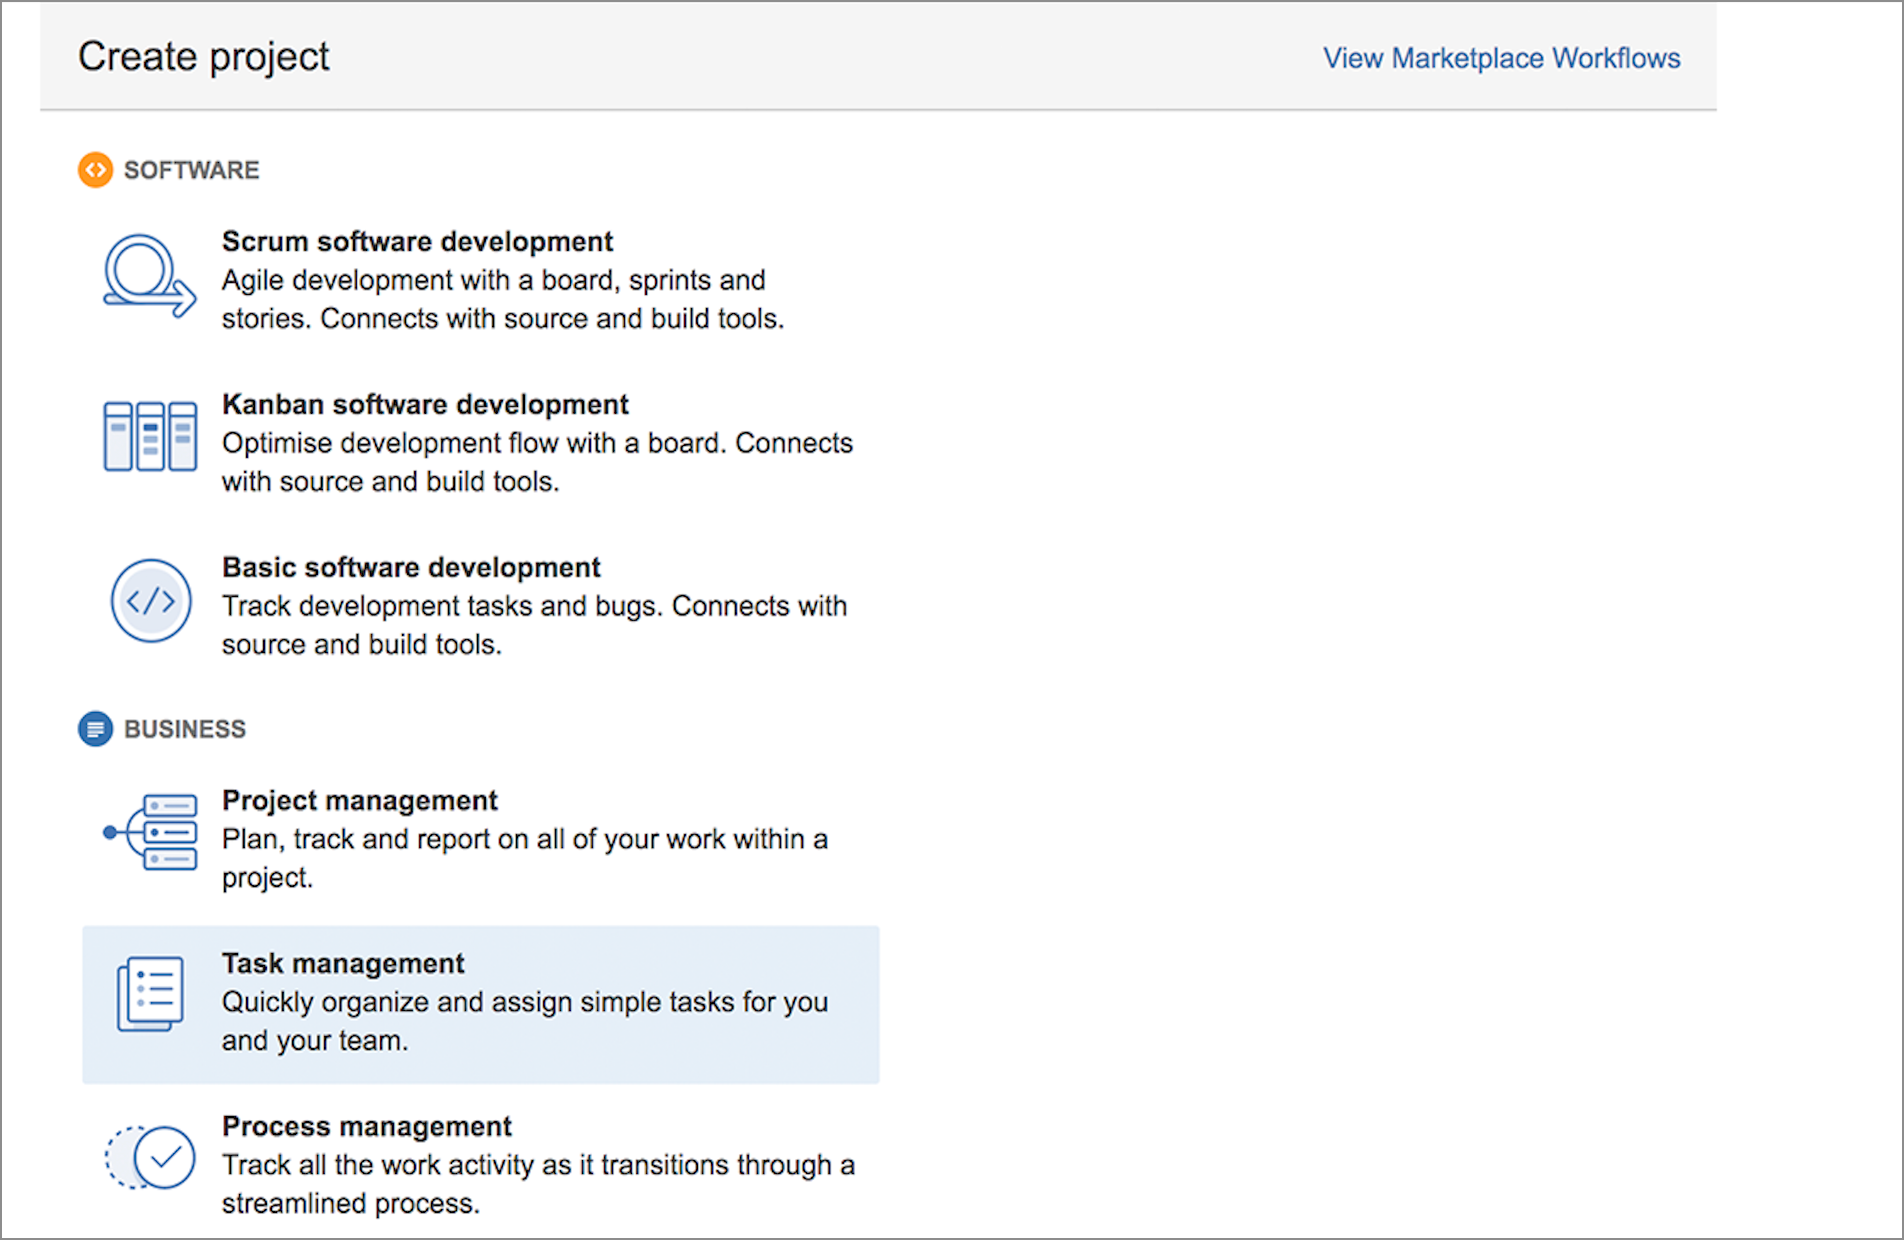
Please choose the "Task management" project.

.
If you already have projects set up in your Jira instance, we recommend that you start by creating a new test project so you can try out your rules before applying any changes to current projects.
Select a project template, e.g. Task management project and complete the project setup.
Step 2:
Create sample issues for your project. Many of our use cases include tasks and subtasks so if you are building test issues, consider adding some subtasks.
Step 3:
Edit the project workflow. Click Project settings in the left sidebar.
Under Workflows,
make sure toclick
onthe
pencil Edit icon next to the workflow that you want to edit. This creates a draft workflow.
| Tip |
|---|
Reminder: Editing an active workflow will impact all the projects where that workflow |
is used. |
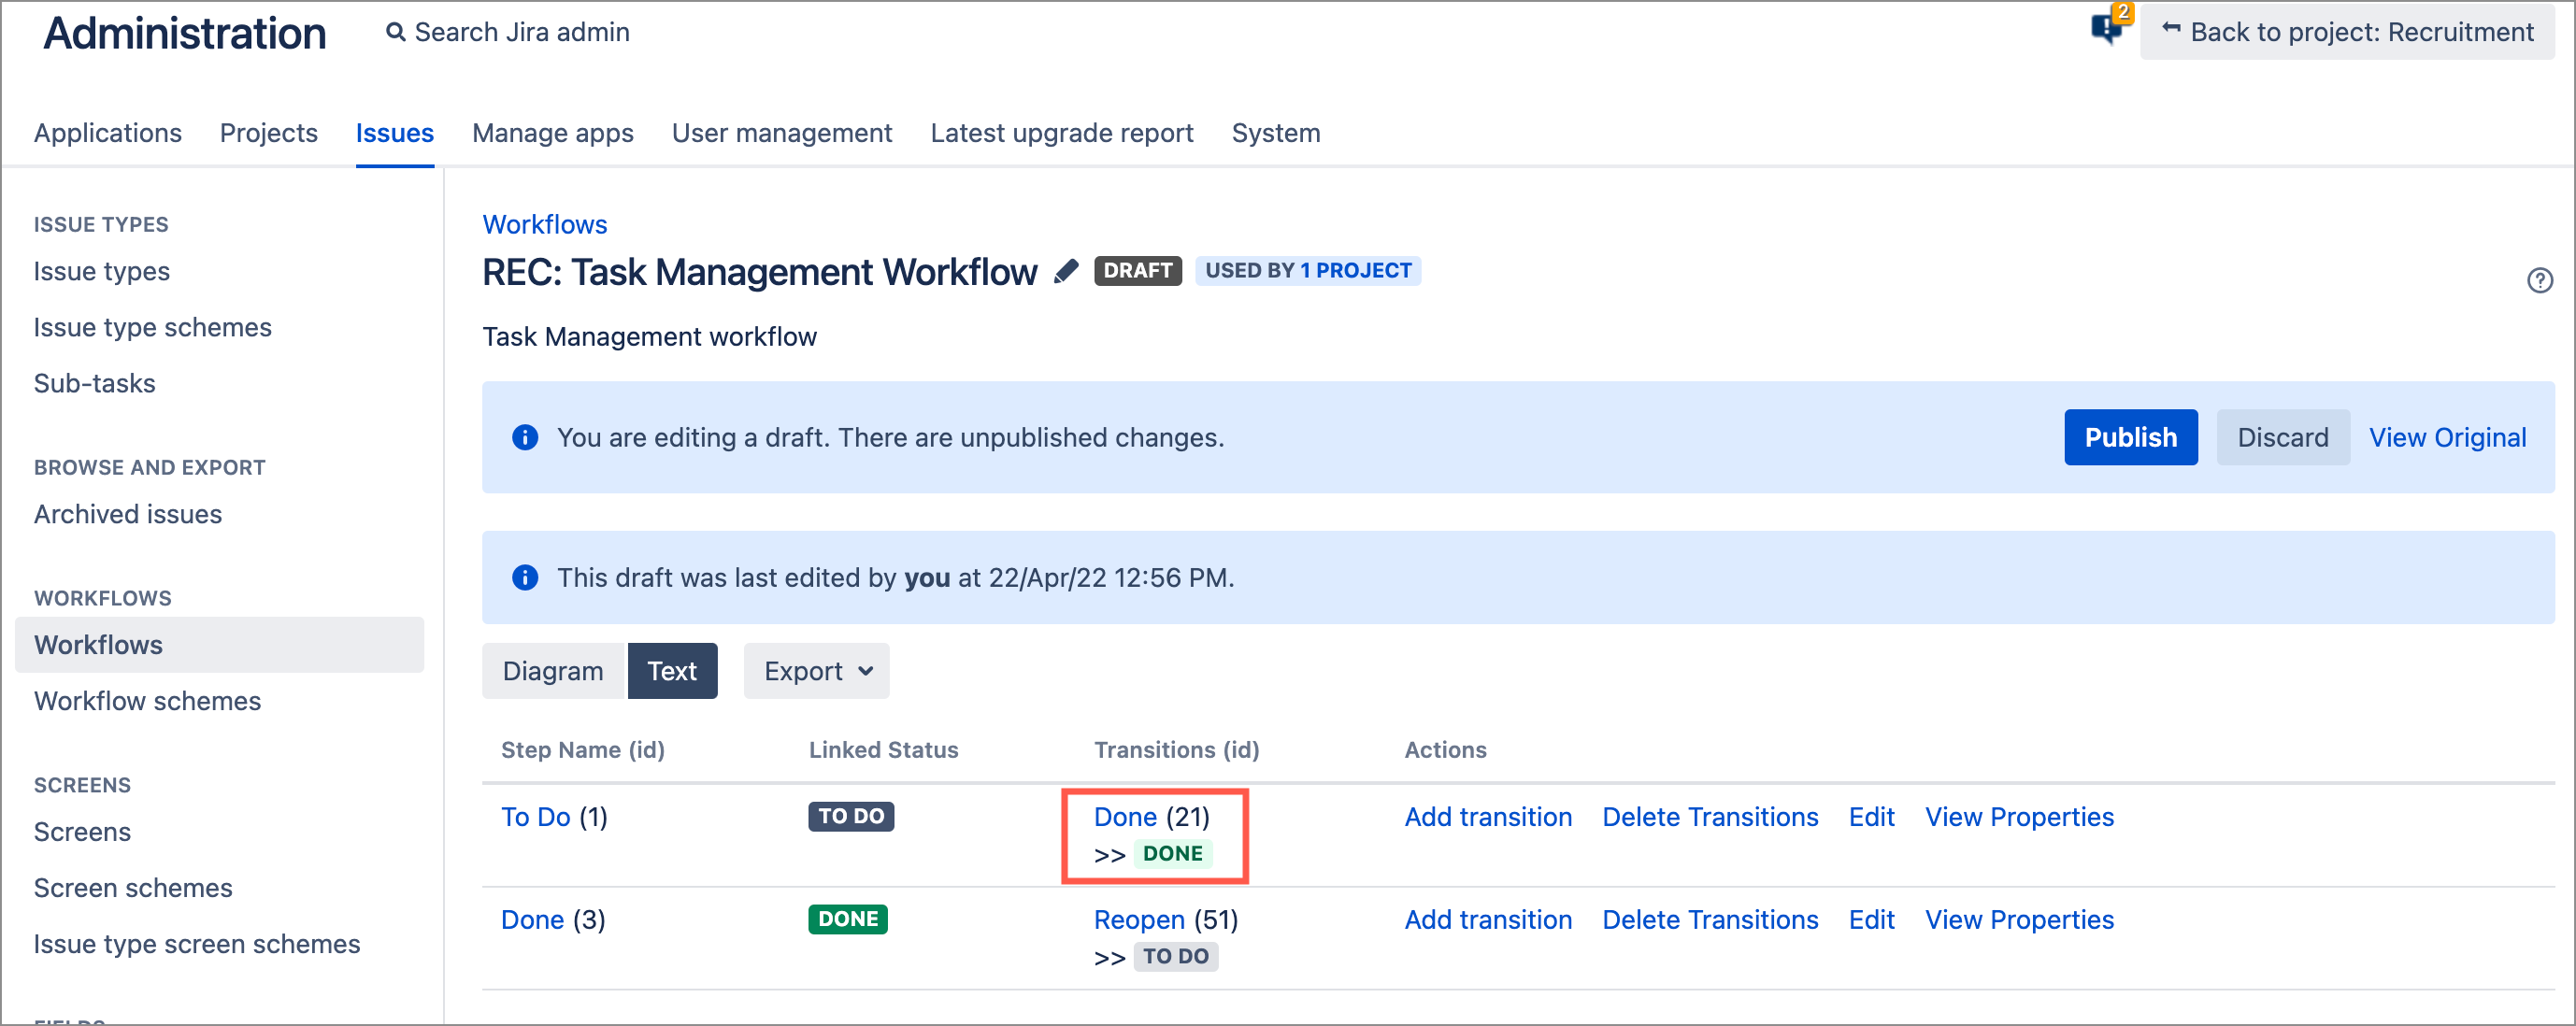
You have reached the back-end view of your workflow transitions (you can change your view to text or diagram).
Follow the next steps to see for yourself how JSU features work.
%20(1).gif?version=1&modificationDate=1571302086198&cacheVersion=1&api=v2&width=511)

You are now ready to build your first automation rule with JSU. In your workflow page, you can view the workflow in Diagram or Text mode.
Step 4:
To start building a rule, select the Transition where you want the rule to apply. See how we added a rule in JSU in Action.
Learn about specific JSU workflow features in the Configuration Guide.