You have reached this point with absolutely zero coding necessary.
All you need to do with JSU is point and click at choices as you follow instructions or go through the app's intuitive interface.
Now, let's see how JSU works in action.Discover can help you laboriousUse case: Automatically close all sub-tasks once the parent issue is closed by using a JSU post-function.
Step 1:
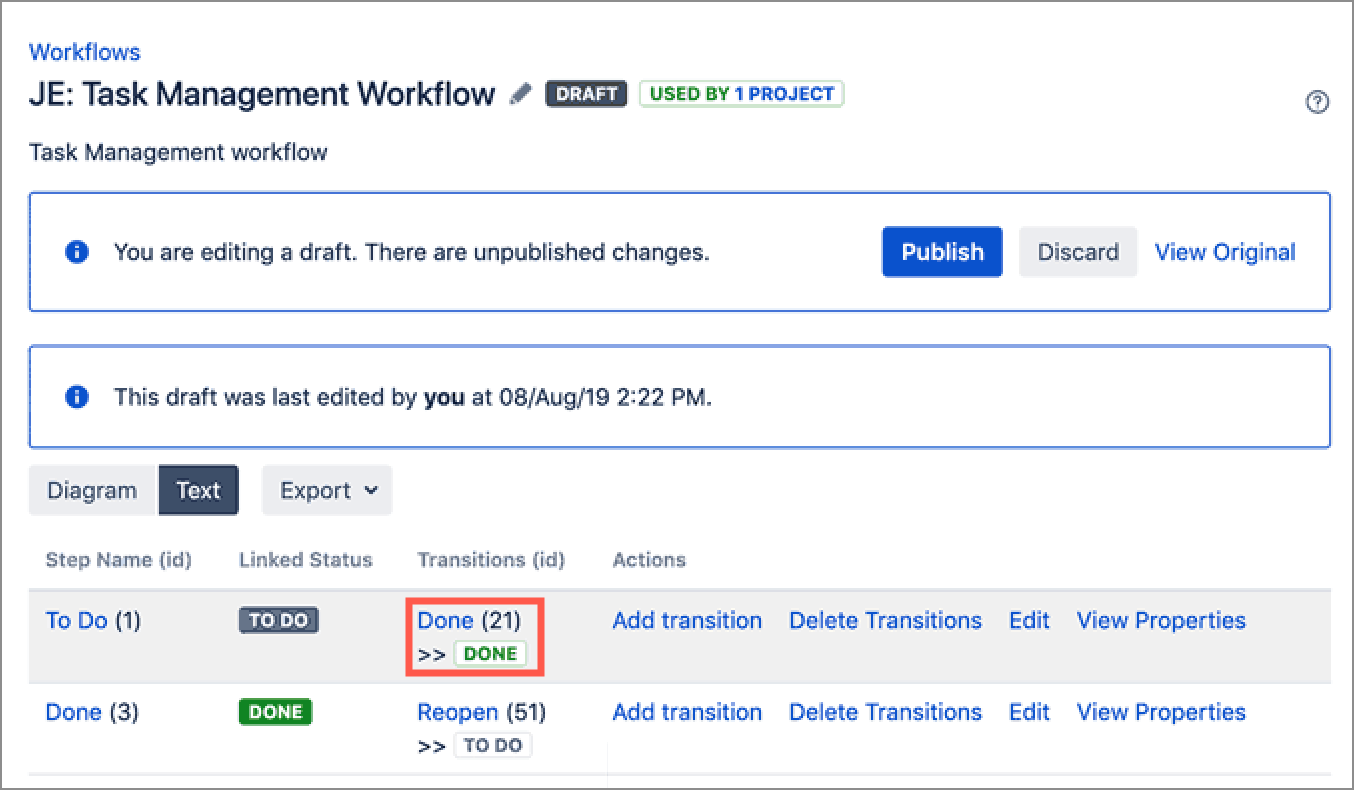
Under the Transitions column, selectCreate a draft workflow and select a transition
Here, we select the “Done (21)” in our Task Management Workflow.
.gif?version=1&modificationDate=1568715683315&cacheVersion=1&api=v2&width=511 "JSU for Jira Server/Data Center - edit workflow transition")
Step 2:
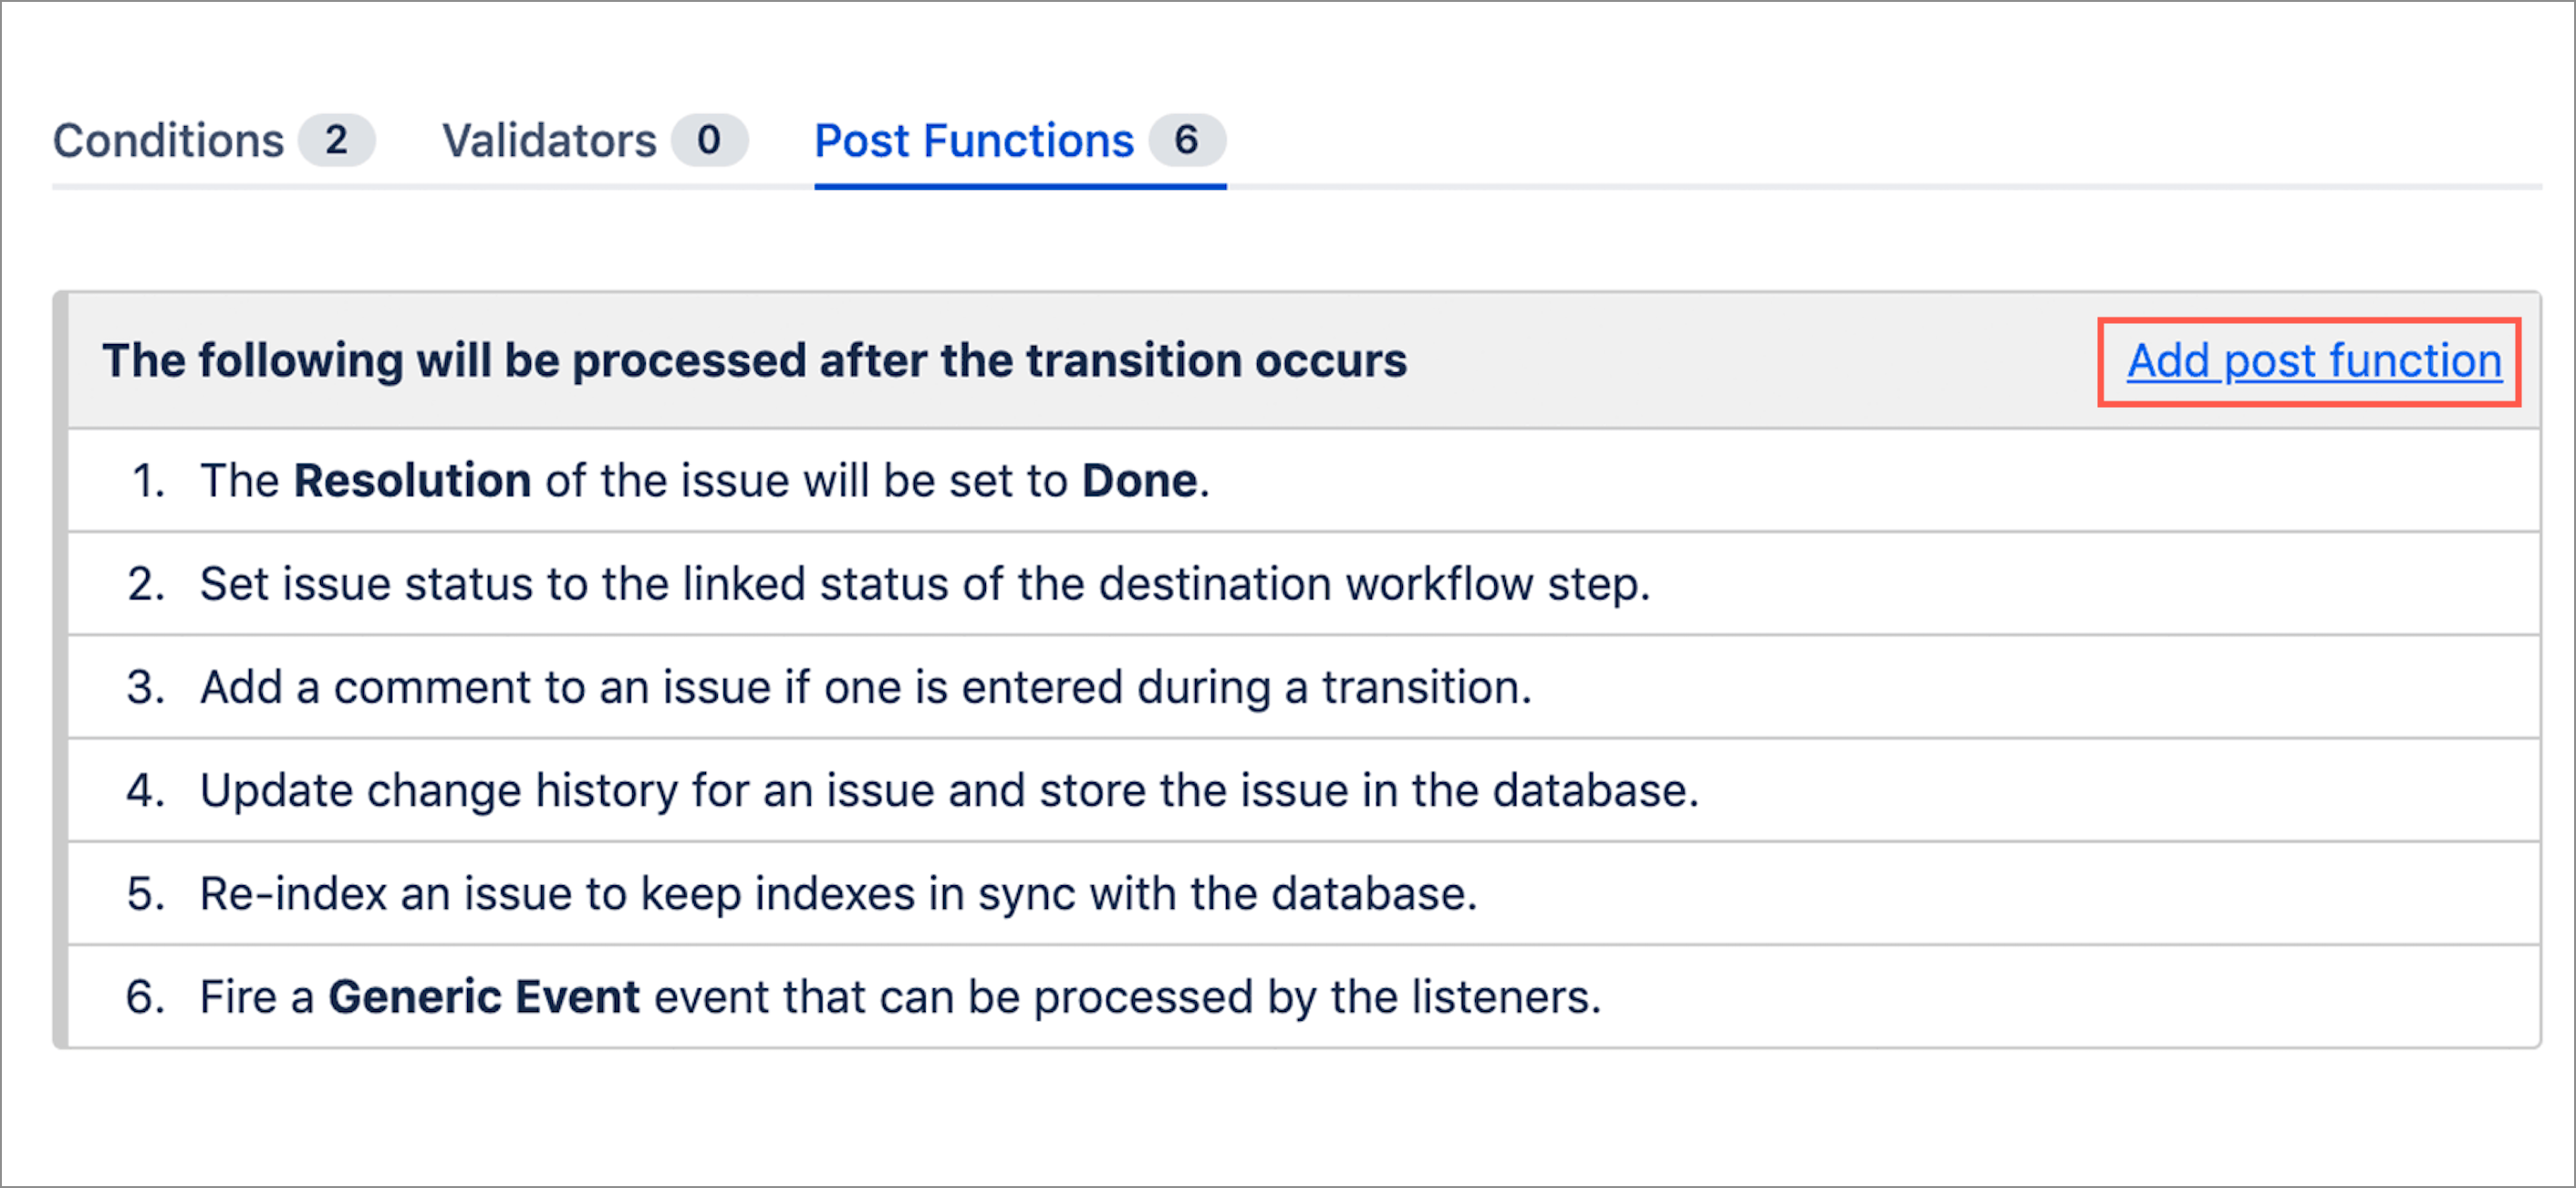
Switch to the post functions tab and on its upper right corner, click on “Add post function”.
Step 3:
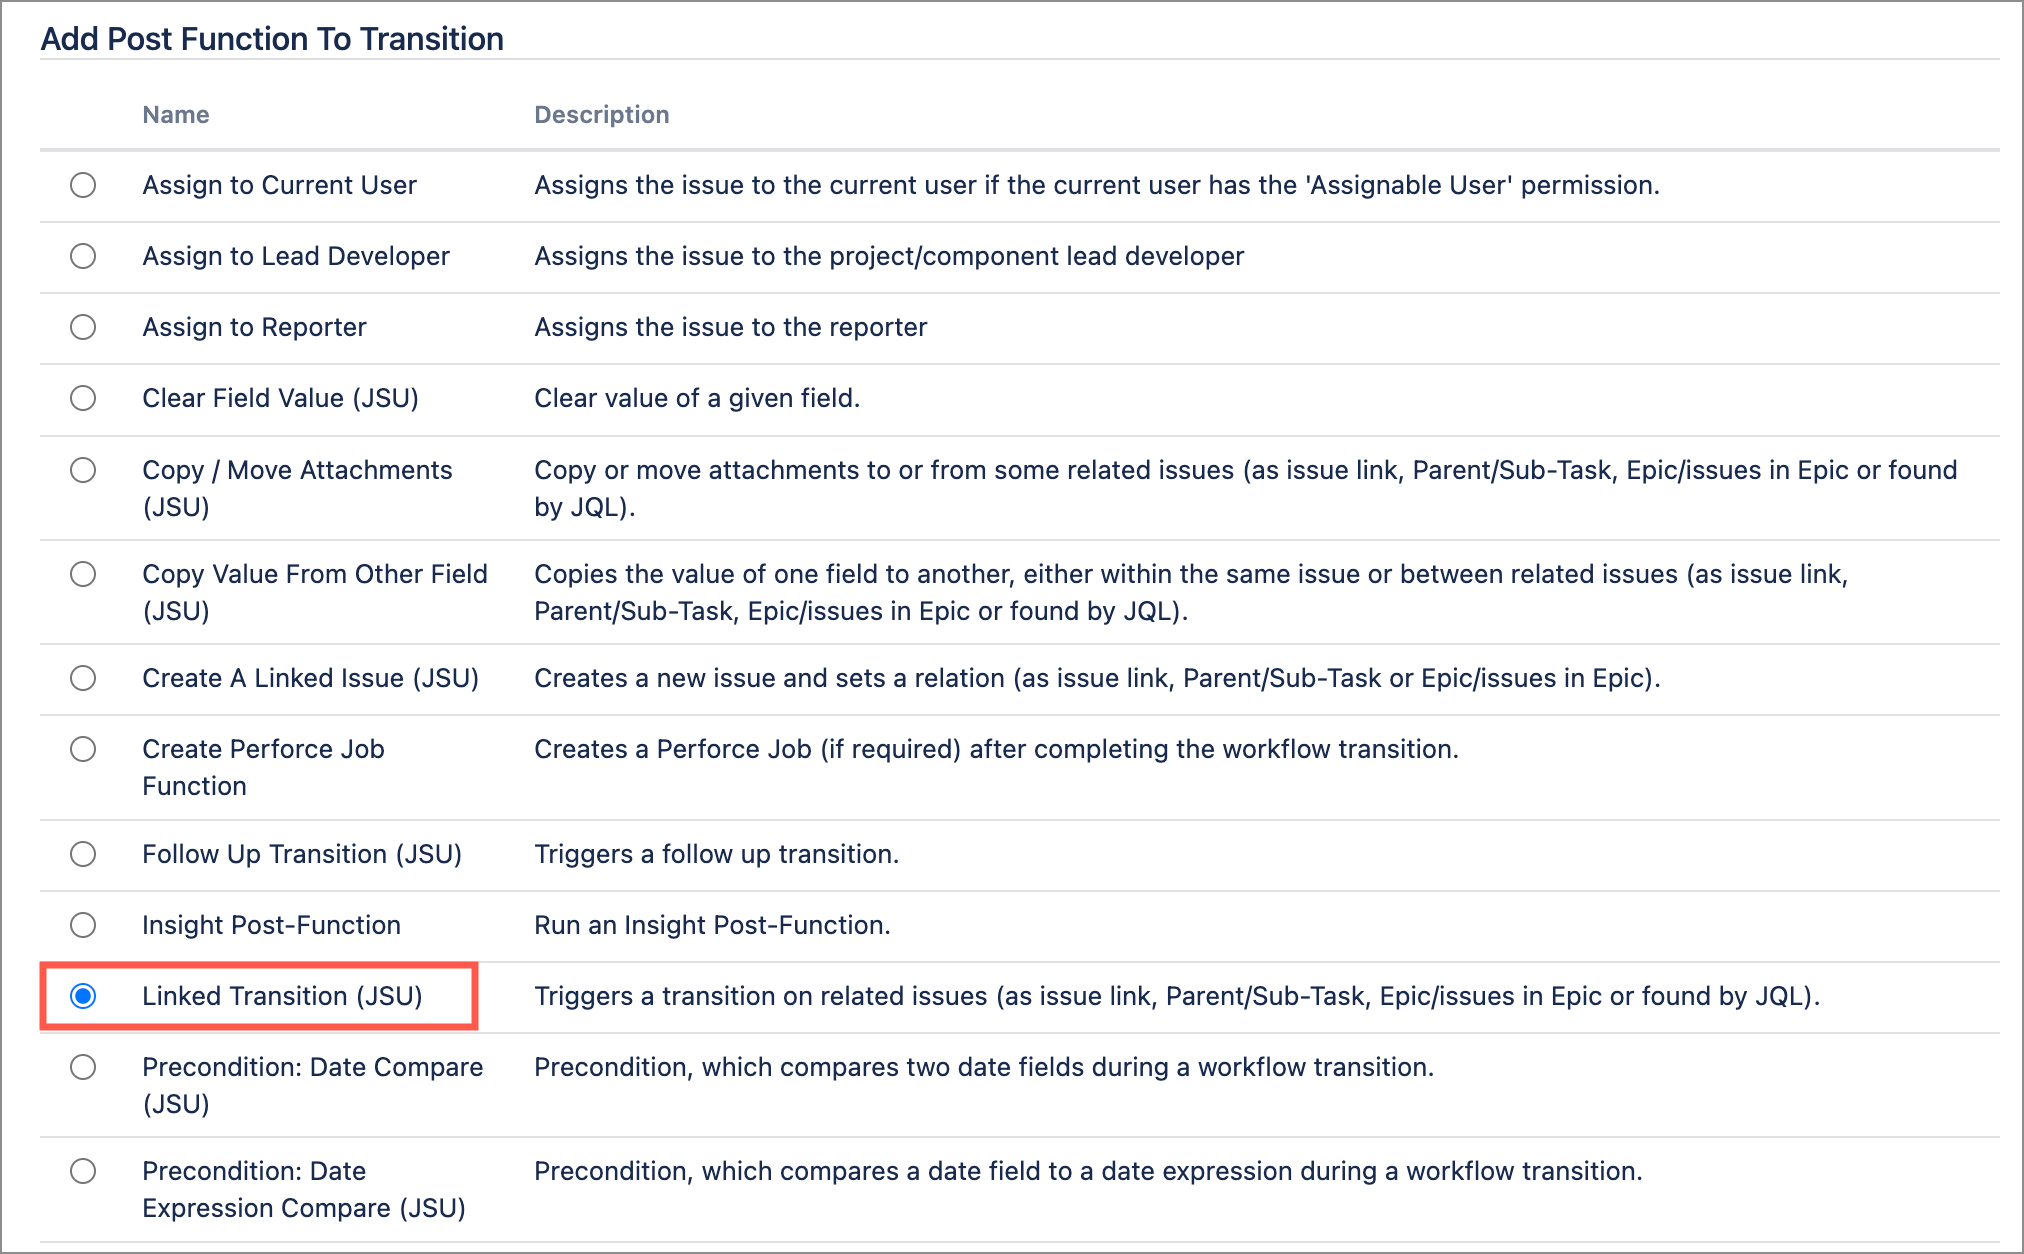
Select the post-function “Linked transition (JSU)” and click on “Add” atAdd post function
First, we select the Post Functions tab then click Add post function.
We want to configure a linked transition so we select the Linked transition (JSU) post function and then click Add at the bottom of the page.

Step 4: Configure the post function
Configure the parameters:
On the
Trigger transition on all issues related
as parameter, choose
Parent/Sub-
task.
Select All sub-tasks (issue in Transition must be parent)
.
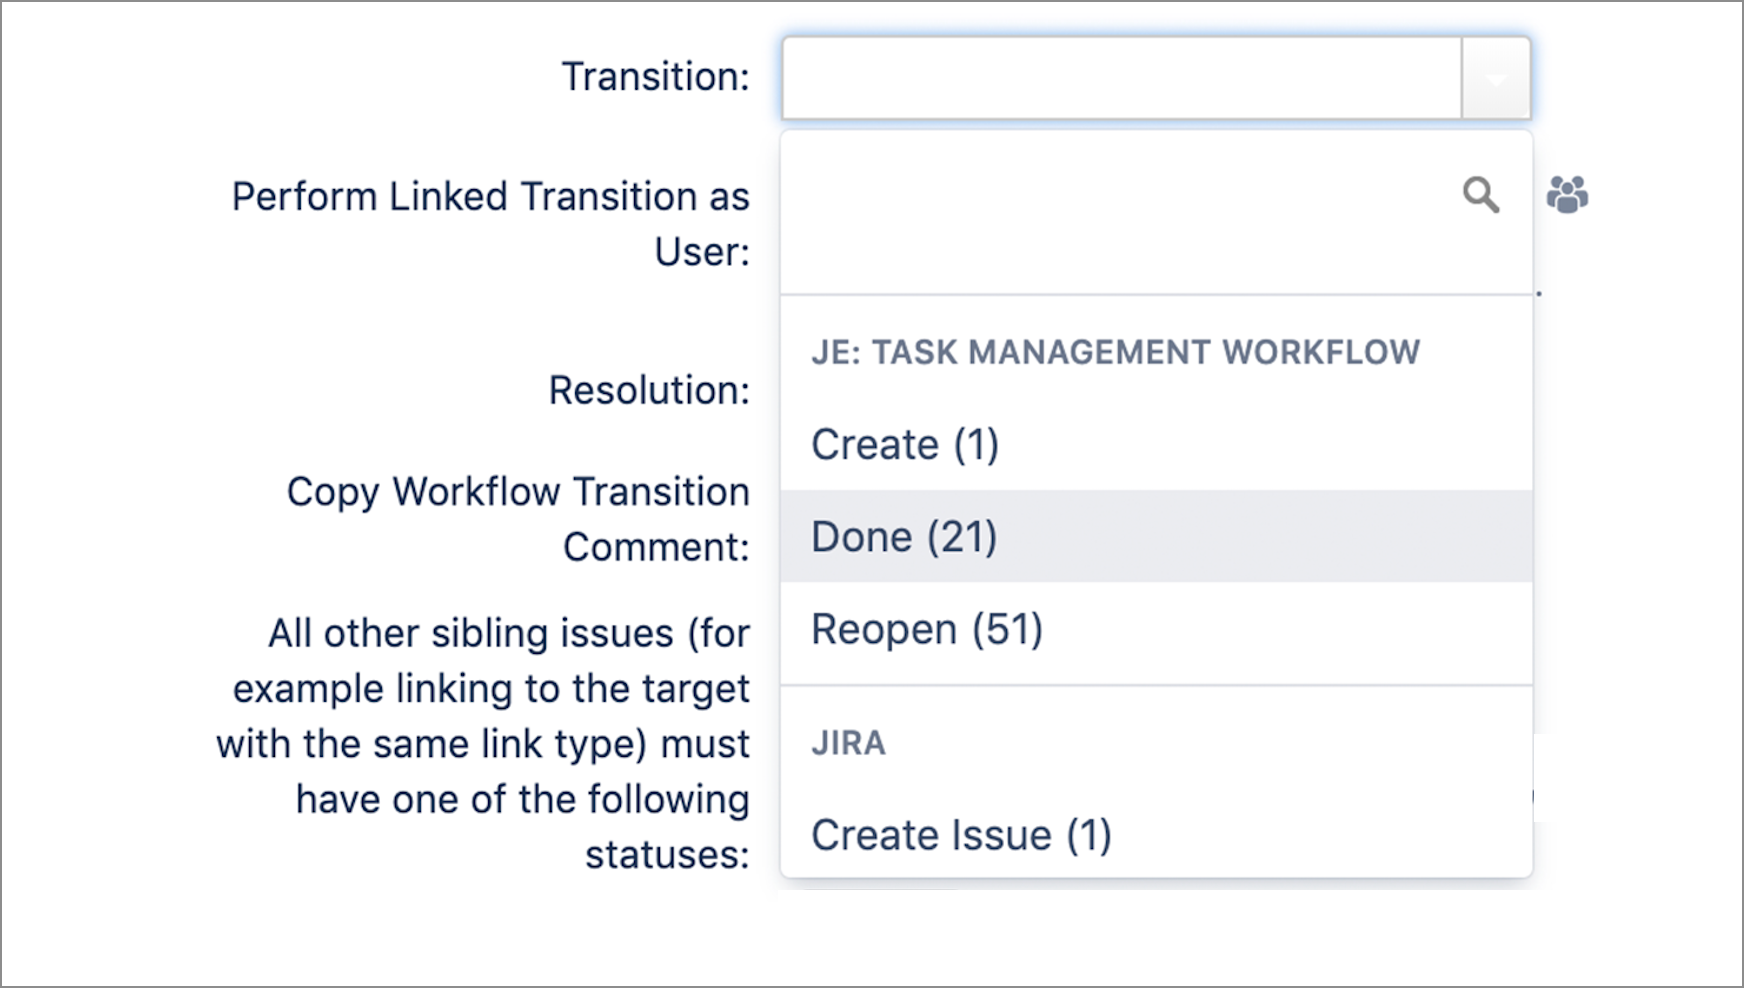
In the
Transition drop-down menu, select
Done (21)
to ensure all sub-tasks would
move to Done.
Select your desired resolution status from the Resolution drop-down menu.
Click Add at the bottom of the page.


Step 5:
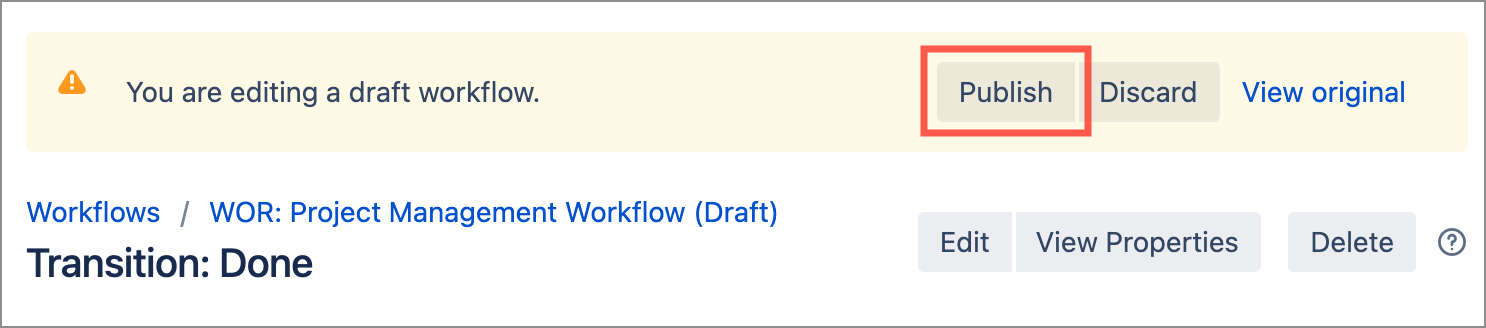
Once you’ve published your workflow, set-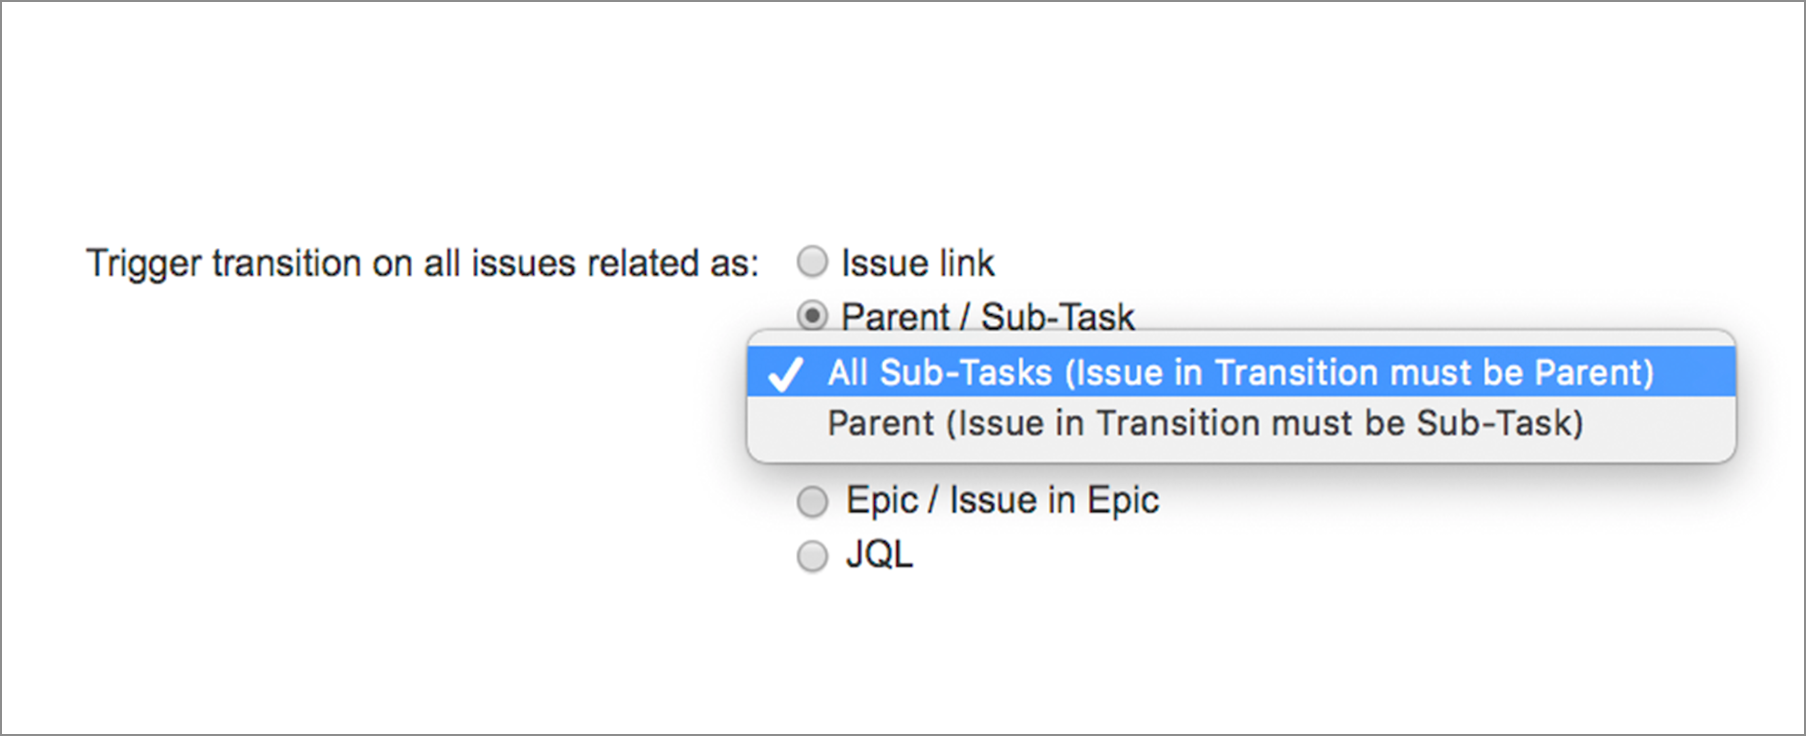
Step 5: Publish the workflow